


Welcome to my guide for the Guild Wars 2 raid event, Statues of Grenth (Statues), the third encounter in Hall of Chains (Wing 5). This is a detailed guide on the mechanics of the event including various strategies that cater to everyone from beginners to experienced raiders. If you’re brand new to raiding, I recommend reading my Path to Endgame guides first.
The Statues of Grenth is unique amongst raid encounters in that it consists of three separate mini-bosses. Players can resurrect and change builds between bosses, but no one receives any rewards until all three bosses are dead. If you only kill one or two bosses, your progress will not be saved if everyone leaves the instance.
The important thing is that these bosses are about controlling your DPS, not killing something as fast as possible. Because of this, power damage is better since you can simply stop doing your rotation.
 Lean Techniques mastery. Every player needs this to get to the bosses’ platforms. You can also use Path of Fire mounts; the
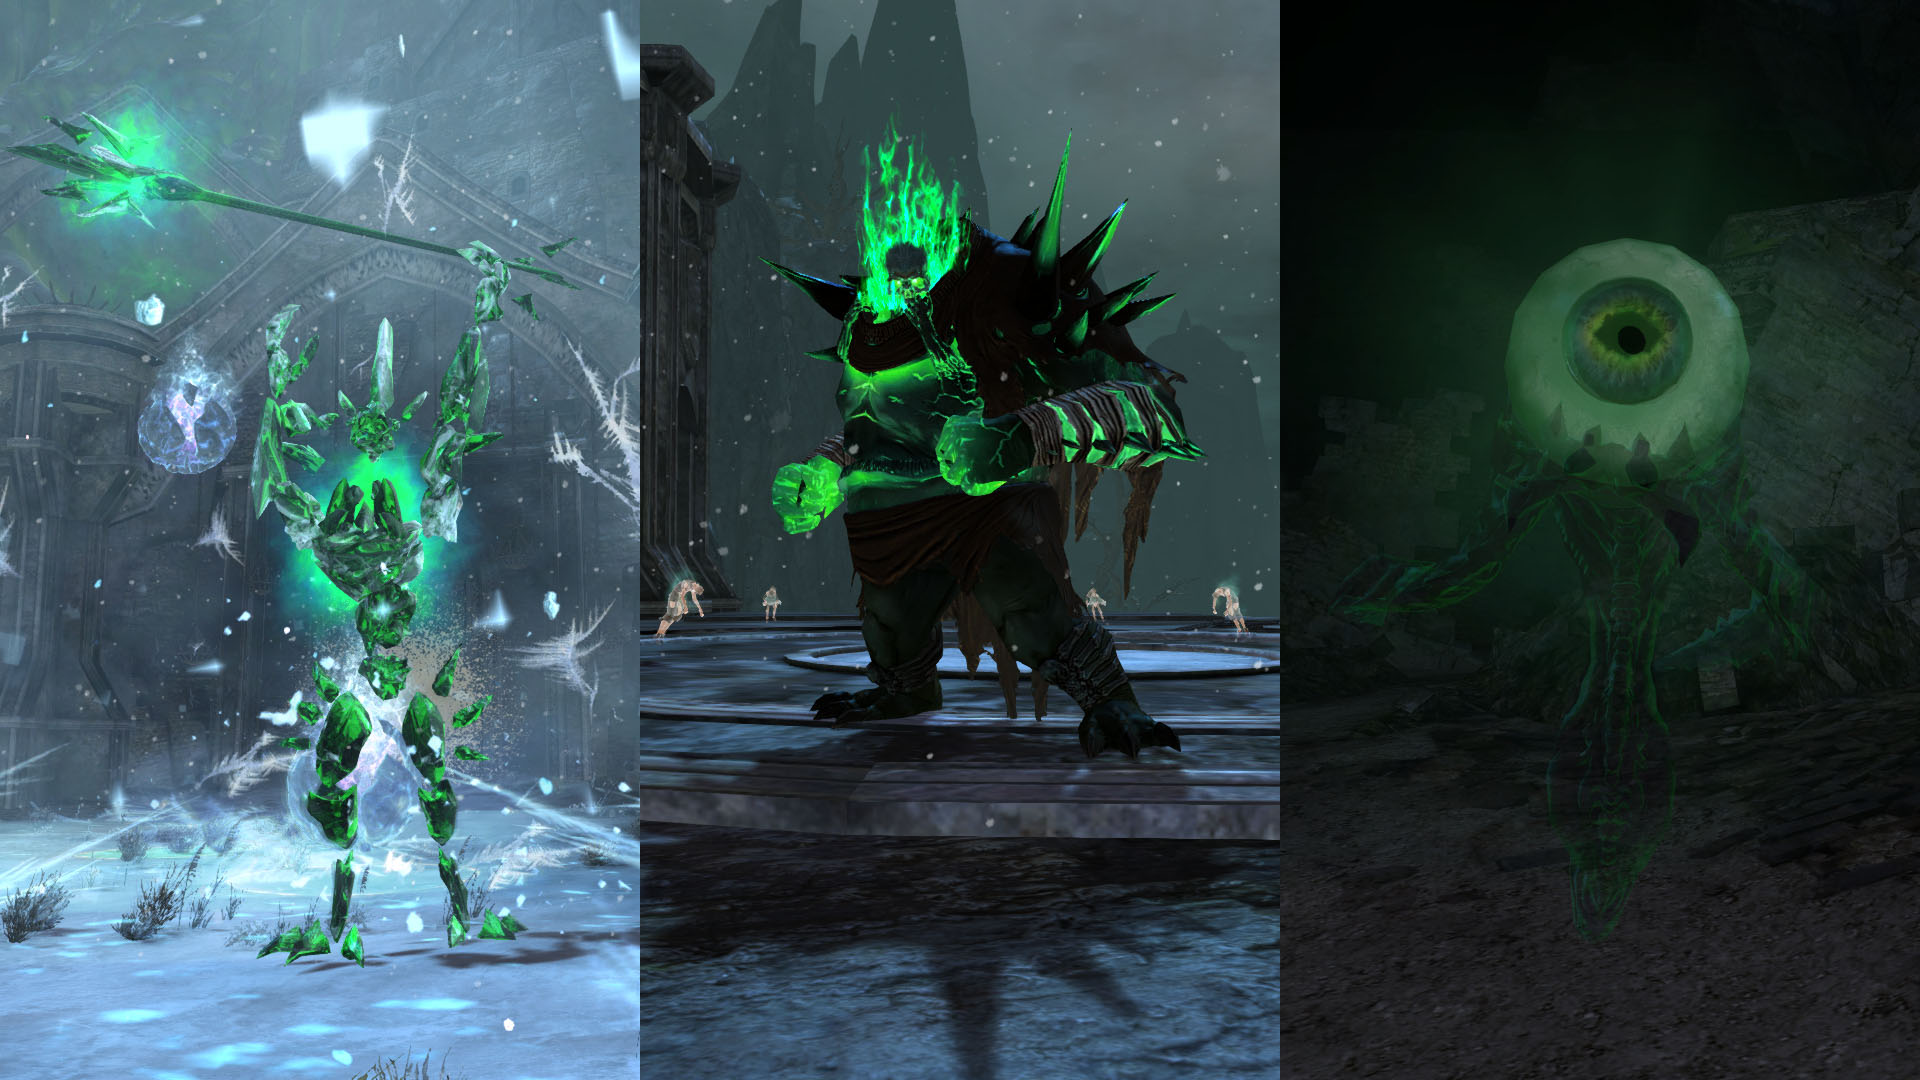
 The boss at the Statue of Ice is the ![]() Broken King, commonly called BK or Ice. It aggros on the player with the highest
Broken King, commonly called BK or Ice. It aggros on the player with the highest  Toughness. I recommend your tank stat as much Toughness as they can for this boss, as it will help them survive on their own without constant attention from the healer(s). Your tank should choose a direction to face the
 ![]() Broken King and stick with it throughout the fight (the
Broken King and stick with it throughout the fight (the ![]() Jackal portal is a convenient direction).
Jackal portal is a convenient direction).
This boss is the only one with a timer and an enrage mechanic. If you do not kill it within 3:30, it will wipe your squad, forcing you to reset.
The boss has two attacks. The first is its auto-attack, ![]() King's Wrath. It will raise its left arm and fire a fan of icicles at the tank while creating many triangular orange AoEs in random directions. It also gives itself 10 stacks of
King's Wrath. It will raise its left arm and fire a fan of icicles at the tank while creating many triangular orange AoEs in random directions. It also gives itself 10 stacks of ![]() Might,
Might, ![]() Fury, and
Fury, and ![]() Resistance every time.
Resistance every time.

Its second attack is ![]() Numbing Breach. The
Numbing Breach. The ![]() Broken King will levitate and spin its staff, creating icy blue veins spidering out from under it. These frozen breaches deal high damage every second and apply chill to anyone standing on them. Players should
Broken King will levitate and spin its staff, creating icy blue veins spidering out from under it. These frozen breaches deal high damage every second and apply chill to anyone standing on them. Players should ![]() Dodge or sidestep away if they’re on one.
Dodge or sidestep away if they’re on one.

It’s difficult to resurrect a player who’s gone ![]() Down on a crack since it might take two or more people resing at the same time to overcome the extreme damage. The
Down on a crack since it might take two or more people resing at the same time to overcome the extreme damage. The ![]() Broken King will use this ability as soon as you start the fight. The veins fade to black and disappear after 30 seconds, and it will create more 30 seconds after that.
Broken King will use this ability as soon as you start the fight. The veins fade to black and disappear after 30 seconds, and it will create more 30 seconds after that.
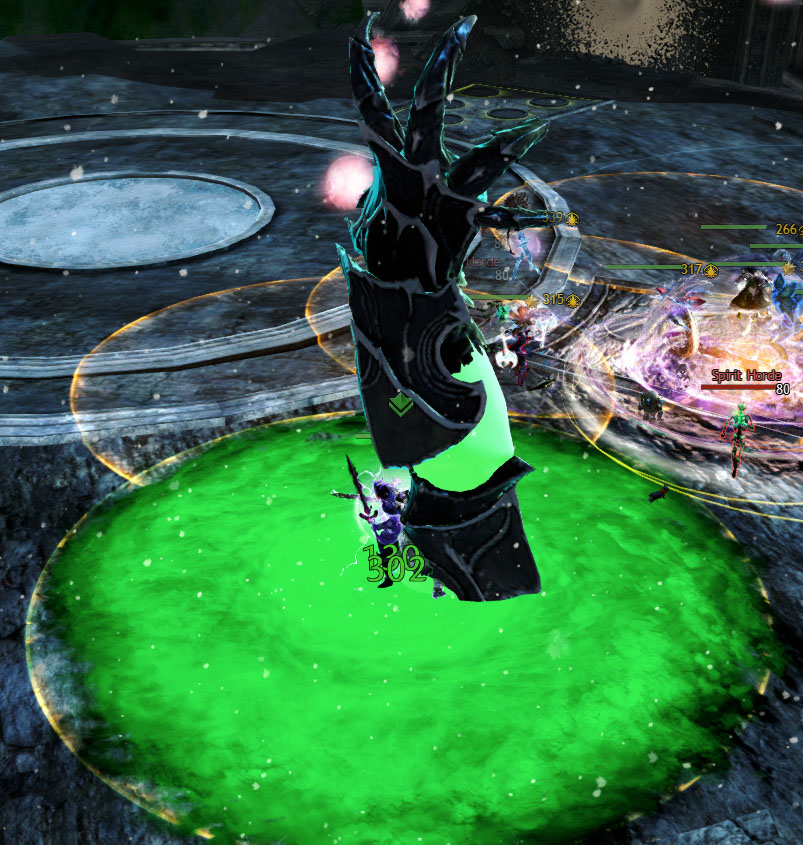
Upon landing on the platform, you’ll notice large spheres of ice falling to the ground, with shrinking green AoEs indicating the remaining time before impact. The fight will begin when a player absorbs one of these by standing in the AoE.
‘Catching’ a ![]() Hailstorm shard does moderate damage and gives players a timed stack of
Hailstorm shard does moderate damage and gives players a timed stack of  Frozen Wind. Trying to catch a fourth sphere with three stacks of the debuff will give a player
  Glaciate. This encases them in ice for 10 seconds, dealing heavy ticking damage and rendering them incapable of action. There is no way to escape aside from waiting it out or going
 ![]() Down. Frozen players should call out so healers can help them survive.
Down. Frozen players should call out so healers can help them survive.

If players fail to catch any of the shards, the ![]() Broken King uses
Broken King uses ![]() Icebreaker, dealing heavy raid-wide damage and probably
Icebreaker, dealing heavy raid-wide damage and probably ![]() Downing a few players. One ice sphere falls for every 1% damage done to the boss. This means you have to balance your damage output so you don’t overwhelm everyone with stacks or miss any shards while also staying ahead of the timer.
Downing a few players. One ice sphere falls for every 1% damage done to the boss. This means you have to balance your damage output so you don’t overwhelm everyone with stacks or miss any shards while also staying ahead of the timer.
It is everyone’s responsibility to absorb the ice spheres and say something if they’re at three stacks and can’t catch one they might be close to. You should allow your tank to catch as many as possible on their side and only send over healers or tanky DPS builds to help them out. If a ![]() Numbing Breach is covering a green AoE, you can stand just inside the circle or wait until the sphere is about to hit the ground before hopping in and back out again.
Numbing Breach is covering a green AoE, you can stand just inside the circle or wait until the sphere is about to hit the ground before hopping in and back out again.
This fight rewards groups with lower damage while those with higher damage won’t be accustomed to reining in their DPS to deal with a mechanic. While DPS will be stunted by players running all over the place and almost only doing ranged damage, it might not be enough. In that case, you can bring in a second or third healer to lower damage output and better manage ![]() Hailstorm.
Hailstorm.
When the ![]() Broken King is at 1% health, you’ll have to absorb all the remaining falling shards on the platform before you can kill it. This is indicated by the
Broken King is at 1% health, you’ll have to absorb all the remaining falling shards on the platform before you can kill it. This is indicated by the  Shield of Ice effect on the boss.
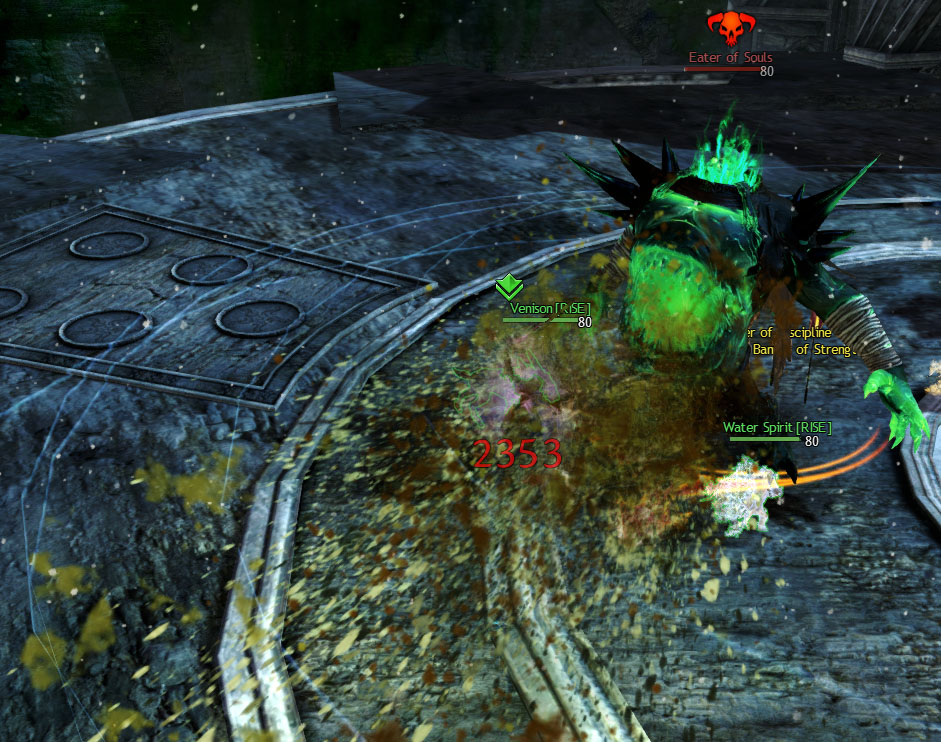
The boss at the Statue of Death is called the ![]() Eater of Souls, also called Mouth. It aggros on the player with the highest Toughness.
Eater of Souls, also called Mouth. It aggros on the player with the highest Toughness.
The boss can only die if all six braziers over the ![]() Jackal portal are lit. Otherwise, it will regenerate when it reaches 5% health.
Jackal portal are lit. Otherwise, it will regenerate when it reaches 5% health.

The boss uses a standard punching auto-attack toward the tank. It also has an ability called ![]() Breath of Death, which will do moderate damage and
Breath of Death, which will do moderate damage and ![]() Blind anyone in front of it.
Blind anyone in front of it.
Its deadly ability is ![]() Hungering Miasma, in which it turns toward a random player and vomits a large cone of green ooze that persists for several seconds. This does heavy damage,
Hungering Miasma, in which it turns toward a random player and vomits a large cone of green ooze that persists for several seconds. This does heavy damage, ![]() Cripples, and
Cripples, and ![]() Poisons anyone who walks through it. The tell is obvious since it turns away from the tank, so it’s easy to avoid if you’re paying attention.
Poisons anyone who walks through it. The tell is obvious since it turns away from the tank, so it’s easy to avoid if you’re paying attention.


The fight begins when you get close to the ![]() Eater of Souls. Damage it to ~20% but be careful not to kill it. Fifteen seconds after the fight begins, a twisted spirit will spawn in a random spot on the outside of the platform. It looks like a shadowy spider. When the first twisted spirit spawns, have everyone but the tank and possibly a healer go to kill it.
Eater of Souls. Damage it to ~20% but be careful not to kill it. Fifteen seconds after the fight begins, a twisted spirit will spawn in a random spot on the outside of the platform. It looks like a shadowy spider. When the first twisted spirit spawns, have everyone but the tank and possibly a healer go to kill it.
Twisted spirits use  Spinner's Web, spitting projectiles toward the farthest player who is not the tank. The webs do moderate damage and inflict
 ![]() Cripple,
Cripple, ![]() Slow, and
Slow, and ![]() Poison (10 stacks) on any player struck. Another twisted spirit will spawn 15 seconds after you killed the last one.
Poison (10 stacks) on any player struck. Another twisted spirit will spawn 15 seconds after you killed the last one.

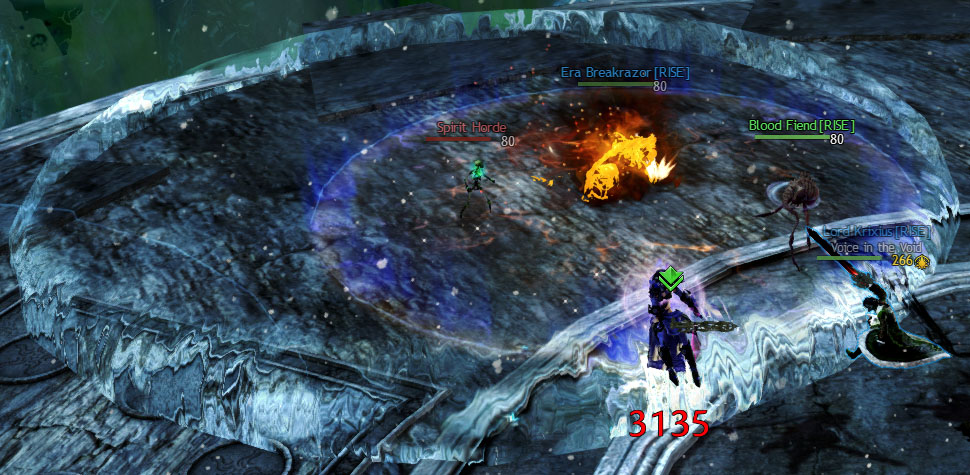
Skeletons of Dhuum’s Spirit Horde from the River of Souls also make a reappearance. They will run around and harass random players, so make sure you cleave and kill them when possible.
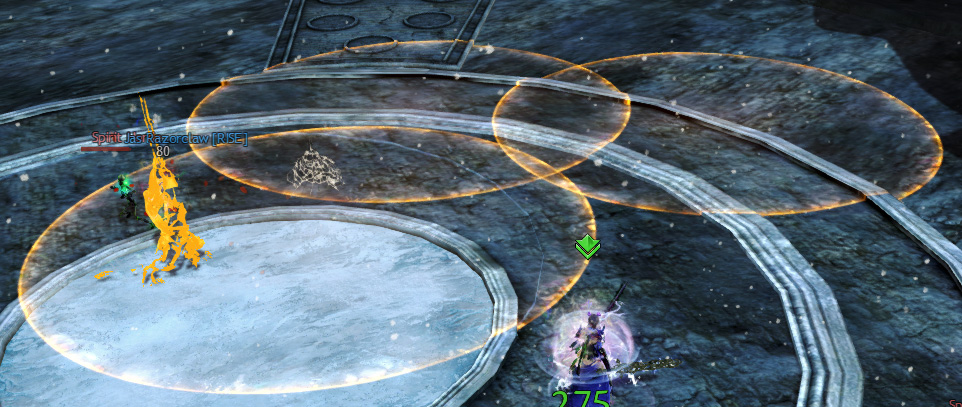
On the platform, there are several rectangular domino-like sections with five circles in each one. A random one will start to glow green when the spider spawns. The tank should move the boss to stand on this domino.
When you kill the spider, it will release five golden light orbs around the center of the platform. Players who run over one will receive a special action skill, ![]() Reclaimed Energy. They can use the ground-targeted skill to throw the orb at the glowing domino. This will cause one of the star emblems on the circles to light up. The goal is to use the orbs to light up all five of the circles.
Reclaimed Energy. They can use the ground-targeted skill to throw the orb at the glowing domino. This will cause one of the star emblems on the circles to light up. The goal is to use the orbs to light up all five of the circles.

Attempting to pick up another orb when a player already has the SAK will destroy one, causing you to be short. In this case, you will need to wait for another twisted spirit to spawn.
When all five circles are glowing, you can ‘kill’ the ![]() Eater of Souls on top of it. Anyone standing on the charged domino to attack will receive the
Eater of Souls on top of it. Anyone standing on the charged domino to attack will receive the  Empowered buff, increasing their outgoing damage by 50%. This will cause the
 ![]() Eater of Souls to regenerate and release 10 red orbs (souls) into the air. Players now need to claim these souls to light the torches over the sand portal.
Eater of Souls to regenerate and release 10 red orbs (souls) into the air. Players now need to claim these souls to light the torches over the sand portal.

Thirty seconds after the fight starts (and every 50 seconds after that) a Lost Spirit will spawn on the platform and you’ll see the message, “A spirit manifests.” Twelve seconds later, a large green PBAoE will appear under the Spirit and you’ll see Dhuum’s hand erupt out of the AoE to snatch the spirit. If a player stands in the circle, they can save the spirit but will be severed from their soul instead. This will launch them up in the air, allowing them to collect the souls the ![]() Eater of Souls released.
Eater of Souls released.
If you skip a green, a large shockwave will billow out, so jump or ![]() Dodge through it so it doesn’t
Dodge through it so it doesn’t ![]() Knockback.
Knockback.
In the air, a player’s weapon skills will be replaced. The first skill will move you up, the third will move you down, and the second will allow you to zoom to the next orb. As on the River, a player will have 30 seconds (tracked by the  Mortal Coil effect) to collect five souls (tracked by the
  Energy Threshold effect). If they fail, they will die. They will also receive the
  Fractured Spirit debuff, which lasts 80 seconds and will kill a player if they attempt to save another lost spirit while it’s active. This means a player can only do every other green circle.

The ![]() Eater of Souls will stop shortly after players are launched and use
Eater of Souls will stop shortly after players are launched and use  Imbibe. It will perform an animation like it’s shoveling food into its mouth and its defiance bar will unlock. Players left on the ground must crowd control (CC) the
 ![]() Eater of Souls to break the bar, or else it will pull the players in the air toward it. If it consumes one of the players, they’ll fall to the platform by the boss and go
Eater of Souls to break the bar, or else it will pull the players in the air toward it. If it consumes one of the players, they’ll fall to the platform by the boss and go ![]() Down.
Down.
Every three souls collected lights one torch, so players must collect a total of 18 souls to light every brazier. When all six braziers are lit, you can finish off the boss anywhere on the platform. It will die at 5% health.
Squads can either assign two teams with two players each or one team with four players to collect orbs. With two teams, you will skip the first green circle because you’ll probably still be killing the twisted spirit, throwing the light orbs, or ‘killing’ the ![]() Eater of Souls for the first time. If there are no souls to collect, you’ll be sacrificing your players. After that, you should be able to keep up the pace as long as you’re not killing and causing the
Eater of Souls for the first time. If there are no souls to collect, you’ll be sacrificing your players. After that, you should be able to keep up the pace as long as you’re not killing and causing the ![]() Eater of Souls to regenerate multiple times or having to mop up
Eater of Souls to regenerate multiple times or having to mop up ![]() Downed players.
Downed players.
With one team, you’ll need to skip the first two green circles so there are at least 20 souls in the air when they all go to collect. Using this strategy, mind that you keep enough CC on the ground, or else your players’ journeys will be cut short.
In either strategy, be sure you’re aware of whether there are souls in the air. If you missed a light orb or spent too long dealing with other mechanics, don’t send anyone up.
The bosses at the Statue of Darkness are the ![]() Eye of Fate and
Eye of Fate and ![]() Eye of Judgment. The area you fight them in is a maze under the Hall of Judgment. There are two sides with one Eye each separated by a high platform.
Eye of Judgment. The area you fight them in is a maze under the Hall of Judgment. There are two sides with one Eye each separated by a high platform.
If they are not killed within 15 seconds of one another, they will regenerate to 25% health.
The ![]() Eyes of Darkness have two attacks. You can LoS (line of sight) both of these attacks by standing behind a rock wall. The first is
Eyes of Darkness have two attacks. You can LoS (line of sight) both of these attacks by standing behind a rock wall. The first is ![]() Piercing Shadow: the Eye will whirl, sending out projectiles that do moderate damage and regenerating a little health.
Piercing Shadow: the Eye will whirl, sending out projectiles that do moderate damage and regenerating a little health.

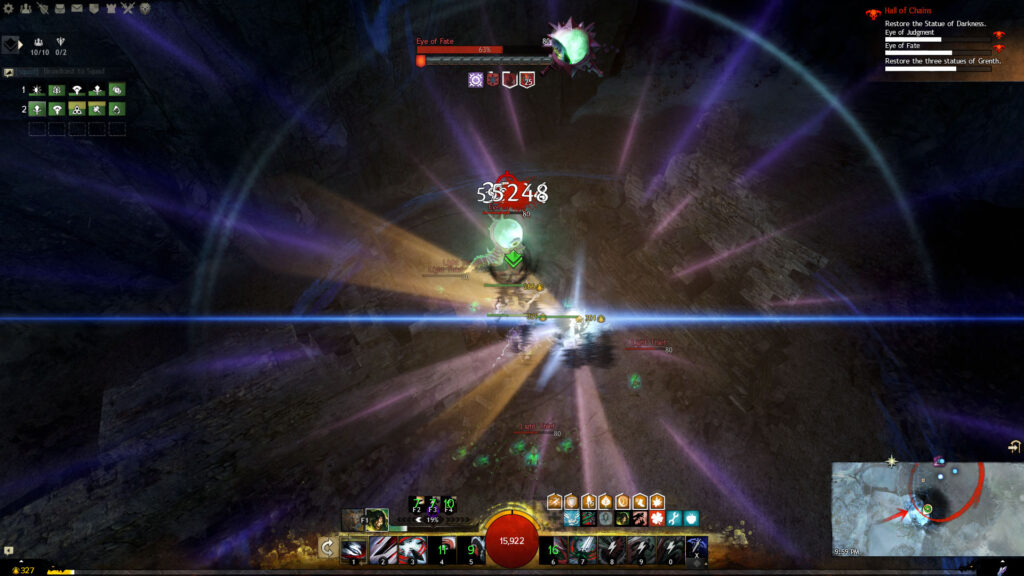
The second is ![]() Deep Abyss. The Eye will lock on to a random player and focus a beam of blue energy on them. The beam will pulse damage seven times, dealing 10 times the damage on the last pulse. Healers should focus on this player so they can survive the final attack.
Deep Abyss. The Eye will lock on to a random player and focus a beam of blue energy on them. The beam will pulse damage seven times, dealing 10 times the damage on the last pulse. Healers should focus on this player so they can survive the final attack.

After the fight starts, if one Eye is not engaged in combat for a period, it will use ![]() Despairing Darkness, unleashing heavy damage on everyone in the maze. Several people will probably go
Despairing Darkness, unleashing heavy damage on everyone in the maze. Several people will probably go ![]() Down.
Down.
The ![]() Eyes of Darkness are only vulnerable in the light. They will receive a debuff,
Eyes of Darkness are only vulnerable in the light. They will receive a debuff,  Exposed, while standing in a pool of light. On the platform separating the sides, three light orbs will spawn periodically.


Players can interact with these to gain the  Light Carrier buff, which illuminates a small area around their character, and two skills that replace their weapon skills. The first is
 ![]() Throw Light with a 3000 range, which players up top can use to throw down to their allies engaging the Eyes. The second is
Throw Light with a 3000 range, which players up top can use to throw down to their allies engaging the Eyes. The second is ![]() Flare, which a player on the ground can use to trigger a bright PBAoE, which will illuminate the surrounding area and
Flare, which a player on the ground can use to trigger a bright PBAoE, which will illuminate the surrounding area and ![]() Stun the Eye for a long duration.
Stun the Eye for a long duration.

There are a few ways to extend the duration of the ![]() Stun:
Stun:
 Air
Air
 Marksmanship
Avoid using ![]() Daze,
Daze, ![]() Fear, or
Fear, or ![]() Knockdown, especially if someone is using one of the traits or sigil above, as they will overwrite the
Knockdown, especially if someone is using one of the traits or sigil above, as they will overwrite the ![]() Stun from
Stun from ![]() Flare.
Flare.
Light orbs left on the ground will also illuminate the area, but light thief skeletons will spawn and try to snatch them. These light thieves will also spawn on the platform and try to claim the light before the throwers can. Their channel to claim a light lasts longer than a player’s, so you can still beat them even if they’ve started. The throwers can also CC or kill them.
If an Eye is not ![]() Stunned, it will teleport to a random place in the maze every 15% of its health,
Stunned, it will teleport to a random place in the maze every 15% of its health, ![]() Fearing everyone away before it does. Partywide
Fearing everyone away before it does. Partywide ![]() Stun Breaks like a
Stun Breaks like a ![]() Ranger's and
Ranger's and ![]() Tempest's are useful to break free. I recommend using object squad markers to mark both
Tempest's are useful to break free. I recommend using object squad markers to mark both ![]() Eyes of Darkness, as they don’t disappear after they teleport.
Eyes of Darkness, as they don’t disappear after they teleport.
The fight starts when you engage an Eye in the light. At this point, you will no longer be able to mount up, but you can glide. The ![]() Eyes of Darkness will still attack before the fight starts, so make sure you are standing behind a wall so you don’t go
Eyes of Darkness will still attack before the fight starts, so make sure you are standing behind a wall so you don’t go ![]() Down.
Down.

If you don’t damage an Eye to 70% health before it teleports, a giant ![]() Minotaur will spawn on that side when the Eye reaches 60% health. This
Minotaur will spawn on that side when the Eye reaches 60% health. This ![]() Minotaur will chase players and can pounce on them, as indicated by an orange AoE circle, inflicting heavy damage and a
Minotaur will chase players and can pounce on them, as indicated by an orange AoE circle, inflicting heavy damage and a ![]() Knockdown. It also uses
Knockdown. It also uses ![]() Twisted Shadow, creating several orange AoEs, which drop shadows onto players, dealing heavy damage.
Twisted Shadow, creating several orange AoEs, which drop shadows onto players, dealing heavy damage.
Like the ![]() Eyes of Darkness, you can only damage the
Eyes of Darkness, you can only damage the ![]() Minotaur in a pool of light. If it spawns, players will often ignore it because it has so much health, but it might be prudent to kill it separately or cleave it with the Eye.
Minotaur in a pool of light. If it spawns, players will often ignore it because it has so much health, but it might be prudent to kill it separately or cleave it with the Eye.
The common-sense strategy is to split your group with four players on either side and two as light throwers up top. You can use portals to great effect though.
If you have excellent DPS, you can use a single or double portal strategy. For the single portal, you’ll have one of your light throwers be a ![]() Chronomancer with . Everyone else but the other light thrower will start on the first side,
Chronomancer with . Everyone else but the other light thrower will start on the first side, ![]() Stun, and burn the first Eye until it’s dead. The
Stun, and burn the first Eye until it’s dead. The ![]() Chronomancer will place a on the top platform, glide down to the group when the Eye is at about 20% health, and place the . Everyone will take it, glide to the Eye on the other side (except the light throwers), and then kill it before the first can regenerate.
Chronomancer will place a on the top platform, glide down to the group when the Eye is at about 20% health, and place the . Everyone will take it, glide to the Eye on the other side (except the light throwers), and then kill it before the first can regenerate.
This strategy is dangerous and strict on timing. If the first Eye teleports, the unattended Eye will likely use ![]() Despairing Darkness, and if the second teleports, you won’t kill it before the first regenerates. Similarly, if you don’t have the burst DPS to burn the second Eye, even if it doesn’t teleport, you’re screwed.
Despairing Darkness, and if the second teleports, you won’t kill it before the first regenerates. Similarly, if you don’t have the burst DPS to burn the second Eye, even if it doesn’t teleport, you’re screwed.
A slightly safer alternative is to use a double portal. Your ![]() Chronomancer will the before they place it and you’ll leave the first Eye at 20%. When you arrive on the top platform, the
Chronomancer will the before they place it and you’ll leave the first Eye at 20%. When you arrive on the top platform, the ![]() Chronomancer will place another and then join the squad on the other side. Kill the second Eye, portal back to the platform, and then glide down to finish off the first one. You have a little more leeway in the DPS required using this strategy.
Chronomancer will place another and then join the squad on the other side. Kill the second Eye, portal back to the platform, and then glide down to finish off the first one. You have a little more leeway in the DPS required using this strategy.
There is also a third portal strategy that leaves more room for error. You’ll need two ![]() Druids, preferably with , and a
Druids, preferably with , and a ![]() Chronomancer with to be a light thrower. At the start, have a
Chronomancer with to be a light thrower. At the start, have a ![]() Druid on one side, two light throwers up top, and the rest of the squad on the opposite side. Throw orbs to both sides.
Druid on one side, two light throwers up top, and the rest of the squad on the opposite side. Throw orbs to both sides.
The single ![]() Druid can send their pet around the corner to attack the Eye while staying safely behind a wall. The Eye won’t attack the pet or teleport, but it will be in combat. The main squad can
Druid can send their pet around the corner to attack the Eye while staying safely behind a wall. The Eye won’t attack the pet or teleport, but it will be in combat. The main squad can ![]() Stun and DPS their Eye to ~10–15%. The
Stun and DPS their Eye to ~10–15%. The ![]() Chronomancer will portal them up top, leaving the other
Chronomancer will portal them up top, leaving the other ![]() Druid and a DPSer on the ground.
Druid and a DPSer on the ground.
The ![]() Druid and DPS player will hide behind a wall and sick the pet on the Eye. The DPS player is there to protect the
Druid and DPS player will hide behind a wall and sick the pet on the Eye. The DPS player is there to protect the ![]() Druid in case there is no light for a short time because the light thieves will then attack players. The main squad will
Druid in case there is no light for a short time because the light thieves will then attack players. The main squad will ![]() Stun and burn the second Eye. When the second Eye is at about 20%, the pair on the original side can come out and finish off the first one.
Stun and burn the second Eye. When the second Eye is at about 20%, the pair on the original side can come out and finish off the first one.
If you’re using this strategy because you can’t ![]() Stun lock the
Stun lock the ![]() Eyes of Darkness reliably, the
Eyes of Darkness reliably, the ![]() Druid staying on the first side should bring a pet with respectable DPS (a
Druid staying on the first side should bring a pet with respectable DPS (a ![]() Jacaranda is good because its
Jacaranda is good because its ![]() Call Lightning will also hit the light thieves), and one with lower DPS such as a bear. They should also consider bringing in case their bodyguard goes
Call Lightning will also hit the light thieves), and one with lower DPS such as a bear. They should also consider bringing in case their bodyguard goes ![]() Down.
Down.
About Phoenix Uprising • Recurring Series • Support the Site • Contact • Editorial Guidelines • Privacy Policy
© 2022 Phoenix Uprising. All rights reserved.
About Phoenix Uprising • Recurring Series • Support the Site
Contact • Editorial Guidelines • Privacy Policy
© 2023 Phoenix Uprising.
All rights reserved.