


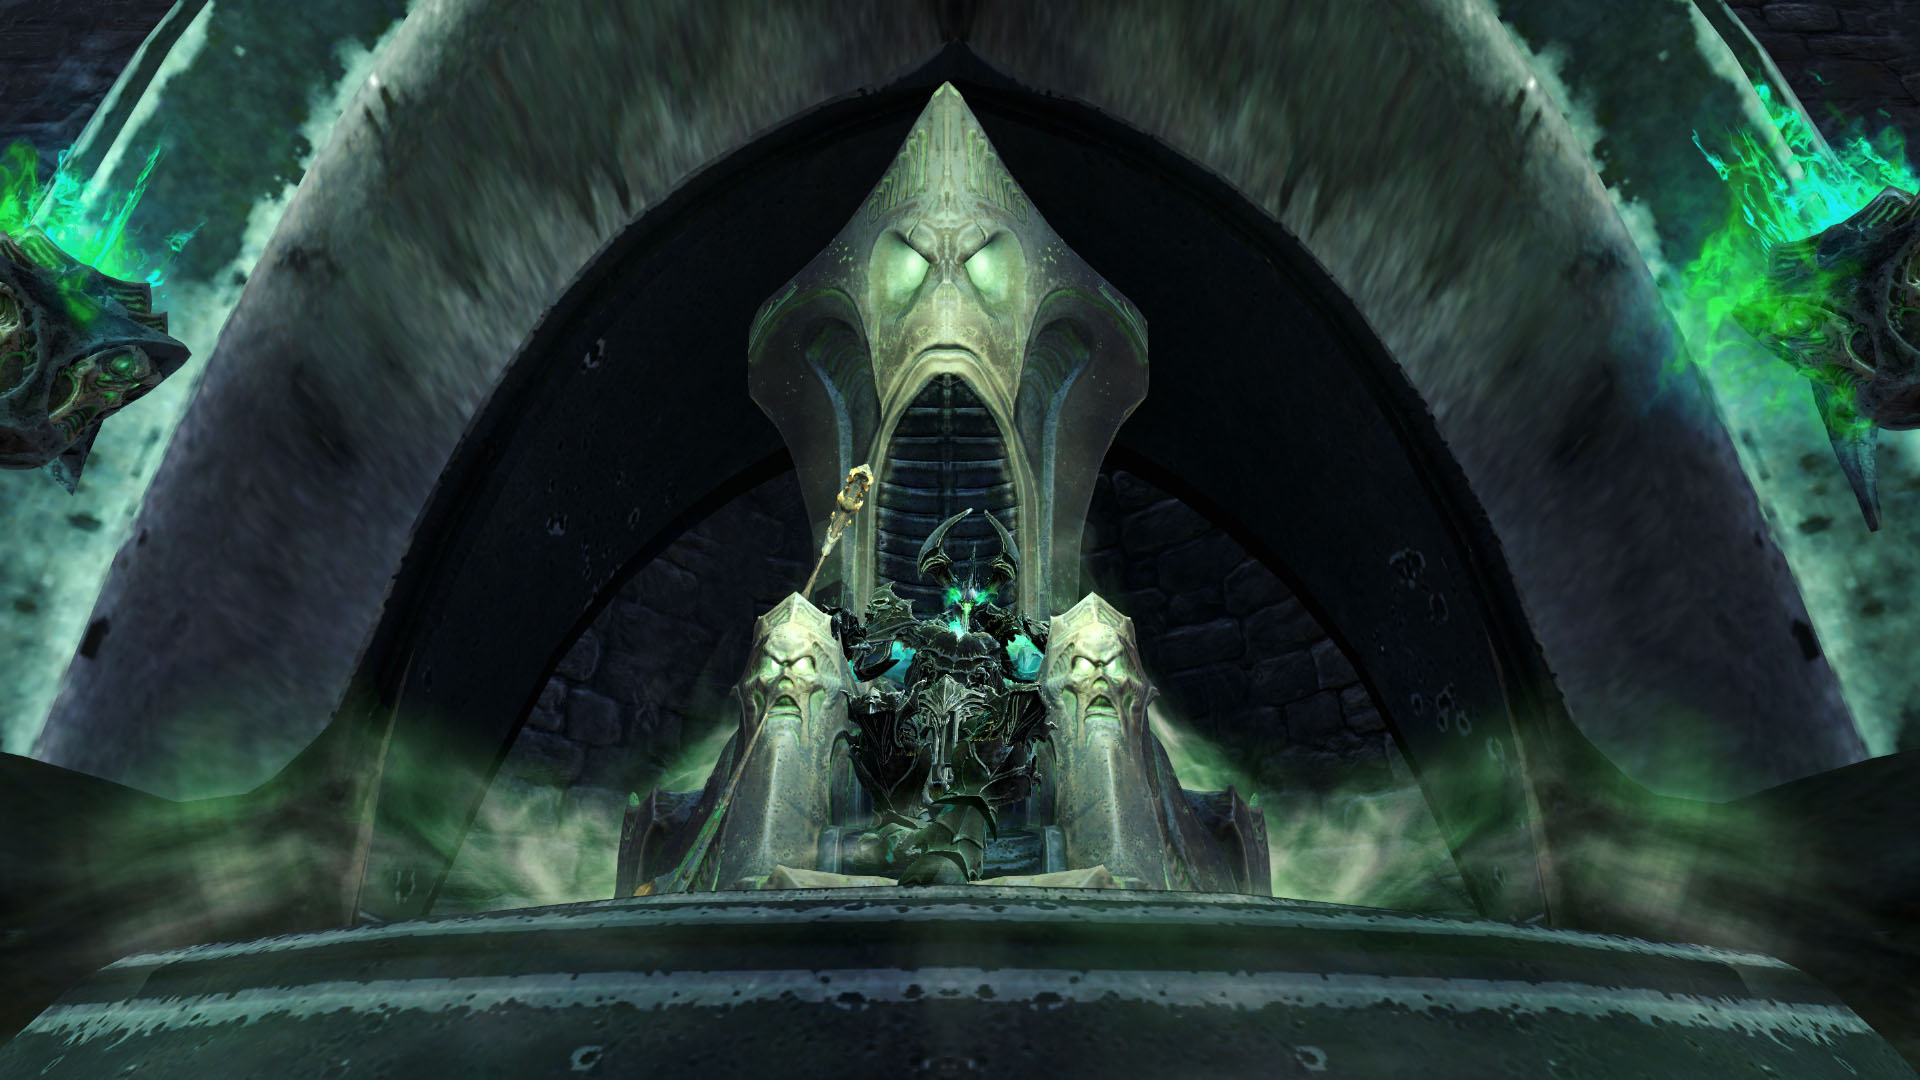
Welcome to my guide for the Guild Wars 2 raid boss, The Voice in the Void, The Final Judge, The Ender of All, Death Inevitable (but we’ll just call him  Dhuum for short), the fourth and final encounter in Hall of Chains (Wing 5). This is a detailed guide on the mechanics of the fight including various strategies that cater to everyone from beginners to experienced raiders. If you’re brand new to raiding, I recommend reading my Path to Endgame guides first.
Due to the challenging roles on this boss, I’ve created a Dhuum Roles Guide for the messenger kiter and orb collectors (better known as running greens). It covers the ins and outs of those roles in detail. This guide is only for the general mechanics of the fight.


Dhuum is one of the hardest raid bosses due to having many roles and (near) instant death mechanics and requiring excellent spatial awareness on the part of every squad member. Condition damage tends to be better for Dhuum because players must run away for mechanics and ticking conditions mean they will maintain DPS while performing them.
 Boon Strip: Dhuum unavoidably steals players’ boons a few times throughout the fight, so it’s especially important to remove them.
 Condition Cleanse: You’ll need to remove
  Torment after every
  Greater Death Mark.
 Messenger Kiter: This is a special role responsible for keeping the messengers away from the squad and the
  Seven Reapers.
 Revival: Depending on your DPS and tanking strategy, Dhuum can be a very mobile fight, and there are a lot of mechanics that will
  Down players, so revivability is welcome.
The Hall of Judgment is a long room with stairs on one side and Dhuum's throne on the other. He is possessive of his throne, so if you attempt to sit in it (or on his lap) or are knocked into it at any point before or during the fight, you will die.
The room also has seven seals, one for each Reaper. In this guide, I’ll be referring to specific squad markers at each of the Reapers. Look at the image to see which marker is where. This configuration is generally accepted by the community, but I make no promises that your squad leader will follow it. When I say left and right or clockwise and counterclockwise, I am referring to those directions when you are facing Dhuum's throne.
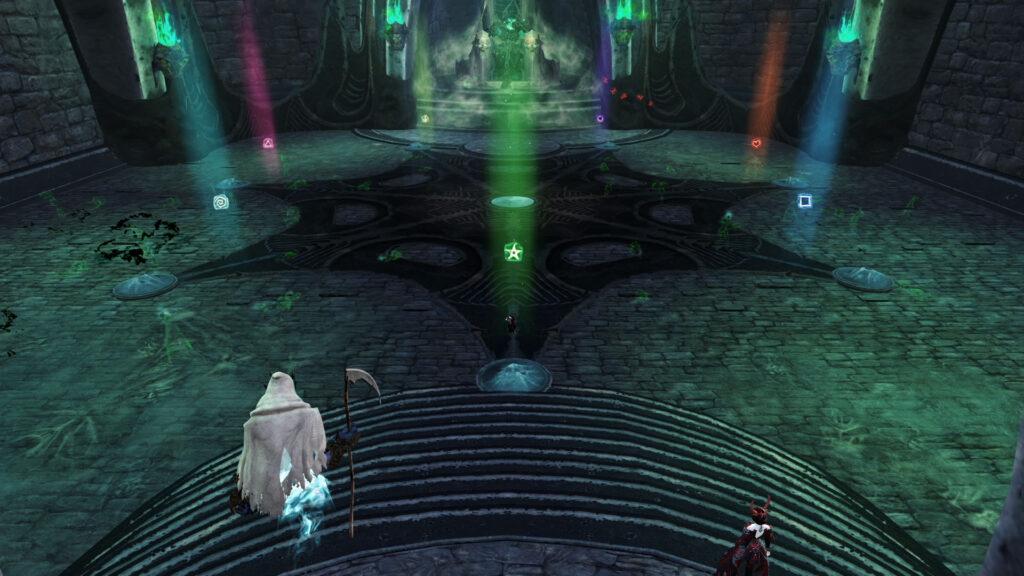
Before the fight begins, you’ll notice Grenth’s Seven Reapers on the ramp to the Hall of Judgment. When you start, they’ll teleport into the room one by one, starting on  Arrow. Your goal is to keep them alive long enough to complete the ritual by distracting (i.e. killing) Dhuum and his minions. If a Reaper dies during the fight, your squad will wipe. You’ll also see the sassy on-screen message: “A reaper has been slain. The ritual has failed, and so have you.” Don’t worry, it was only the fate of Tyria resting on your shoulders.
Reapers are impervious to Dhuum's attacks, so you can move him wherever you want when he deigns to get off his throne. His minions will focus on the Reapers, but you can divert or kill them.
The Reapers have a massive incoming healing modifier (in normal mode) so you can easily heal them if they take damage. You can also give them boons,  Barrier, and stealth. Stealth will give them
  Cloaked in Shadow, which makes minions unable to attack them.
When the Reaper of the Chaos Planes joins the fight by the steps, all the minions that spawn afterward will aggro on it. You’ll have to pay special attention to this Reaper, but the remaining Reapers should be safe during the main fight as long as you adequately perform the mechanics.
Dhuum summons three types of minions to aid him. Deathlings are small spiders with low health that take increased  Condition Damage. They spawn en masse so you’ll have to kill them regularly.
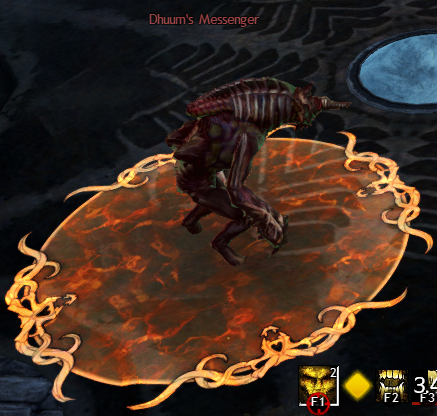
Messengers are large flesh golems tinged in green. They have an orange PBAoE that pulses massive damage to Reapers and players standing in it. They aggro on the first player who attacks them and die 15 seconds later. That player will get an on-screen message: “Dhuum’s Messenger is fixated on you.”
Except for the first two that spawn when the fight begins, they will spawn at one of the four half-circles near the stairs. They spawn clockwise starting between  Spiral and
  Triangle never skipping a spawn point. During the pre-phase, messengers spawn every 10 seconds. During the fight against Dhuum, they spawn roughly every minute at X:25 ± 5 seconds.
You’ll need to dedicate a healer or hybrid build to kite them. See my Dhuum Roles Guide for tips and instructions on how and where to kite them.
Enforcers are spooky scary skeletons that take increased  Power Damage. They approach the nearest Reaper and repeatedly use
 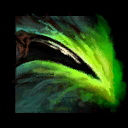 Rending Slash, a frontal cone that deals massive damage to the Reapers and players. They are immune to hard crowd control (CC) but susceptible to soft CC like
  Blind,
  Chill, or
  Cripple.
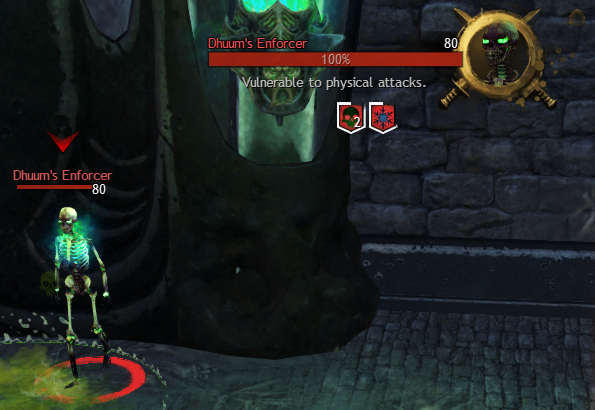
Except for the first two that spawn when the fight begins, they will spawn at one of four locations: on either side of the throne or on either side of the stairs. They spawn clockwise starting by the brazier between Triangle and Arrow never skipping a spawn point. During the pre-phase, enforcers spawn every 15 seconds. If they spawn during the fight against Dhuum, they spawn roughly every 30 seconds.
The pre-phase is dedicated to killing enforcers, but if your orb collectors are doing their job, you shouldn’t have any enforcers spawn during the main fight.
Also called: Greens
Every 30 seconds, Dhuum will reach for one of the Reapers and kill it unless a player sacrifices themselves by standing in the green circle under the Reaper. If no one is standing in the circle when Dhuum's hand snatches the Reaper, the ritual will fail and your squad will wipe. Dhuum targets the Reapers in the order that they spawn, starting with Arrow at 9:30 and going clockwise.
If you are standing in the green circle, your soul will be separated from your body and launched into the air. You will lose access to all your skills and have 15 seconds to collect five red orbs to reunite with your body. Entering the blue pillar of light in the middle of the room kills you.

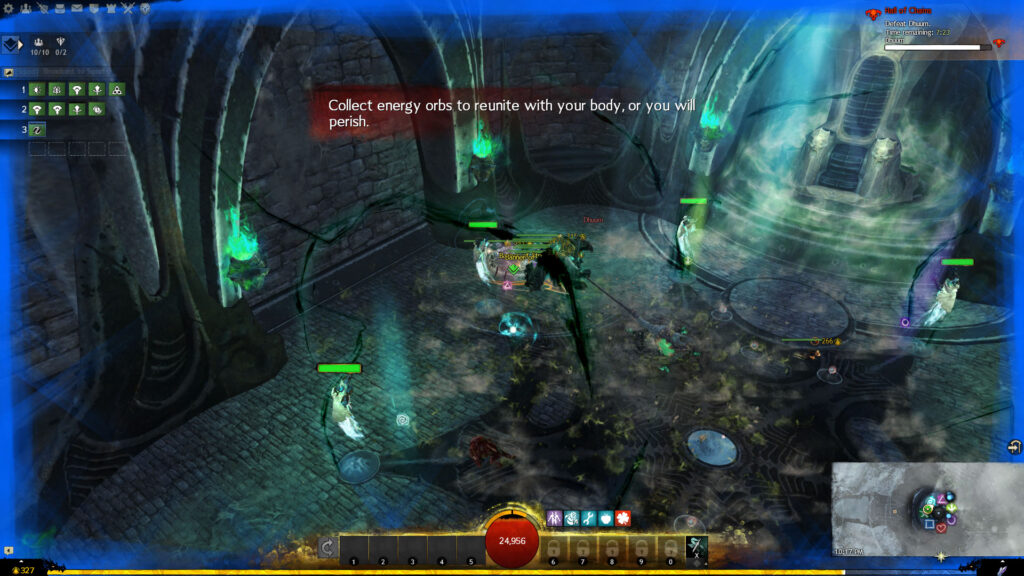
There are three sizes of orbs and collecting each will prevent a type of minion from spawning during the fight. Small orbs are deathlings, medium orbs are messengers, and large orbs are enforcers. There will always be one large orb every time a player goes up. You must collect the large orb every time. If you don’t, an enforcer will spawn and this is a huge danger to the Reapers and a massive DPS loss because your squad will have to leave Dhuum to kill it.
If you fail to collect five orbs within the time limit, you will die. When you return, you will be  Invulnerable for a few seconds, meaning any wayward messengers or exploding bombs won’t damage you.
As soon as your soul is snatched, you receive an 80-second debuff called  Fractured Spirit. If you attempt to do another green while this debuff is active, you will die on the spot. Therefore, you need at least three players dedicated to collecting orbs.
See my Dhuum Roles Guide for more information about this role and a bunch of tips to help you perform it successfully and consistently.
Also called: Bombs
Tells: Circular timer overhead ( ), purple ghost icon on buff bar (
 ), on-screen message: “<Player name> is afflicted!”
At 9:00, one random player will receive Arcing Affliction, a time-bomb-like mechanic, and a special action skill, 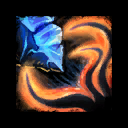 Expel Energy. That player will also be surrounded by a fiery green aura. Letting the timer run out or using the special action skill will release a blast of energy that damages other players based on their proximity to the target. Three seconds after a bomb detonates, whether manually or by timing out, another player will be afflicted. Afflicted players also gain
  Residual Affliction, preventing them from being reafflicted for 40 seconds.
Players will take more damage the closer they are to you, almost certainly going Down if you’re right next to them. On your minimap, you will see a clear area of space around your player’s icon and fog outside of it. This is the fog of war. Your squadmates will take the minimum possible damage from the explosion if they are in the fog. This is about two markers/ Reapers away.

The target of Arcing Affliction is always responsible for running to or staying in the correct spot so they don’t blow up their squadmates. You never want to use the SAK if you can help it. It leads to more players running back and forth and will mess up the timing for coordinating bombs with the Greater Death Mark mechanic. It’s good squad etiquette to call out where you’re exploding, especially if you notice someone nearby.
Speak to  Desmina to start the fight. When it begins, two enforcers, two messengers, and a load of deathlings will spawn. There will be an enforcer-messenger pair on each side of the room, one between Spiral and Triangle and the other between
  Square and
  Heart. It doesn’t matter which side you start on. The first enforcer that spawns after this will be on the left side.
Have your kiter start grabbing messengers. The squad should kill the first enforcer and then go to the opposite side to kill the other one, cleaning up deathlings on the way. Unless you’re loaded with power DPS, the next enforcer should have spawned and will be approaching the Reaper on Arrow.
At this point, the main squad can go from one enforcer spawn point to the next. Make sure you’re maintaining boons and killing deathlings as you go. The kiter will be running around the center the whole time since messengers spawn so frequently in the pre-phase.
The players who get the bombs should run counterclockwise since the squad will be moving clockwise. However, when you get to the stairs, you need to be careful. Your main squad will be killing the enforcer trying to attack Square, but someone will be going to do the green on Heart. Use your best judgment: if the enforcer dies quickly, you can stay while the squad runs away from you. If not, you’ll need to go all the way back toward the throne. The next player will run into a similar situation, needing to choose to stay behind Spiral as the squad goes to kill the last enforcer or run ahead.
When in doubt during the pre-phase, Arrow should always be a safe place to blow up, but still try to communicate this for your kiter.
At 8:00, Dhuum will stand up and aggro on the player with the highest  Toughness. Your tank will need to move him throughout the fight. There is a section at the end of the guide explaining various strategies for tanking, but first, you should understand why you need to move him.
Dhuum's auto-attack,  Scythe Swing, does massive damage in a frontal cone and creates many marks in a 330° radius. These explode shortly after and deal moderate damage and inflict
  Poison.

The tank takes greatly reduced damage from Dhuum's scythe and marks, making a hybrid boon support or DPS player with a a viable tank. Everyone else should stack tight behind Dhuum since there is only a 30° safe area to stand in. You can afford to eat a couple of marks throughout the fight, but this will put unnecessary stress on your healer(s) since Poison reduces incoming healing.
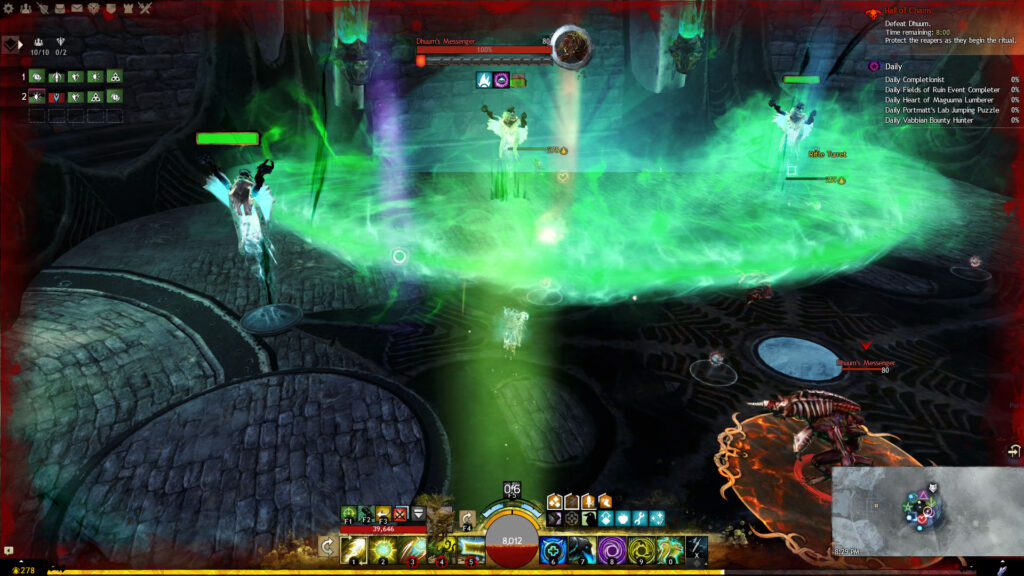
At 90% health, Dhuum gains a new attack named 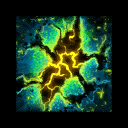 Cull. He will turn away from the tank and slam his scythe into the ground ~600 units away, indicated by an expanding orange circle. The slam itself does no damage.
After the slam, a series of rippling black veins will spider away from the point of impact. When they’ve fully spread, they’ll glow green for ~1.5 seconds and then erupt. Players hit will take ~50% of their health in damage and be  Feared for several seconds. This could Fear you into an AoE or the throne, so it’s wise to use a
  Stun Break or instant Condition Cleanse to remove it, even if it impacts your DPS.
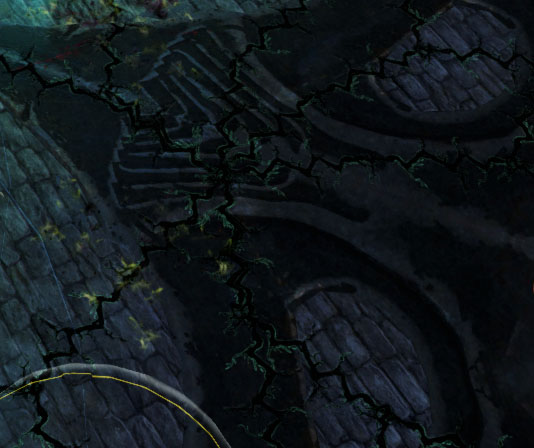
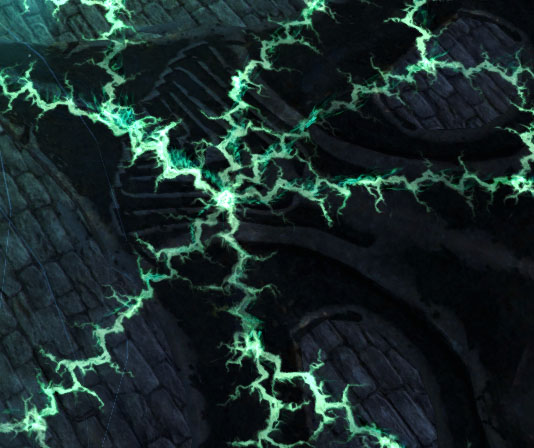
The spread of the cracks is random, so you may need to  Dodge or sidestep one even if you’re standing directly behind Dhuum. The cracks grow in density at 50% and 25% health. Dhuum will use Cull every 30 seconds unless he is in the middle of another attack.
Also called: Dip, puddle
Every 80 seconds starting at 7:05, > Dhuum will face a random player (he can choose the tank). He will then dip into the ground and reappear on top of that player. A large, quickly expanding AoE will appear under that player, and about a second later, Dhuum will slam the haft of his scythe into the ground.
Dhuum will steal all the boons of anyone caught in the initial impact and separate them from their soul, a 1,000-unit  Knockback. They will need to retrieve their soul from where it was split by running over it. A bright blue pillar of light indicates the location. If they don’t reunite with their soul within a few seconds, they will die.
The attack leaves behind an orange AoE that is harmless for a few seconds. Green  Dhuumfire will spread around the outside and when the ring is complete, the circle will take on a greenish hue. Stepping in the AoE after this will cause players to take massive damage. The field persists for two minutes.

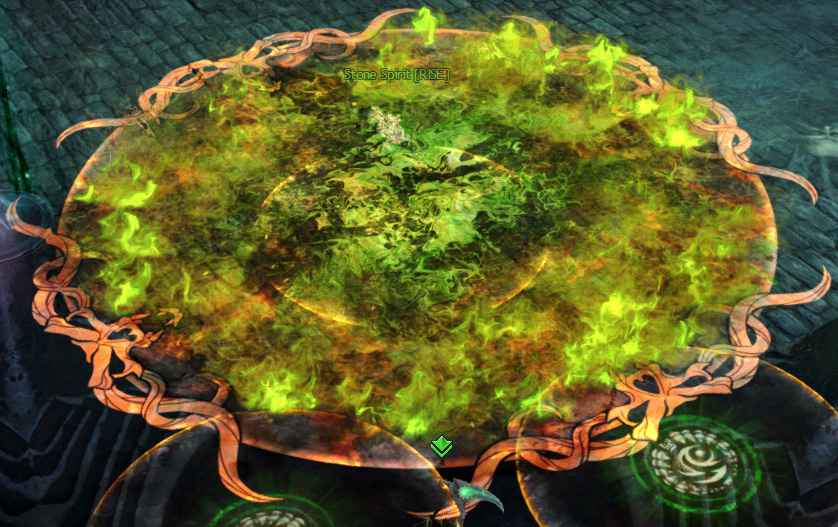
Be aware that ¾ of the AoE appears in front of Dhuum while only ¼ of it is behind him. To avoid the initial impact, make sure everyone stands still before the attack. You can start running away after he disappears. Assuming he’s chosen anyone but the tank, this will ensure he’s facing the stack and everyone can run forward a short distance to avoid the attack. As long as no one jumps the gun, you shouldn’t even have to Dodge. If he chooses the tank, Dodging backward is your safest bet.
If you lose your soul in the middle of the Death Mark, you should try to retrieve it before the flames spread. Otherwise, you’ll want to Dodge out immediately or use a movement skill when you get it back. You’ll probably go Down anyway, but you’ll be on the edge of the circle, making it easier for your squadmates to res you or someone to pull you to safety using or .
You’ll also want to strip, corrupt, or steal any boons Dhuum gains as soon as possible.  Protection and
  Resolution will severely inhibit his incoming damage.
Also called: (Big) soul split, vacuum, suck
Every 80 seconds starting at 6:25, Dhuum will disappear into the ground and teleport to the middle of the room. He will split everyone from their souls, inflicting 20% of their maximum health in damage and a Knockback. He will also steal all their boons and inflict them with six stacks of Torment. If players don’t reunite with their souls within several seconds, they will die. Unlike the regular Death Mark, this soul split is (mostly) unavoidable. (Someone who recently returned from a green will not be split.)

Two seconds later, he will start channeling  Cataclysmic Cycle. He creates an orange AoE under him, a little bigger than his hitbox, and sucks players toward him. If anyone gets pulled into the AoE, they will take massive pulsing damage, likely going Down.
Anyone with Arcing Affliction will lose the bomb without it exploding when the Greater Death Mark occurs. If someone gets Arcing Affliction within six seconds of the attack, they can stay with the squad. This will line up perfectly assuming everyone held previous bombs as long as possible (never used their SAK). No one else will get a bomb until after Cataclysmic Cycle ends.
To handle this mechanic, have everyone face the center when he dips. You’re Knocked Back no matter which direction you are facing, so if you’re looking away from Dhuum, you could be knocked right into his AoE. Healers should top up everyone’s health and give out Barrier if possible.
Players should aim to be a short distance from a wall. If you’re too close, you could ping pong away, leaving your soul in an inconvenient location. If you’re too far, you’ll be Knocked Back farther and have to run forward a long way to retrieve your soul, putting you near his AoE. Everyone should run for their soul before the vacuum effect begins.
Cleanse the Torment immediately. It is usually your healers’ job:
I recommend you have some form of Condition Cleanse on a non-healer since you’ll only have one and/or one might be away kiting a messenger. Good options are with (this will also be useful if anyone is Feared by Cull) or with . Your boon givers will also need to reapply the vital boons ( Might,
  Fury,
Fury,  Alacrity, and
  Quickness) as soon as possible.
Once everyone has their souls and Torment has been Cleansed, you need to strip Dhuum's boons. (Legendary Demon Stance) is ideal since it removes three boons and can be spammed for only 20 energy. If you don’t have a  Revenant or want to remove them a little faster, you can use a
  Necromancer's or
  Mesmer's . There are other Boon Strips available, but those three will give you the most bang for your buck.
At this point, you should check on the Reaper of the Chaos Planes ( Star). Clear it of deathlings and heal it up. As you’re doing all this, make sure you’re running away from Dhuum to fight the vacuum. If you get too close to the center, Dodge away or use a movement skill to gain more ground.
Be careful you don’t aggro or intersect a messenger at the 6:25 and 2:25 Greater Death Marks if they spawn. They’re easy to attract if you attack Dhuum or the spiders too soon and cleave or pierce the messenger.

Tells: Bell clang audio cue on acquisition, shackled foot icon on buff bar ( ), on-screen message: “Your soul has been shackled to another!”
Starting at 60%, Dhuum will shackle the two players closest to him, excluding the tank. He says, “Join one another in sacrifice,” when he does this. They will both have a blue-green aura and multiple threads of energy tethering them together. The first player shackled (the closest to Dhuum) will also have a gold-orange border around their screen. After four seconds, both players will start taking heavy pulsing damage.

The two players must run away from one another; once they’re far enough away, the shackle will break. When this happens the tether will disappear and a cloud of blue smoke will surround the players for a moment. The Reaper of the Chaos Planes will say, “Your souls are linked! Separate!” when you start taking damage, but you should already be running away by this time.
It’s helpful to use voice chat so you can call out which direction you’re heading if you’re shackled. Usually, players will call out a marker or say ‘throne’ or ‘stairs’ to make it easy. It’s also good to call when it’s broken so both players know they can return to the group.
Like Arcing Affliction, the shackles will break automatically when a Greater Death Mark begins. If you get them several seconds before, it’s best to break it manually since those two players could take a lot of damage before eating the 20% from the attack.
Dhuum will shackle players every 30 seconds. Even though they break when the soul split occurs, players can get them during the vacuum.
At 30% health, Dhuum gains a new attack named Slash. He will turn toward a random player and manifest ghostly claws and a gold cone-shaped AoE. The claws rake players within 1,200 range toward him like a Necromancer's . Anyone caught and pulled into the AoE will take moderate damage and have their boons stolen.

As long as everyone stacks behind Dhuum you can run forward into the back or side of his hitbox to avoid it. The biggest danger is the potential of someone standing on a green getting pulled out of it since the range is so great.
Except for the first time, Dhuum will almost always use Cull right before this, so be aware of the placement of the cracks as you move.
If you don’t get to 10% within 10 minutes, Dhuum becomes  Enraged and does 500% more damage. This includes all his attacks and the passive areawide damage aura. It’s not a hard enrage, but your squad likely won’t survive long.
At 10% health, the timer will be reset to 1:45 regardless of how much time you had prior. All existing minions and Dhuumfire puddles will disappear. The Reaper will (ostensibly) succeed in the ritual, teleporting Dhuum to the middle, prone in midair. Unfortunately, the Reapers will then die in a blast of green energy, whether because of Dhuum or Desmina is unclear.
He also separates players from their bodies and flings them up in the air on the spot. Everyone will have 30 seconds to collect five souls or else they will die. If you are in the middle of doing a green, you will bounce back to the ground in soul form and be relaunched into the air. Any orbs you collected toward completing the green mechanic do not count toward this 10% phase, so even if you had four, you’ll need to get five again.
Since you’ll be competing for the orbs, you should start to spread out when Dhuum reaches 11% health (assuming conditions will finish the job). DO NOT stand in the middle of the room though, as you’ll be launched up and killed immediately since you’ll be in the blue pillar. Remain calm even if your squadmates yoink some of the orbs you were going for. You have plenty of time.
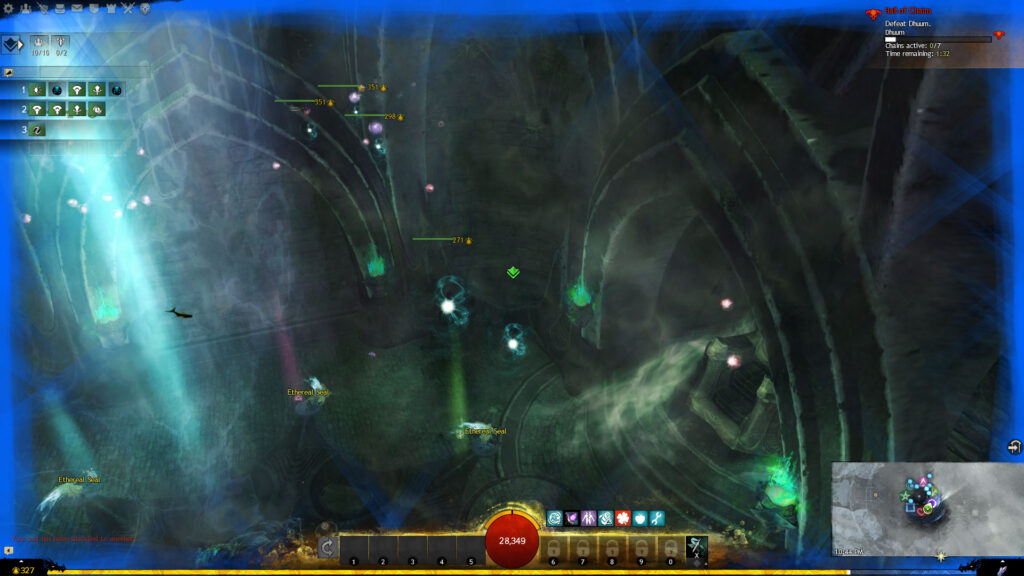
Everyone who succeeds will be teleported to a safety bubble in the middle of the room created by Desmina. Anywhere outside the bubble pulses moderate damage. When everyone (or at least seven players) has returned, you’ll need to stand in for the Reapers. One player should run out to each seal/marker and interact with it to channel its power.
As people start arriving, everyone should generate boons to make this job less deadly.  Regeneration, Protection,
  Swiftness, and Barrier will help players survive the journey. Quickness affects the rate at which you channel, so it’s good to have too.
There is a channel bar, but when you’ve finished channeling the yellow ‘Ethereal Seal’ text label over each one should disappear, indicating you’ve done your job. All seven players must complete the channel within 10 seconds of each other. If they aren’t, the seals will reset one by one, and you’ll need to try again. This wastes valuable time, so make sure no one jumps the gun.
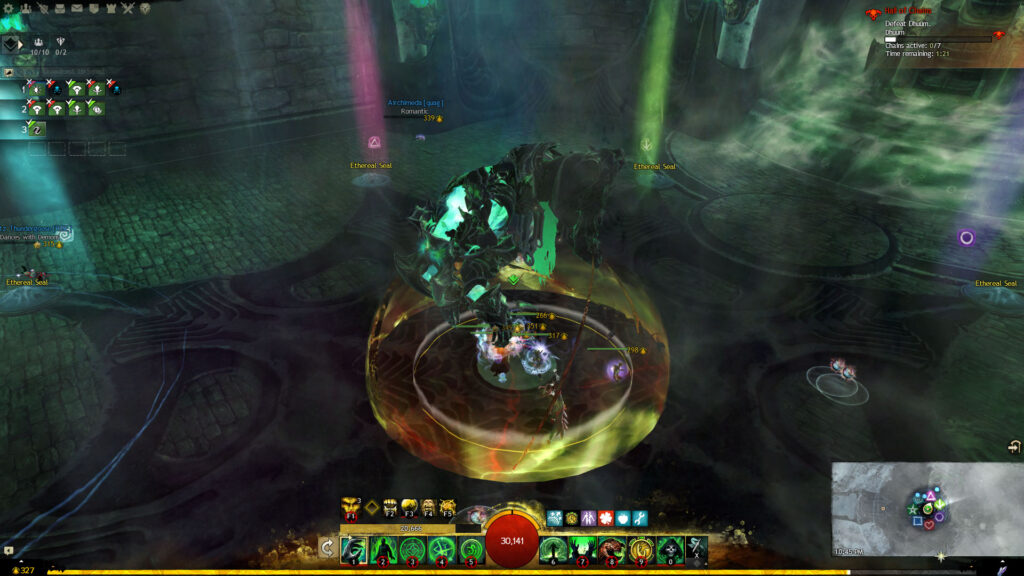

Return to the bubble as soon as you’re finished. With all seals channeled, Dhuum will drop to the floor in the bubble, becoming vulnerable. You’ll have 20 seconds to burn him and then he’ll rise up again and players will have to go back out and channel the seals. Generally, you can only repeat this process two or three times depending on how long it took everyone to get back from collecting orbs, so aim to burn him ~5%+ each time. Conditions still tick after he levitates, which is another reason condition builds are superior.
If you fail to finish Dhuum off within the new 1:45 time limit, your squad will wipe.
The main reason to move Dhuum is because of the Dhuumfire left after a Death Mark, but it’s also convenient to move toward markers where your orb collectors will be going up next. There are two strategies: a center strategy and a wall strategy. The former will net you higher DPS but is more dangerous while the latter is safer.
These are general tanking locations; your experience with different tanks and squads may vary. Feel free to adjust my suggestions to suit your needs, keeping in mind the more often you move him, the lower your DPS will be.
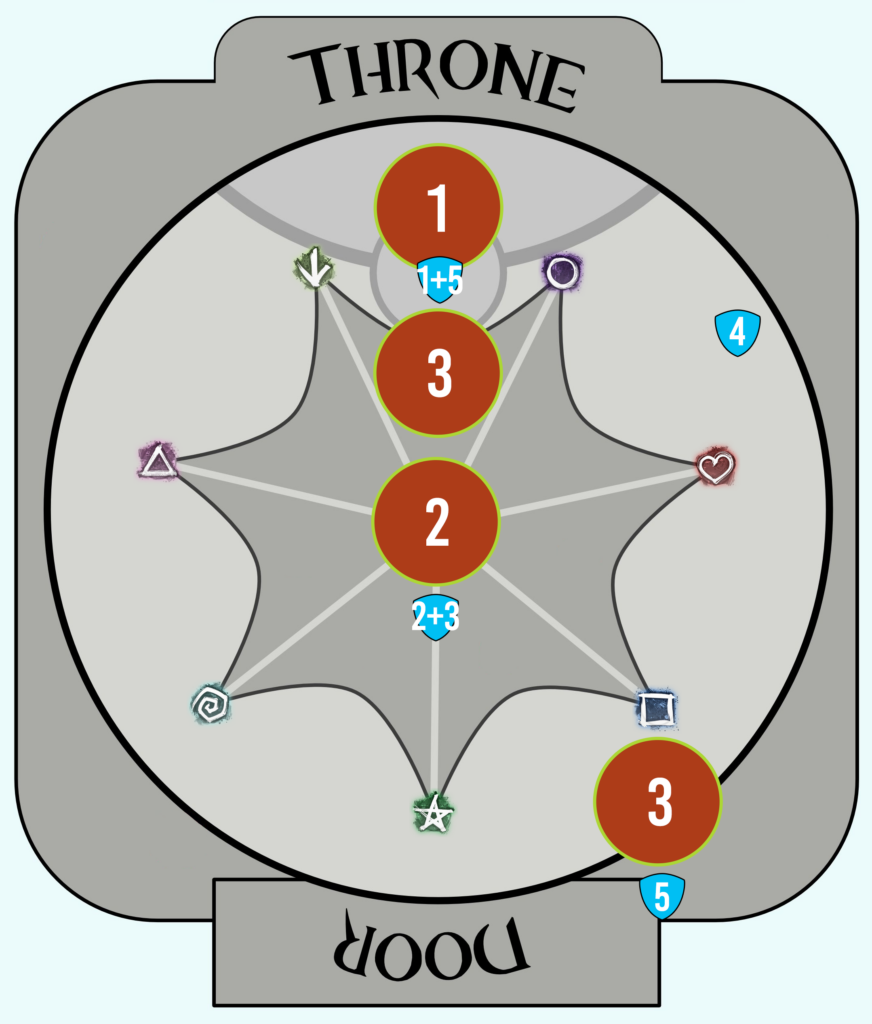
For the center strategy, your tank will start by facing Dhuum toward his throne. You can kill the last enforcer first or you can stealth the Reaper of the Spawning Pools ( Triangle), forcing the enforcer to move to the next closest Reaper, which is Arrow. This will put it on a collision course with your squad, allowing you to slow it down and cleave it with Dhuum. The most efficient way to stealth the Reaper is to have a  Druid bring .
The first Dhuumfire should be halfway up the dais and overlap the circle on the floor at the base of the throne. Make sure it doesn’t completely cover the Arrow or  Circle markers. Move Dhuum out to the middle. For the first Greater Death Mark, make sure you aren’t between Dhuum and his throne or the Dhuumfire. Continue tanking in the same spot as before, placing the second Dhuumfire in the middle of the room.
Move off to the side on the semicircle between Circle and Heart. The same advice applies for the second Greater Death Mark, but give Dhuum a wider berth since the puddle is larger than the AoE under him. Some groups will reach 10% before another mark. If not, as long as there is plenty of room between the throne and the second Dhuumfire in the center to maneuver, you can move back to the first tanking location.
Alternatively, you can go toward the wall; your next green will be Square, so head over there to give your collector a shorter walk. The Dhuumfire can go between the markers or even on top of Square since your collector will be Invulnerable long enough to move away when they return.
This strategy is more dangerous because you have less room to move or Dodge; you might get tossed into the throne or a puddle if you face Dhuum at an odd angle; you will have to run farther for your soul, and your orb collectors have a longer run (around a puddle) to get to their green.

If you want to skip most of this section, the short version is you always tank near a wall between two Reapers, usually following the greens as you go.
For the wall strategy, start between Triangle and Arrow. Cleave the enforcer when it spawns. If it gets to the Reaper, you must redirect your attention to it to finish it off. Place the first Dhuumfire between the markers. Make sure you don’t completely cover Triangle. Move between Triangle and Spiral for the Greater Death Mark.
You can go to the middle or to the opposite side of the room between Circle and Heart. Placing the second Dhuumfire in the middle is more convenient and requires you to move Dhuum less, but going between the markers might be better for your orb collectors.
Move between Heart and Square or Square and Star. After the vacuum, you can go back to the same location and put the puddle there. Next, move between Star and Spiral. Do the Greater Death Mark there and return to place the next Dhuumfire in that spot.
Now go back to where you started between Triangle and Arrow. If you’re still going strong after the vacuum, you can either place the next puddle there or move across the room again between Circle and Heart or Heart and Square.
If you still need more time, you can continue the pattern. But I would also start to worry. It means your DPS is quite low, a few people have died, or both. Remember you need seven players alive for the 10% phase anyway, so if you have fewer than that, you can wipe and restart unless you’re trying to show people mechanics.
Good luck ending the Ender!
About Phoenix Uprising • Recurring Series • Support the Site • Contact • Editorial Guidelines • Privacy Policy
© 2022 Phoenix Uprising. All rights reserved.
About Phoenix Uprising • Recurring Series • Support the Site
Contact • Editorial Guidelines • Privacy Policy
© 2023 Phoenix Uprising.
All rights reserved.