


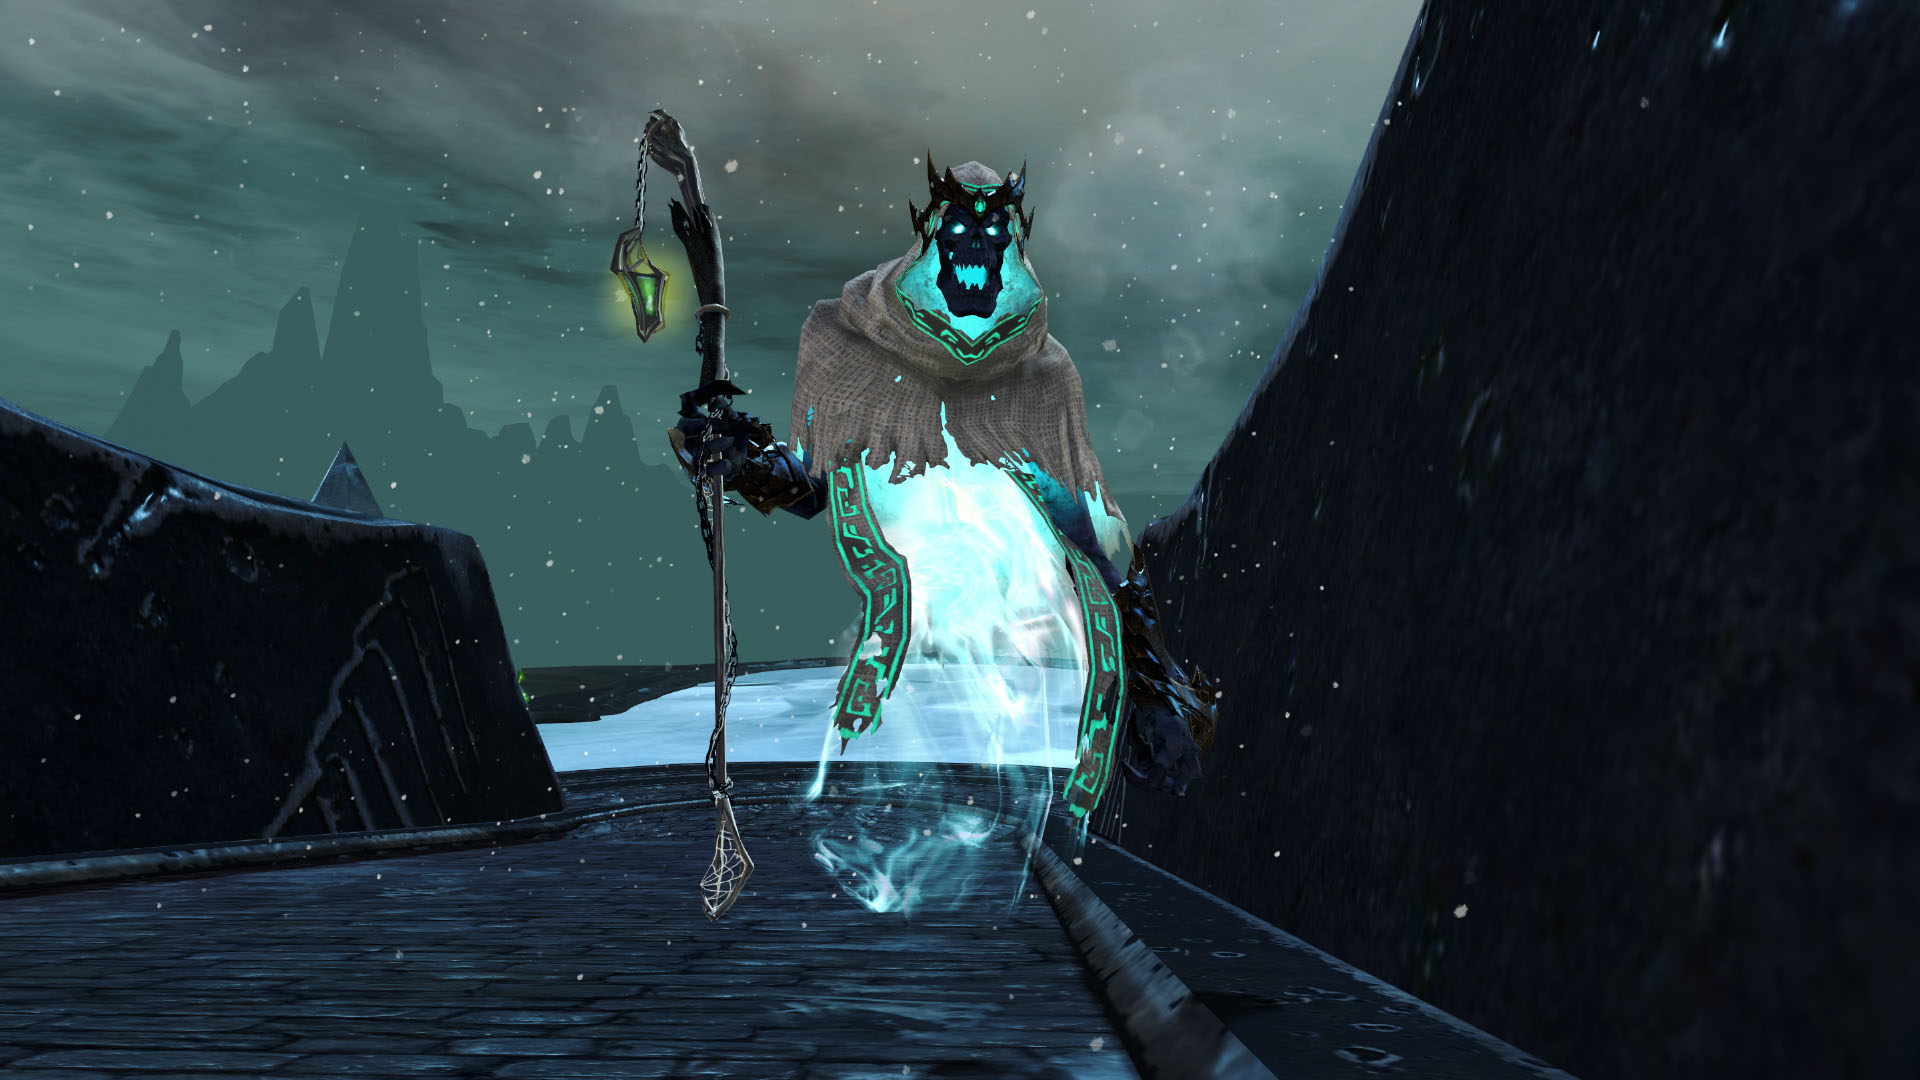
This is a supplemental guide describing the ins and outs of the two  Dhuum roles: messenger kiting and orb collecting (also known as running greens). I also have a complete Dhuum guide detailing the mechanics of the fight. I still recommend reading this one, even if you aren’t assigned to one of these roles since you can be saddled with either in an emergency.
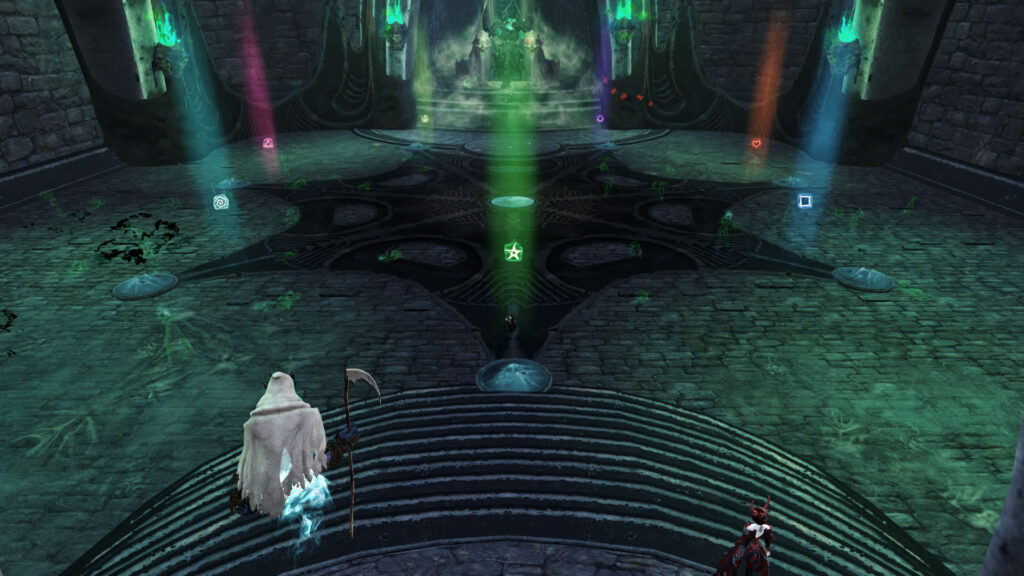
In this guide, I’ll be referring to specific squad markers at each of the  Reapers. Look at the image to see which marker is where. This configuration is generally accepted by the community, but I make no promises that your squad leader will follow it. When I say left and right or clockwise and counterclockwise, I am referring to those directions when you are facing Dhuum's throne.
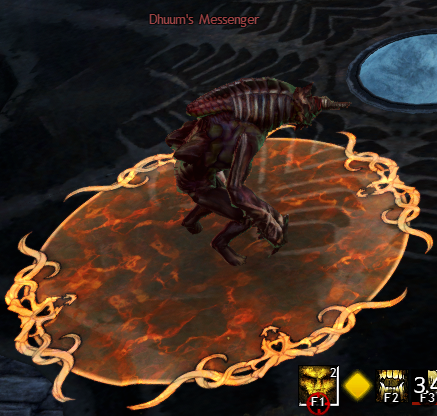
Messengers look like large flesh golems tinged in green. They have an orange PBAoE that pulses massive damage to anyone standing in it. They aggro on the first player who attacks them and die 15 seconds later.
The messenger kiter should be a healer or hybrid build since, at the very least, they’ll have to support themselves through Deathly Aura (the passive pulsing room-wide damage) and the unavoidable  Arcing Affliction (bomb) damage.
 Druids,
 Scourges, and
 Tempests are all good options. Scourges are particularly good in challenge mode because the Reapers no longer have an increased incoming healing modifier (more on that later).
Dhuum, they spawn roughly every minute at X:25 ± 5 seconds. Triangle and
 Spiral never skipping a spawn point. Tempests can use shouts or place a (Staff 2) while Scourges can place marks or shades on spawn points in advance. Since Druids lack good AoE options for this, their best bet is to use (Staff 1) since it pierces enemies. The
 Necromancer's (Staff 1) acts similarly.
 Desmina will start throwing out white orbs that, when run over, will disappear and grant the player a speed boost. This is helpful if you don’t have a ready source of
 Swiftness in your build.
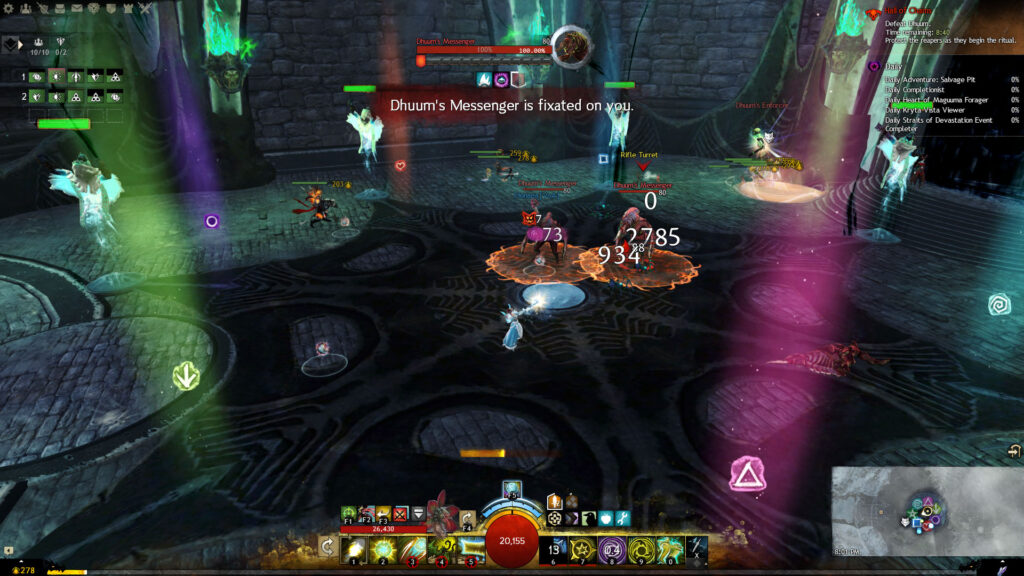
The biggest danger of this role is not the messengers themselves, but rather your allies. Your allies will be setting off their Arcing Affliction bombs according to where the squad and orb collectors are at any given time — not where you are. You can try to kite close to the squad, but you don’t always have that luxury. Here are some tips to help you survive:
 Toughness to your build. You will always take damage from the explosion, but if you’re standing close to the afflicted player, Toughness will reduce the extra damage you take. Toughness also reduces the damage you take from Deathly Aura.
 Vitality is also helpful because you’ll have a larger health pool to work with. Tempests can bring and Scourges should bring and/or . Only sacrifice and teleport to your wurm if you’re in dire straits and you can see your wurm is in a safe space. Druids can use (Staff 3) while Tempests can use (Staff 4).
But what if you get the bomb? On the positive side, since you’re running in circles, you probably have a pretty good awareness of where everyone else is. On the negative, you have murderous messengers chasing you, so you can’t loiter in one spot for too long. Try to go toward a wall, but don’t put a Reaper between you and your messenger. It helps to have your movement skill ready to get back to where you need to be, but if you don’t, start doing a U-turn as your bomb goes off.
When the fight starts, you’ll have to grab two messengers. If your squad is starting on the right: grab the right one, then the left one, then run toward  Arrow but stand off to the side — this way you can draw the enforcer on the left toward the Reaper of the Ice Wastes without mauling it. Next, run or teleport to the next messenger spawn point when the existing messengers get near or the medium red orb is nearing the point, whichever comes first.
In this case, the first spawned messenger can be tricky to grab depending on the configuration of the left enforcer and messenger. If the left enforcer was closer to the throne, and assuming you followed the pathing above, it will be near Arrow by the time your squad gets there, letting them kill it without worrying about accidentally aggroing the messenger.
If, however, it spawned on the outside, close to the corner, it might be right on top of the first messenger spawn point. If this happens, do your best to grab it quickly when it spawns. If you aren’t successful in getting the first hit, it’s not a big deal. This messenger is the one most likely to be pulled by another player and it will probably happen frequently as you practice.
If, on the other hand, your squad is starting on the left, grab them and wait for the first spawned messenger. There is no need to draw the right enforcer anywhere since your group will have to zig-zag across the room with this method anyway. This method is better if squadmates have a tendency to grab the first spawned messenger and go down to it, but either way works fine.
If you aren’t running greens, all you have to do is keep grabbing messengers as they spawn. If someone collects a medium orb during the pre-phase, you may get a very brief respite.
If you’re running the second green ( Circle at 9:00 and
 Star at 7:30), things will be different. Consider asking someone else to take Circle at 9:00. If you don’t, you’ll need a backup kiter to take over for you while you’re gone. The trouble with this is when you come back, there will be two kiters temporarily. You can cross paths and run one another over with your messengers. It will be easier if a different support or even a DPS (you can spare one during the pre-phase) takes over this green. If you have to run Circle, be careful to avoid the other kiter when you return.
Dhuum will step off his throne at 8:00 and the last pre-phase messenger will despawn in conjunction with Star at 7:30. If your squad is tanking near the wall, I recommend grabbing the last few messengers and dragging them toward the throne. Be careful of Dhuum's attacks when standing there.
At around 7:35–7:33, use your teleport skill as close to Star as possible and run the remaining distance. You should now be able to wait for your green with the remaining messenger slowly walking toward you. If your squad is tanking by the throne, you can also skirt a wide arc around the Reaper while waiting and enter the green circle as the hand is about to snatch. The messenger will despawn shortly before or after you go up.
When you return from Star at 7:30, there might be deathlings attacking the Reaper of the Chaos Planes. Ideally, the person who ran the green before you,  Square at 8:00, will have taken care of a few. Kill the remaining spiders. Be aware that the first
 Death Mark (dip) occurs at 7:05 and Dhuum may choose you.
Instead of describing every messenger that may spawn, I’m going to list them by the circumstances you might have to kite them in. During the fight, any player collecting orbs on the minute may encounter a medium orb in midair; collecting this will deny the next messenger from spawning 25 seconds later.
Times: 6:25 and 2:25
These messengers spawn immediately before the  Greater Death Mark (vacuum/suck) or as it happens. These are the most dangerous messengers for you, your group, and the Reapers. In normal mode, you should always wait until after you retrieve your soul to aggro it. Your squad will generally be making a quick trip to Star to clear the deathlings while your tank will make a beeline to the next tanking spot. You should use your teleport ability to get away from the messenger since Dhuum will be pulling you inward and the messenger will be approaching.
If your squad is tanking in the middle, teleport off to the side between two Reapers. If your squad is tanking near the walls, the best place to teleport is generally toward the throne. This is convenient because if you’re running the second green, you will have to go up immediately after the first vacuum ends on Arrow at 6:00.
Time: 5:25
This messenger spawns ~15 seconds before the second Greater Death Mark at 5:05, meaning it expires right before Dhuum teleports to the middle. You have two options for dealing with this messenger. You can kite it around the center and then run or teleport back to your group shortly before the vacuum. It should expire before it reaches the squad, allowing you to stay with your group as much as possible for healing and  Torment cleanse during the vacuum.
Alternatively, if you’re new to kiting or worried that your squad won’t be standing where they’re supposed to, feel free to drag this messenger to the opposite side of the room. Just make sure you have a personal  Condition Cleanse and you’re facing the center when the vacuum starts.
Times: 4:25 and 1:25
These messengers spawn as you’re going up to collect orbs on Square at 4:30 and  Heart at 1:30. You may be able to aggro these if they spawn in time and on that side of the room. It will be close, but try to do this if possible since the messenger will still follow your trajectory in the air. If you can’t get an attack off, inform your group so a backup Kiter can grab it instead.
Either way, when you return, you should be able to ignore the messenger, which will be despawning soon, and join the squad. If it hasn’t been aggroed, you can do that now. But to be clear: this would be bad since it will have been standing on top of a Reaper for several seconds. In this case, heal it from range or alert your squad.
Times: 3:25 and 0:25
These messengers have no dangerous circumstances around their spawning. For both, you will have recently finished a vacuum with your group and your next green won’t be until ~10 seconds after the messenger dies.
The biggest complication in challenge mode is that the Reapers no longer have their healing modifier, meaning you have to avoid them taking a lot of damage in the first place.
The issue is the Reaper of the Chaos Planes ( Star) can be overrun by deathlings. Also, the messengers during the Greater Death Mark will walk straight toward it. Depending on how low it is, you may need to aggro the messenger before you retrieve your soul. This is risky and you want to avoid doing it unless completely necessary.
Everyone needs to be diligent about clearing spiders, but for you in particular, it means the spiders at Star at 7:30 need to be cleared before you return to the squad. Deathlings take extra  Condition Damage and this is why Scourges are particularly good kiters for CM. They can use some Viper’s gear or choose a hybrid build with Shaman’s, Marshal’s, or Plaguedoctor’s stats. It will also be easier for them to destroy the spiders with their shades while kiting or stacked with the group.
The other addition in CM is the Ender’s Echo or Dhuumba, if you will. It chooses a player and charges at them in a straight line. If it catches you, it drags you along and deals rapid damage. As you’re the kiter and you’re running around during the majority of this fight anyway, the Dhuumba choosing you isn’t a huge problem. Be careful that you don’t intersect it or double back onto it while someone else is running away from it.
Even if you’re not the kiter, try not to zero in on your rotation too much and forget to look up at your on-screen messages. You will get one if you aggro a messenger. If this happens, stay calm. Anyone can kite a single messenger.
If you aggro a messenger, run away from it. Do not try backing up or sidestepping as they will catch up to you. If you can, give yourself Swiftness or  Superspeed. Desmina will be throwing out white orbs that linger on the ground; these grant you Superspeed. If the messengers get close, use a movement skill if you have one available.
Never run toward your squad or a Reaper. As much as you might be tempted to, imagining you can hand off your messenger to the designated kiter (you can’t), please do not run toward them either. In the pre-phase, they’ll have other messengers to kite and you might get them killed with your own. In the fight, they might be healing the group, trying to heal you, or running to or back from a green.
If you have to run a green, look at the timer on the messenger’s debuff: it might despawn before your soul has to be snatched. If in doubt, call for a backup.
Collecting orbs/running greens is the most important role on Dhuum. I’m not telling you this to make you nervous, but so you know that no matter what you’re doing when your green comes up, you must be there. It doesn’t matter if you have a bomb, are kiting a messenger, or are in the middle of the most perfect DPS rotation of your life, you have to be on the Reaper being sacrificed.
Every 30 seconds, Dhuum will reach for one of the Reapers and kill it unless a player sacrifices themselves by standing in the green circle under the Reaper. If no one is standing in the circle when Dhuum's hand snatches the Reaper, the ritual will fail and your squad will wipe. Dhuum targets the Reapers in the order that they spawn, starting with Arrow at 9:30 and going clockwise.
If you are standing in the green circle, your soul will be separated from your body and launched into the air. You will lose access to all your skills, become immune to damage, and have 15 seconds (tracked by the  Mortal Coil effect) to collect five red orbs (tracked by the
 Energy Threshold effect) to reunite with your body. If you fail to collect five orbs within the time limit, you will die. When you return, you will be
 Invulnerable for a few seconds, meaning any wayward messengers or inopportunely exploding bombs won’t damage you.
Unlike orb collecting on the Eater of Souls, there is no vertical axis and you receive no skills enabling you to move up or down.
As soon as your soul is snatched, you receive an 80-second debuff called  Fractured Spirit. If you attempt to do another green while this debuff is active, you will die on the spot. Therefore, you need at least three players dedicated to collecting orbs.
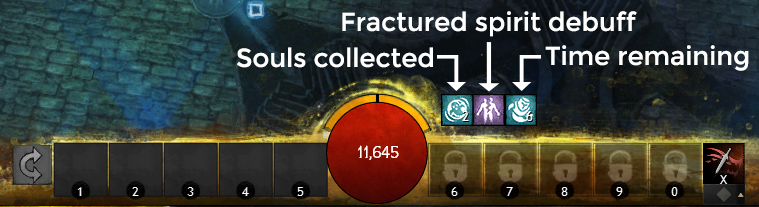
There are three sizes of orbs and collecting each will prevent a type of add from spawning during the fight:
Reapers away from the one you went up at, e.g. if you went up at Arrow, you will find the large orb at Heart. Large orbs can appear the same size as the medium ones; do not get them confused. The large orb spawn is fixed and there is only ever one. Reapers away from the one you went up at (two more markers past the large orb). Collecting these will make your messenger kiter’s job easier, but if you can’t find any medium orbs or you’re running out of time, don’t worry about it. It’s more important for you to collect all five orbs and survive.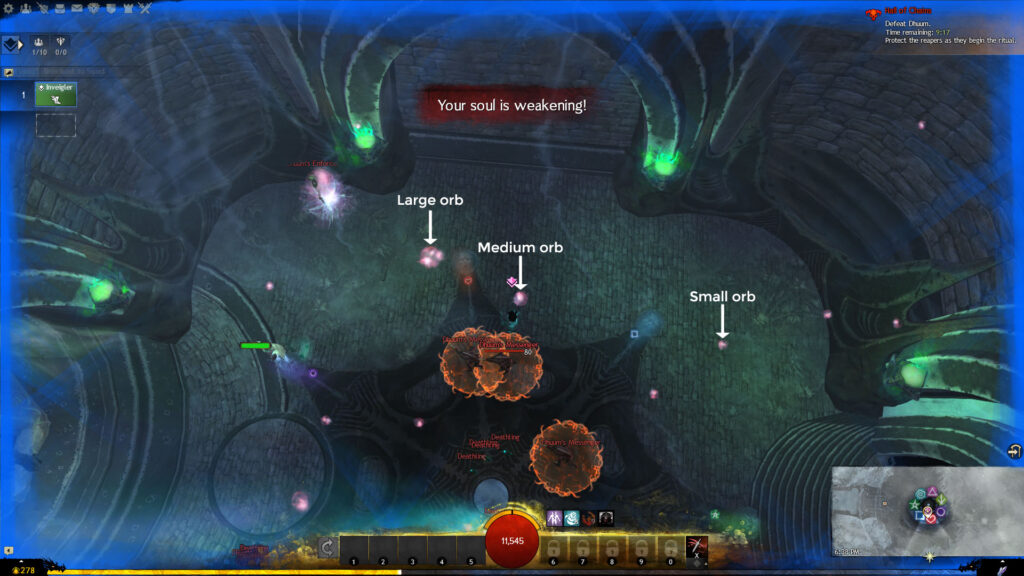
You must collect the large orb every time. If you do not, an enforcer will spawn and this is a huge danger to the Reapers and a massive DPS loss because your players will have to leave Dhuum to kill it. The first extra enforcer spawns by the brazier between Circle and Heart. Any subsequent extra enforcers spawn clockwise in the same locations as in the pre-phase (near the stairs behind Square, near the stairs behind Spiral, then between Triangle and Arrow).
If you fail to collect the large orb for some reason, you need to tell your squad so they’re prepared. You can recover if an extra enforcer spawns, but everyone will need to be on their game and you’ll need good DPS to make up for it.
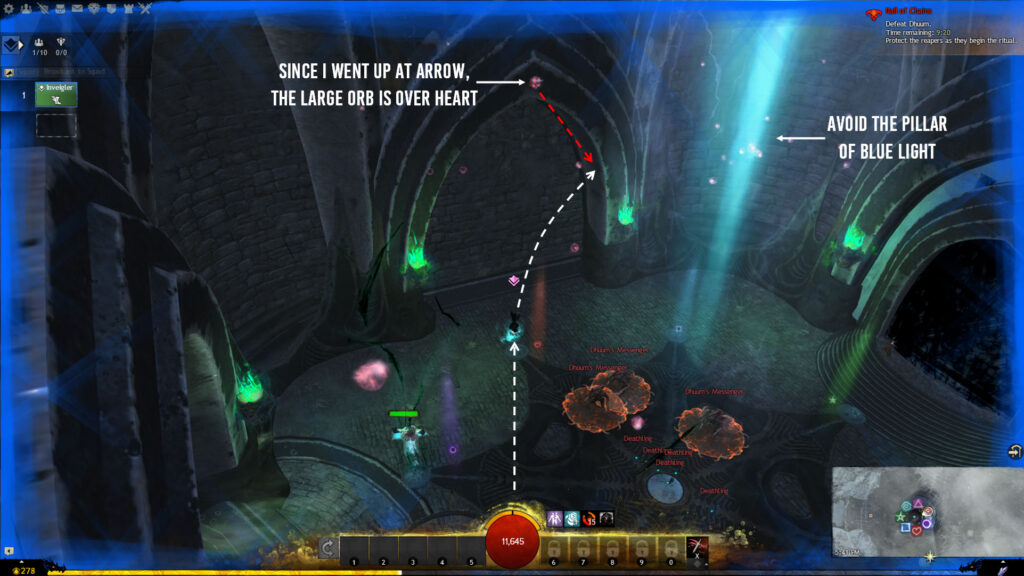
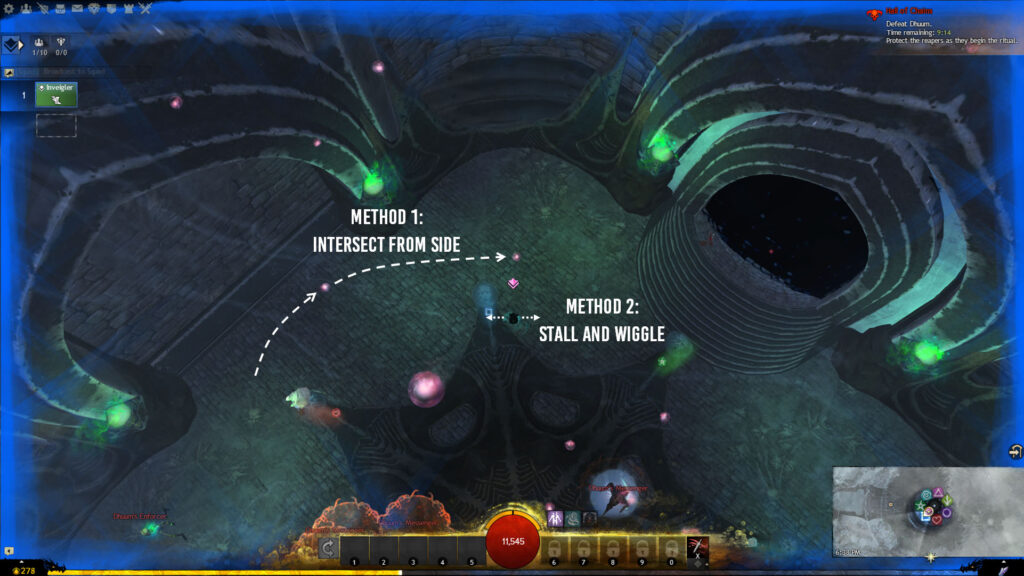
Orbs start on the edges of the room and drift in toward the center pillar of blue light. Your goal is to intercept them before they get there. Entering the pillar of light kills you, so you can’t cross the room directly.
The orb hitboxes are notoriously weird, more so on the large orbs. It takes practice to figure out the best way to actually intersect them. Here are some tips to get you started, but keep practicing and trying different things until you find the style best suited to you.
Dhuum's hand actually snatches your soul five seconds after the green circle appears and there is no lock-in period, so you have some leeway. Scythe Swing can coincide with a green. They only do moderate damage but they can down you if you’re already low on health, so try to stay topped up when heading for your green. Dhuum creates can overlap a green circle. Unfortunately, the green circle conceals these cracks and when they explode, they inflict a lot of damage and cause
 Fear. Be very careful if this attack coincides with your green. You can go down or be Feared right out of the circle if you don’t watch your positioning. The cracks increase in density at 50% and 25%, so be careful where you’re standing later in the fight as there is less room between them. Arrow and Circle), so do not linger there, particularly if you had to go to one of those markers for a large orb.
If you have a bomb and you’re meant to go up soon, there’s good news and bad news. The good news is that you can take the bomb up with you and let it explode in midair. The bad news is you need to be careful about watching the bomb timer to make a smart decision.
If you recently got the bomb and you’re sure you’ll be lifted up before it goes off, there’s no problem. However, know that even if you let it explode in midair, players directly beneath you will still take some damage. If you notice this will happen, try to let the group know so they’re prepared.
If you have the bomb and you’re afraid it will expire before you go up, you have a couple of options. If your green is across the room from the squad, let it expire while you wait. But if your green is near the group, you’ll need to leave with the bomb and call for someone to back up your green. This isn’t ideal, but it is the safest option for you and your squad.
If you aggro a messenger before you go up, that’s okay. Remember, you only have to be in the green circle when the hand closes, so take advantage of that in this situation. Run around outside of the circle and hop in at the last moment. The messenger will still follow your pathing after you’re lifted up. Don’t collect orbs over your squadmates or any Reapers. You may be safe, but they can still take damage.
About Phoenix Uprising • Recurring Series • Support the Site • Contact • Editorial Guidelines • Privacy Policy
© 2022 Phoenix Uprising. All rights reserved.

About Phoenix Uprising • Recurring Series • Support the Site
Contact • Editorial Guidelines • Privacy Policy
© 2023 Phoenix Uprising.
All rights reserved.