


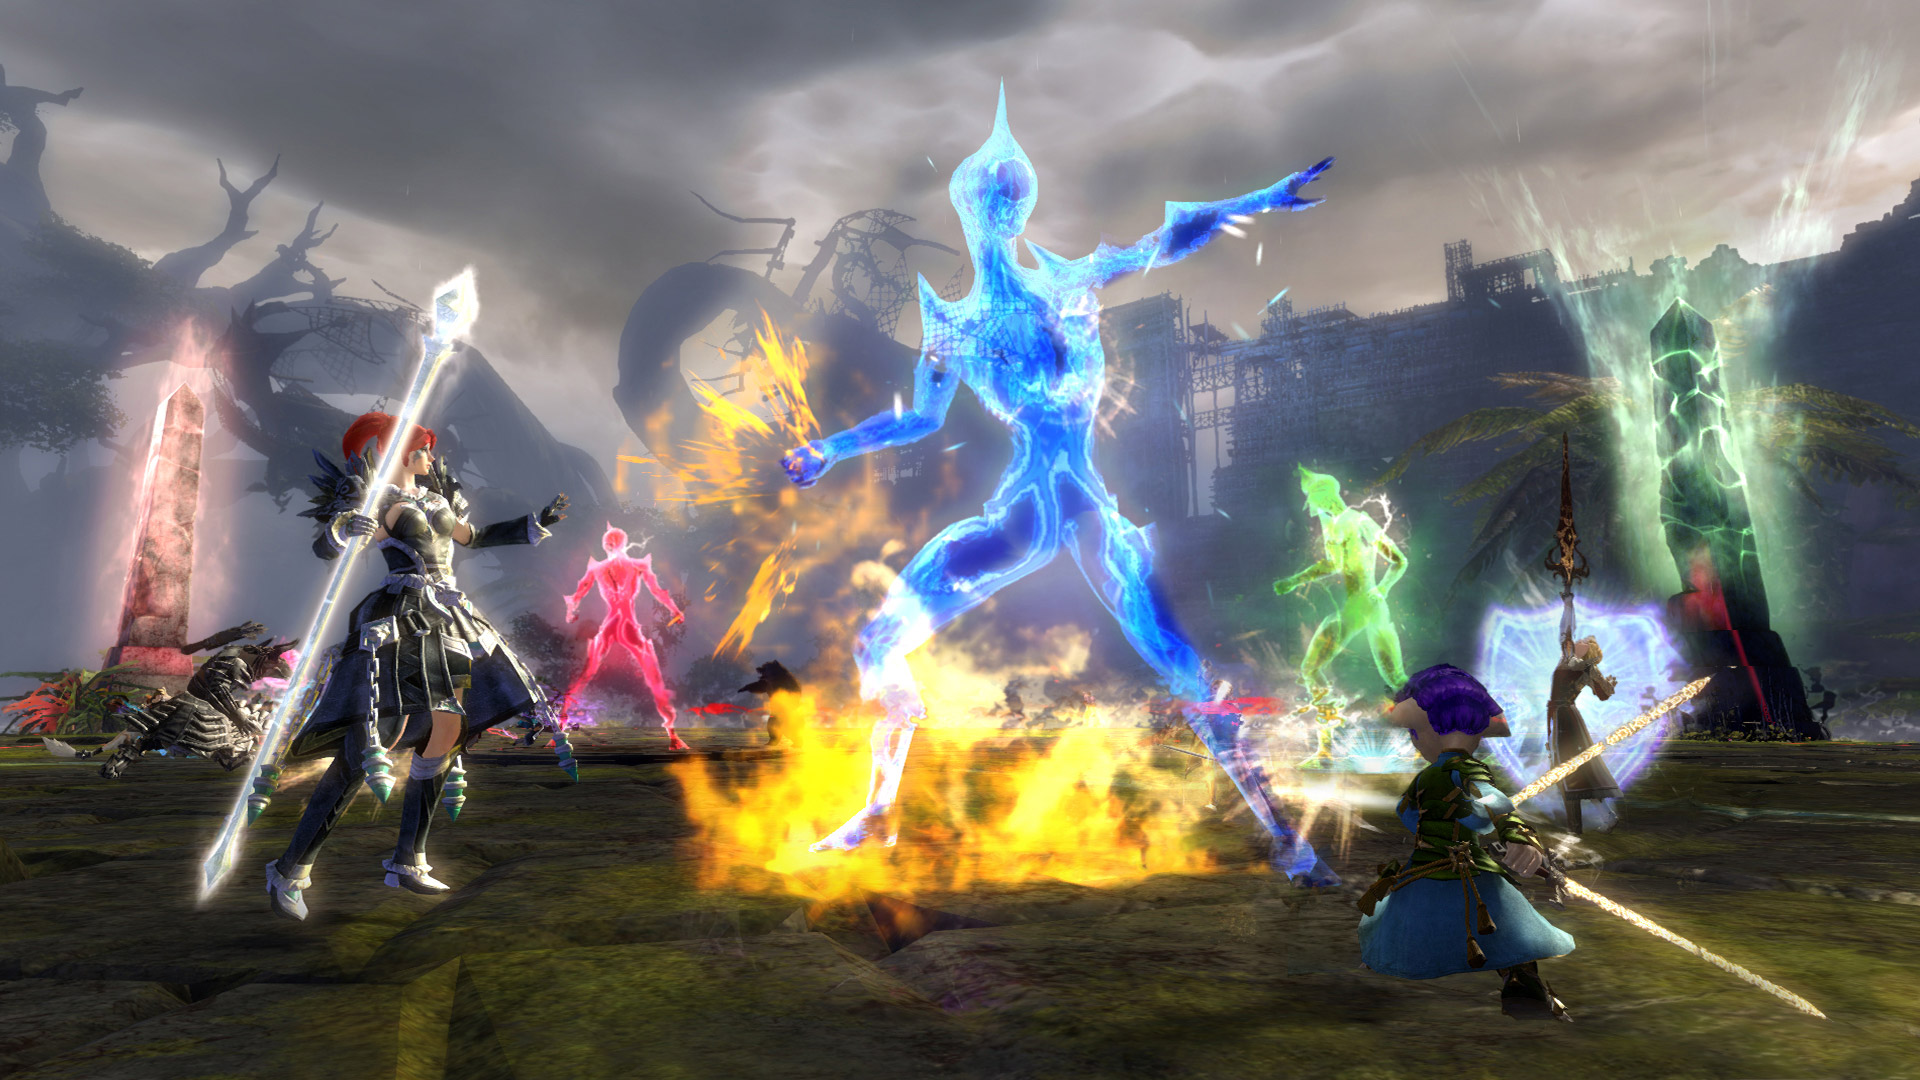
Welcome to my guide for the Guild Wars 2 raid boss,  Vale Guardian (VG), the first encounter in Spirit Vale (Wing 1). This is a detailed guide on the mechanics of the fight including various strategies that cater to everyone from beginners to experienced raiders. If you’re brand new to raiding, I recommend reading my Path to Endgame guides first.


Chronologically, Vale Guardian is the first raid boss, and while it’s not the easiest, it’s a good boss to acquaint players with the fundamentals of raiding. There is a pre-event that introduces the primary mechanics of the fight.
 Blazing Speed Mushrooms mastery. This is not required for the encounter but there are three Speed Boost Mushrooms in the arena. They can boost your DPS and help you perform some mechanics.
 Boon Strip: Vale Guardian gets
 Blue Pylon Power, which makes it immune to damage. This effect can be removed, converted, or stolen (although players can’t receive the effect).
 Condition Damage: The
 Red Guardian has extremely high
 Toughness, so it takes 99.8% reduced power damage. You should have at least two condition DPS players in your squad. However, Vale Guardian itself has reduced Toughness and takes 36% more power damage, so power DPS is recommended for the remainder of your DPS and hybrid boon support players. Vale Guardian's defiance bar about once every 30 seconds, as well as break the Vale Divisions’ bars during the two split phases.
 Immobilize and/or
 Pushes: You’ll want a way to keep the seekers away from your squad. Long-lasting Immobilize or the occasional Push will do the trick. The shorter your main phases, the less CC you’ll need to keep them at bay.
The pre-event requires you to kill the Red Guardian,  Green Guardian, and
 Blue Guardian, collectively known as Vale Divisions. They appear in a random order on the path to the arena.
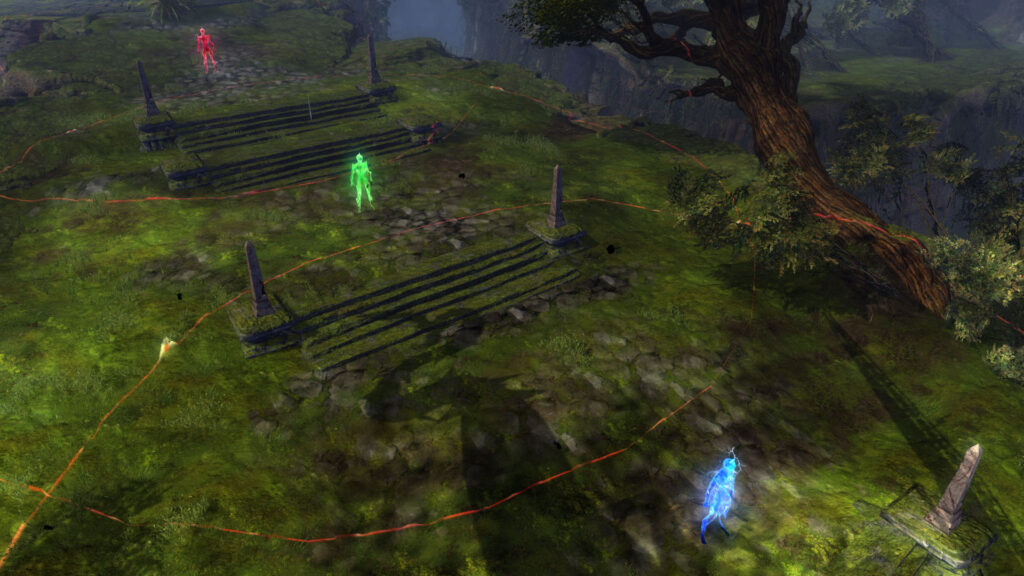
Each guardian has  Magic Aura, a pulsing damage aura indicated by a large red ring that will be present throughout the entire Vale Guardian fight. The damage of each guardian’s aura stacks. Each Division also has one of Vale Guardian's signature abilities that it will use during the fight. Those abilities are covered in the General Mechanics section below.
Red Guardian only takes damage from conditions and summons seekers. Green Guardian uses Unstable Magic Spike. Blue Guardian starts with Blue Pylon Power, an effect that makes it immune to damage. It will regain this effect as well as  Protection every 10 seconds. You need to strip both to effectively damage the Blue Guardian. The Blue Guardian also uses
 Distributed Magic.
You can fight two or even all three guardians at the same time, but make sure your entire squad is present and that you’re able to out-heal the damage from three Magic Auras and deal with all of the mechanics. Also, ensure your condition DPS focuses on the Red Guardian.
Once a guardian reaches 0% health, its defiance bar (1,000) becomes active — when it’s broken, the guardian dies.
Vale Guardian stands in the middle of an arena split into three colored zones corresponding to the three glowing pylons within them: red, green, and blue.

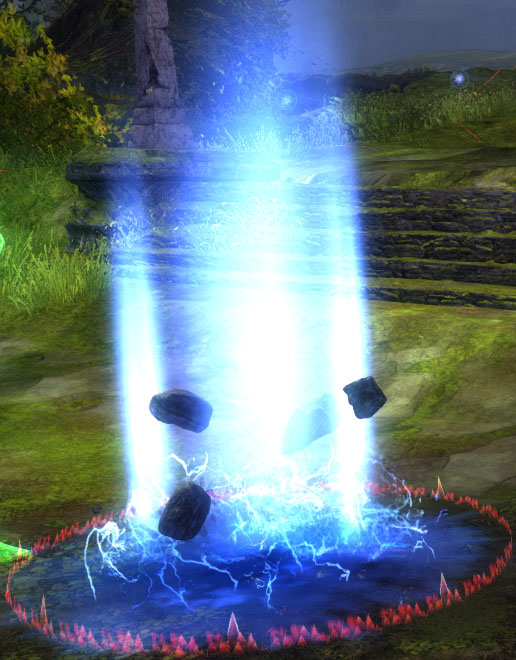
Also called: blues, teleports
Every 10 seconds, Vale Guardian will create blue lightning circles under the five closest players or summons. These circles detonate after two seconds, dealing damage and teleporting anyone in them to a random location in the arena. If you are standing in one, a gold-orange border will appear around your screen. Being teleported will cause your DPS to drop and can get you killed later in the fight. As soon as you see them spawn, move away,  Dodge, or
 Block.
Every 20 seconds, three seeker orbs will spawn, one near each of the pylons. When one set spawns, the old set will disappear. They slowly move toward players and deal moderate damage to anyone they come in contact with. Try to avoid standing in these orbs as much as possible because the damage can rack up quickly.
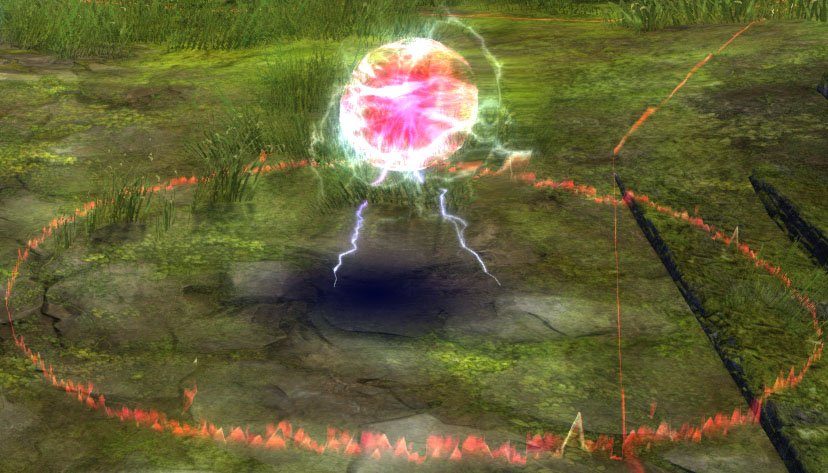
Seekers are susceptible to crowd control and life steal:
Those are some of the most efficient methods of dealing with them, but any Knockback or Immobilize skills work well. Players should avoid using  Pulls that bring the seekers on top of the group.

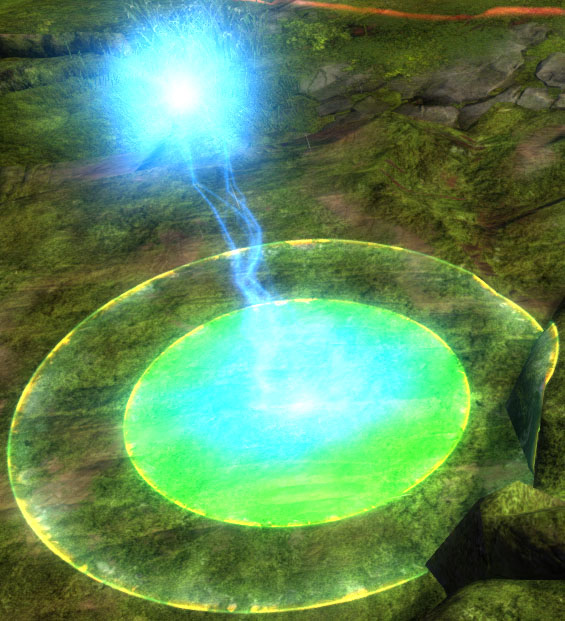
Also called: green, sizzle
Every 15 seconds, a green circle will spawn at a random location in the same color zone where the boss is being tanked. For six seconds, the opaque green circle in the ring will shrink and then disappear. When that happens, it will deal 80% of a player’s total health in damage unless four players are standing inside the circle as it detonates.  Downed players, pets, and summons do not count.
The damage does not decrease proportionate to the number of players in the circle: it’s either 80% damage or nothing. There are two ways to deal with this mechanic:
Seekers can, and often do, follow players to the circle. Since you cannot leave the circle to avoid the orbs, make sure you have enough CC to prevent the orbs from reaching you.
Note that the circles have a “lock-in” point a split second before detonation when they will stop counting new players that enter the circle as actually being in them. This point coincides with the end of the sizzle sound effect that occurs during the countdown.
If your tank is teleported by a blue circle, the green circle might appear in a faraway section of the arena. If this happens, it’s best to stack tight and brace for heavy damage. If half your squad starts running away, they have the potential to not make it to the green circle in time and could go down to the pulsing damage or in a danger zone (see Phases 3 and 5 below). In that case, you might have a few Downed players scattered all over the arena.
At the start of the fight, Vale Guardian will aggro on your tank, the player with the highest Toughness. The tank can position Vale Guardian on the border of the arena or closer to the middle. Tanking on the border is more common when doing greens, while center tanking is more common when ignoring them, but you can tank in either location using either strategy.
Everyone else should stand behind the boss since its melee attacks cleave. When Vale Guardian reaches 66% health, it will gain  Invulnerability and retreat to the middle of the arena, beginning Phase 2.
Vale Guardian will split into its three Vale Divisions, with each one spawning at its respective pylon and retaining its individual mechanic from the pre-event. Only three players need to stand in the Blue Guardian's green circle during this phase. When a guardian dies, its mechanic stops.
You will receive a Pylon Attunement corresponding to the sector you are standing in when the split occurs, indicated by a colored symbol appearing over your player’s head. Each guardian has a large PBAoE, indicated by a red circle. If you are standing in the AoE of a guardian you aren’t attuned to, you will take pulsing damage.
Also during this phase, a bullet storm of slow-moving blue-white orbs will radiate out from the center of the arena. They do a small amount of damage, so getting hit many times in a row is bad, but overall they aren’t that dangerous.
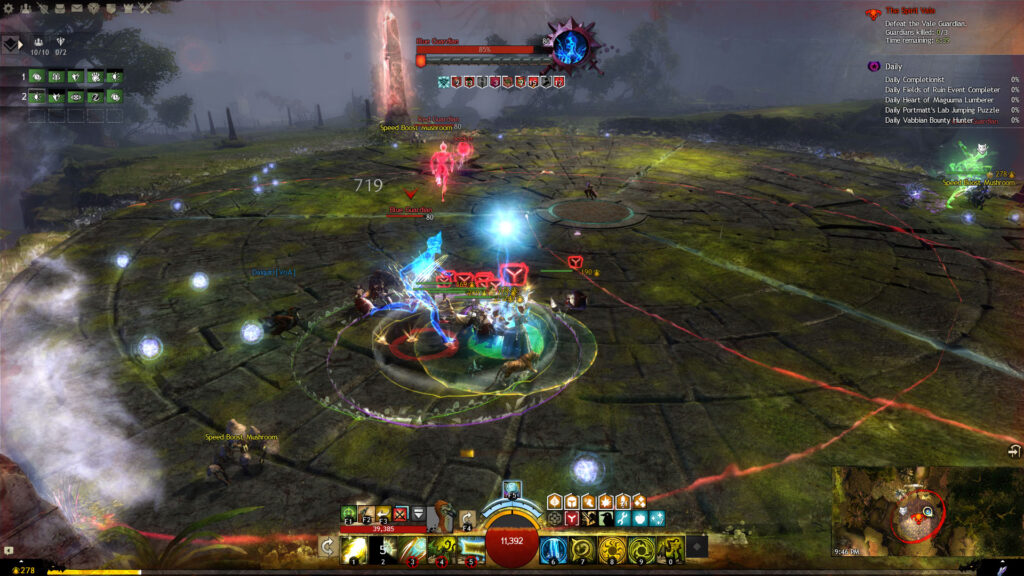
There are a few different ways to deal with the split:
Split into three groups
Have your condition DPS go to the red pylon, some of your power DPS, at least one with Boon Strip, go to the blue pylon, and your remaining power DPS go to the green pylon.
Split into two groups
Have your condition DPS go to the red pylon and the rest of your players go to the blue pylon. One player should aggro the Green Guardian and bring it over to the Blue Guardian where most of the squad is standing. Your condi DPS won’t take extra damage and need only avoid the small white orbs, but the rest of the squad will take damage since the other two guardians are standing together. This is the most common method.
Stick together
Everyone can attune to the same color (it doesn’t matter which) and stay in one sector. You will kill all three guardians together. You shouldn’t stand in the red sector since the seekers spawn there. If you’re standing farther away, they’ll take longer to get to the group. Everyone will take heavy damage using this strategy; defensive measures including healing, Protection, and  Barrier are vital.
When a guardian reaches 0% health, you must break its defiance bar (1,000) to kill it.
Vale Guardian will reform in the middle of the arena. This phase is similar to the first, with two additions.
First, one colored sector of the arena will light up at a time. This zone will deal periodic damage to anyone standing in it. Every 20 seconds, the next clockwise zone (green → blue → red) will light up and the previous one will go inactive again.
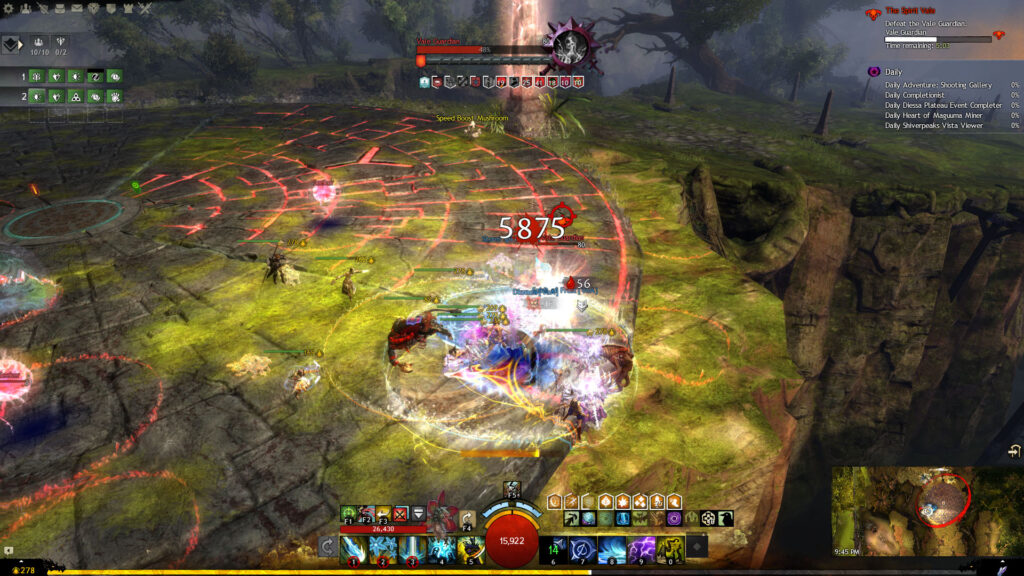
For this phase, choose two zones to switch between. Your tank should try to proactively move so the green circle doesn’t spawn in an active zone. Again, if a green circle spawns in an active zone, you should stay with the tank and brace yourselves. If you’re outhealing the greens, your positioning does not matter as much.
The second new mechanic during this phase is  Magic Storm. Vale Guardian will raise its arm and start raining lightning orbs all over the arena, indicated by AoE circles. The orbs have a travel time, so the AoEs closer to the boss will touch the ground sooner than those farther away.
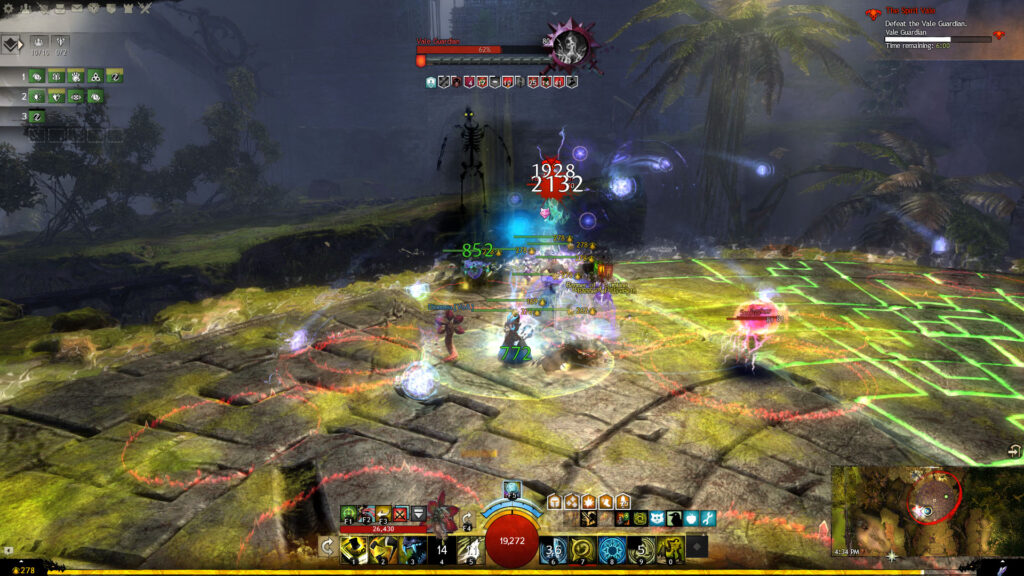
Its defiance bar becomes active when it starts casting Magic Storm; breaking it stops the boss from channeling this attack. You do not need to break the bar to progress, but the AoEs add up quickly and do a lot of damage, so it’s best to take care of it as soon as possible. The boss also does not move during this attack, so if you don’t break it in time, you might have a green circle in a bad sector.
When Vale Guardian reaches 33% health, it will go Invulnerable again and retreat into the middle of the arena, beginning Phase 4, the second split.
This split is the same as the first split in Phase 2. Deal with it using whichever strategy you used before.
Instead of just one active, lit-up sector at a time as in Phase 3, there are now two danger zones at any given time and only one safe zone. It still travels clockwise (green+blue → blue+red → red+green). In addition, four seekers spawn at a time instead of three — one in each sector and one in the center.
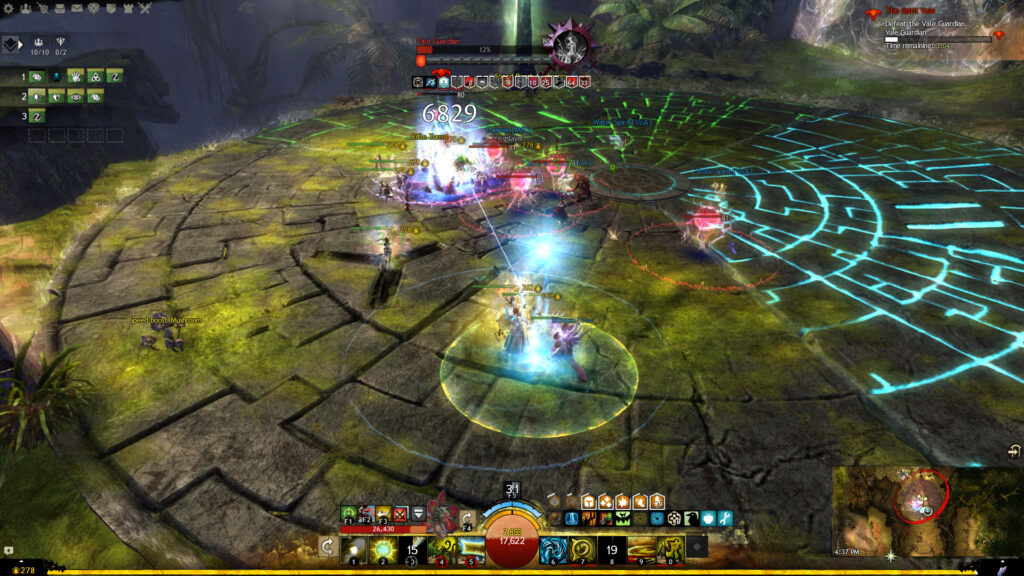
Instead of switching between two zones in a line, you’ll need to travel in a circle, following the pattern. The same tips apply: the tank should move proactively to control where the green circles spawn and prevent players from standing in an active zone. The blue teleport circles won’t be as much of a problem in this Phase since you’ll be more mobile.
If you don’t kill Vale Guardian within 8 minutes, it becomes  Enraged and does 200% more damage.
About Phoenix Uprising • Recurring Series • Support the Site • Contact • Editorial Guidelines • Privacy Policy
© 2022 Phoenix Uprising. All rights reserved.
About Phoenix Uprising • Recurring Series • Support the Site
Contact • Editorial Guidelines • Privacy Policy
© 2023 Phoenix Uprising.
All rights reserved.