



Welcome to my guide for the Guild Wars 2 raid boss, 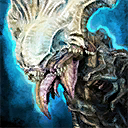 Gorseval the Multifarious (often shortened to Gors), the third encounter in Spirit Vale (Wing 1). This is a detailed guide on the mechanics of the fight including various strategies that cater to everyone from beginners to experienced raiders. If you’re brand new to raiding, I recommend reading my Path to Endgame guides first.


Gorseval is a straightforward tank-and-spank boss with a DPS race element. He remains stationary throughout much of the fight — depending on which tactic your squad uses, he may not move the entire time — so you don’t have to worry about losing DPS to him moving out of your AoEs.
 Updraft Use mastery. Every player needs this to get to Gorseval’s platform. Gorseval's defiance bar up to four times and he has a hefty defiance bar strength of 4,500.
 Immobilize: Most squads will want to stop the charged souls so they have more time to kill all four of them.
 Pulls: It can be helpful to group the four spirits that spawn after
  Ghastly Rampage so your squad can cleave them down.
During the main phases (1/3/5), Gorseval will use two different mechanics. If your DPS is quite high, you may only see the first, Ghastly Rampage, but most groups will see the second,  World Eater, as well. How your squad handles these mechanics can dictate your squad composition and what players are doing during most of the fight.
Gorseval will raise both arms, teleport to the center of the platform, and start pounding the ground with his fists. This creates black and blue goo on the ground in preset patterns. The entire platform will always be covered for the final pattern.

When Gorseval starts the attack he gains the  Vivid Echo effect which reflects damage. Anyone doing burst damage will lose health extremely quickly during this attack, so be careful with your DPS. His defiance bar also unlocks, allowing you to use crowd control (CC) to break it and end the attack. You may want to strategically avoid breaking the bar depending on how you want to deal with the next mechanic.
After a few seconds, the goo will explode, dealing damage and inflicting  Vulnerability (25 stacks) on everyone standing in it. A different pattern will then form and this repeats until his defiance bar is broken or the channel ends.
When this attack is complete, four spirits will spawn. They have a  Knockback and give
  Regeneration to Gorseval. A
  Mesmer can use (Focus 4) to pull them in so they are cleaved.

This ability defines the entire encounter. Gorseval will stop wherever he is standing, raise his arms, and begin channeling a deadly attack. When the dark orange circle fills the platform, the entire squad will die if they’re hit by it. There are two ways to avoid it: force Gorseval into the next phase before he completes the attack or glide into one of the four  Updrafts hovering above the chasm and then back onto the platform. There are three strategies to accomplish this.

Your squad will break the defiance bar during Ghastly Rampage normally. They will then go to the edge of the platform near one of the Updrafts and destroy the Spirit Barrier blocking the way. While you destroy the barrier, you should continue doing as much damage as possible to Gorseval with AoEs. Make sure any of the four spirits that spawned are killed as well. Watch out for any spirits kicking you or Gorseval's  Spectral Impact (described below), both of which can knock you off the platform prematurely.
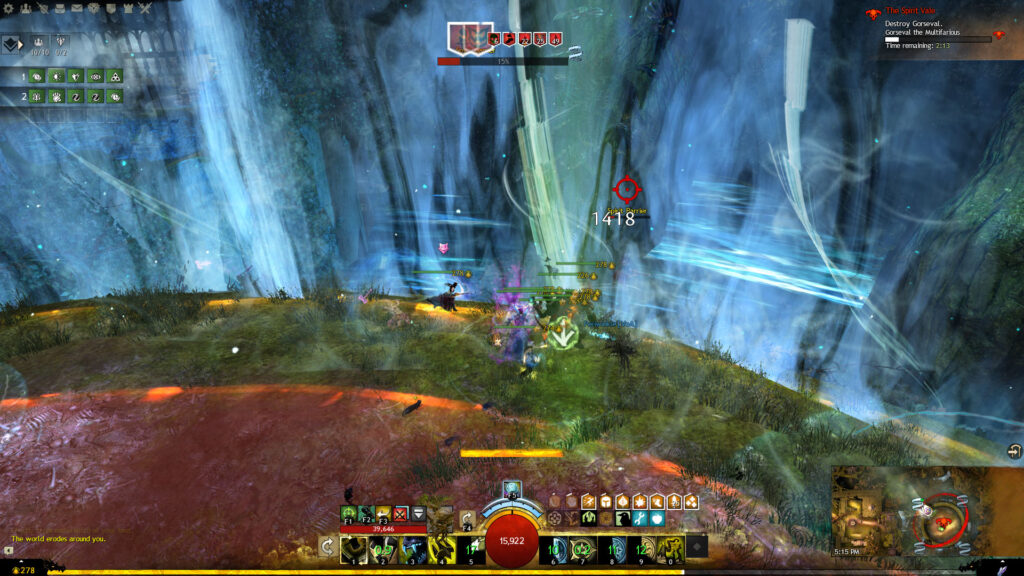
When the inner circle all but meets the outer ring, your squad should jump off the edge, glide into the Updraft, and immediately return to the platform. The Updrafts have a timer: they last 15 seconds from the moment the first player comes into close proximity, so don’t jump early or you may be the death of your teammates.
The Updrafts disappear permanently after one use, so if Gorseval is allowed to use World Eater more than four times, the squad will wipe.

This method forces Gorseval into the charged souls phase that occurs at 66% health by largely ignoring the defiance bar during Ghastly Rampage. This gives your team more time to DPS since he only uses World Eater after completing Ghastly Rampage.
The squad can stand still, back up, or move forward depending on which pattern is used. This prevents melee and power players from doing the full extent of their DPS during Ghastly Rampage, making condi and ranged DPS more beneficial.
You can also stay in the center the entire time, but this is taxing on your healers. If you do this, try to break the bar before the final pattern explodes to avoid Vulnerability.

This method forces Gorseval into the charged souls phase by breaking the defiance bar as fast as possible during Ghastly Rampage and then unloading damage onto him. This should only be attempted if you have 75,000 or higher squad-wide DPS. Players need to be aware of exactly when the defiance bar unlocks and breaks since jumping the gun and piling on damage too quickly can near-instantly  Down you due to Vivid Echo.
Note that Gorseval has the strongest break bar of any raid boss, requiring 4,500 defiance bar damage to break, so you really need to pile on the CC to perform this strategy correctly.
For the no-break and fast-break methods, skills like and can allow you or your squad to continue doing damage during Ghastly Rampage.
You can use a hybrid of the latter two strategies if needed. You may have less DPS in Phase 5 due to additional mechanics and potential  Defeated players. If this is the case, your commander might call for you to CC slowly during the final Ghastly Rampage, giving you enough time to end the fight before the last World Eater finishes.
If you leave any of the four spirits alive that spawned after Ghastly Rampage, Gorseval will kill them as well when he finishes channeling World Eater. Each spirit consumed gives him  Spirited Fusion, a buff that increases his outgoing damage by 10% per stack.
Gorseval only attacks when a player approaches him, so land on the edge of the platform when gliding in. He aggros on the player with the highest  Toughness. On the pull, your tank should run through Gorseval to turn him away from the group but remain in the middle where he is initially situated. He has two main attacks.
 Wicked Swipe: A standard melee attack that only affects players standing in front of Gorseval, so the tank should be the only one hit. Spectral Impact: Gorseval raises his fist and slams it to the ground. This will do medium damage, Knockback, and inflict
  Torment (3 stacks) on players hit by the impact. You can
  Dodge or
  Block the attack completely, or use
  Stability just to avoid the Knockback. Skills like or are useful so the group doesn’t have to interrupt their rotations.

Gorseval will alternate between using his auto-attack and Spectral Impact. During Phase 1, he will start Ghastly Rampage with 6:50 left on the timer, 10 seconds after the fight begins.
At 66%, Gorseval gains  Protective Shadow, a buff that renders him
  Invulnerable and puts a large bubble around him. This begins the first spirit phase.
Four charged souls will spawn, one in each intermediate direction (northwest, northeast, southwest, and southeast). The spirits will walk toward Gorseval, oblivious to the players. If a charged soul reaches the center of the boss’ hitbox, he will absorb it and instantly begin another World Eater, essentially wiping the raid unless you happen to have a Spirit Barrier down again.

The charged souls are immune to hard CC like Knockback, but not to soft CC like  Chill,
  Cripple, and Immobilize. They also have a small, swirling, blue and black PBAoE, which periodically gives players in melee range
  Weakness. You can range them, but the Weakness only lasts a few seconds, and will probably wear off or be cleansed before you start fighting Gorseval again. There are a few ways to deal with this phase:
Split up
One-on-one control
Mass control
 Ranger use to hit all three. A Ranger with high
  Condition Duration is best so Immobilize lasts longer.
Keep in mind that Gorseval doesn’t absorb the souls until they reach the center of his hitbox, so don’t give up hope if they’ve crossed into the bubble as this phase makes or breaks the fight.
This phase is the same as the first, with one addition. At the beginning of the phase, the message, “Darkness closes in. Seek light if the darkness envelops you,” will appear on your screen. This refers to the new mechanic: Spectral Darkness. Black orbs will begin spawning at random locations around the platform, emanating a blue PBAoE that slowly expands in size.

Standing in the AoE gives players 10 stacks of  Spectral Darkness, a debuff that reduces outgoing damage by 10% and increases incoming damage by 10% per stack. Affected players will also have a ghost icon (
 ) over their heads, visible to everyone in the squad. To get rid of the debuff, you have to collect two golden orbs, each of which reduces your stacks by five. Every Spectral Darkness orb drops two golden ones when it is destroyed. All stacks will also be removed if you’re Downed.

It is important to control the orbs during this phase. If you’re using the classic method to deal with World Eater, make sure the path to the next Updraft is clear. If you’re using the no-break method, clear the path you’re backing out on.
If you are using the mass control method to deal with the charged souls, make sure the path to the first soul is clear. If you’re using the one-on-one control or split methods, clear the path to each one, starting from the inside out.
works well to clear multiple orbs if they start building up in the same area. Otherwise, players can use ranged attacks or send pets or minions to destroy them since they are immune to the effects.
This spirit phase is the exact same as the one in Phase 2. Deal with it using whichever strategy you used before.
There is one new mechanic in Phase 5 in addition to all those previously mentioned: Ghastly Prison, also known as traps or eggs. After using his slam, small expanding AoEs will appear under each player’s feet. Two seconds later, any player standing in one will be encased in a blue spectral cocoon. Players lose access to all their skills and their auto-attack is replaced by a new skill:  Rebel. Using this skill repeatedly breaks the player out of the shell. Any untrapped players can assist by damaging their allies’ cocoons.
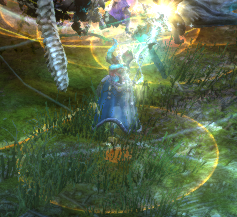

You cannot Block, Dodge,  Evade, or use Invulnerability to avoid this attack. If you are standing in a circle, you will be trapped. You can sidestep or Dodge out of the circle, but make sure you don’t move into another player’s trap.
If you don’t kill Gorseval within 7 minutes, it becomes  Enraged, does 200% more damage, and all the remaining Updrafts disappear. If you run out of Updrafts and allow Gorseval to complete another World Eater attack, your squad will wipe.
About Phoenix Uprising • Recurring Series • Support the Site • Contact • Editorial Guidelines • Privacy Policy
© 2022 Phoenix Uprising. All rights reserved.
About Phoenix Uprising • Recurring Series • Support the Site
Contact • Editorial Guidelines • Privacy Policy
© 2023 Phoenix Uprising.
All rights reserved.