

Final Fantasy XIV uses a lot of visual effects for mechanics. As the expansions have been released, they’ve been attempting to standardize and make important mechanics more obvious.
In my Final Fantasy XIV Mechanics Guides, I outline most of the mechanics that are repeated at least a few times. There are tips on how to handle them, if applicable, and examples of where you’ll see them. I include boss names, but any boss encounters with MSQ spoilers are grayed out and can be revealed by clicking on them.
There is overlap in the various types of mechanics but I've sorted them how I believe most players will come to identify and understand them. This guide is dedicated to mobilize and cooperate mechanics that require players to team up with their allies to avoid high damage or death.
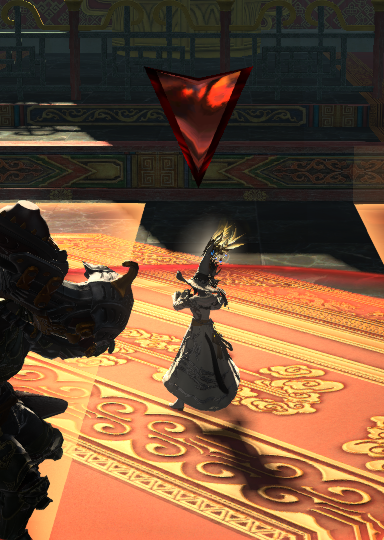
One of the most frequently encountered and familiar mechanics, the stack or soak marker puts a large yellow ring around a player, an arrow pointing down at their head, and four pulsing arrows pointing in toward that player.
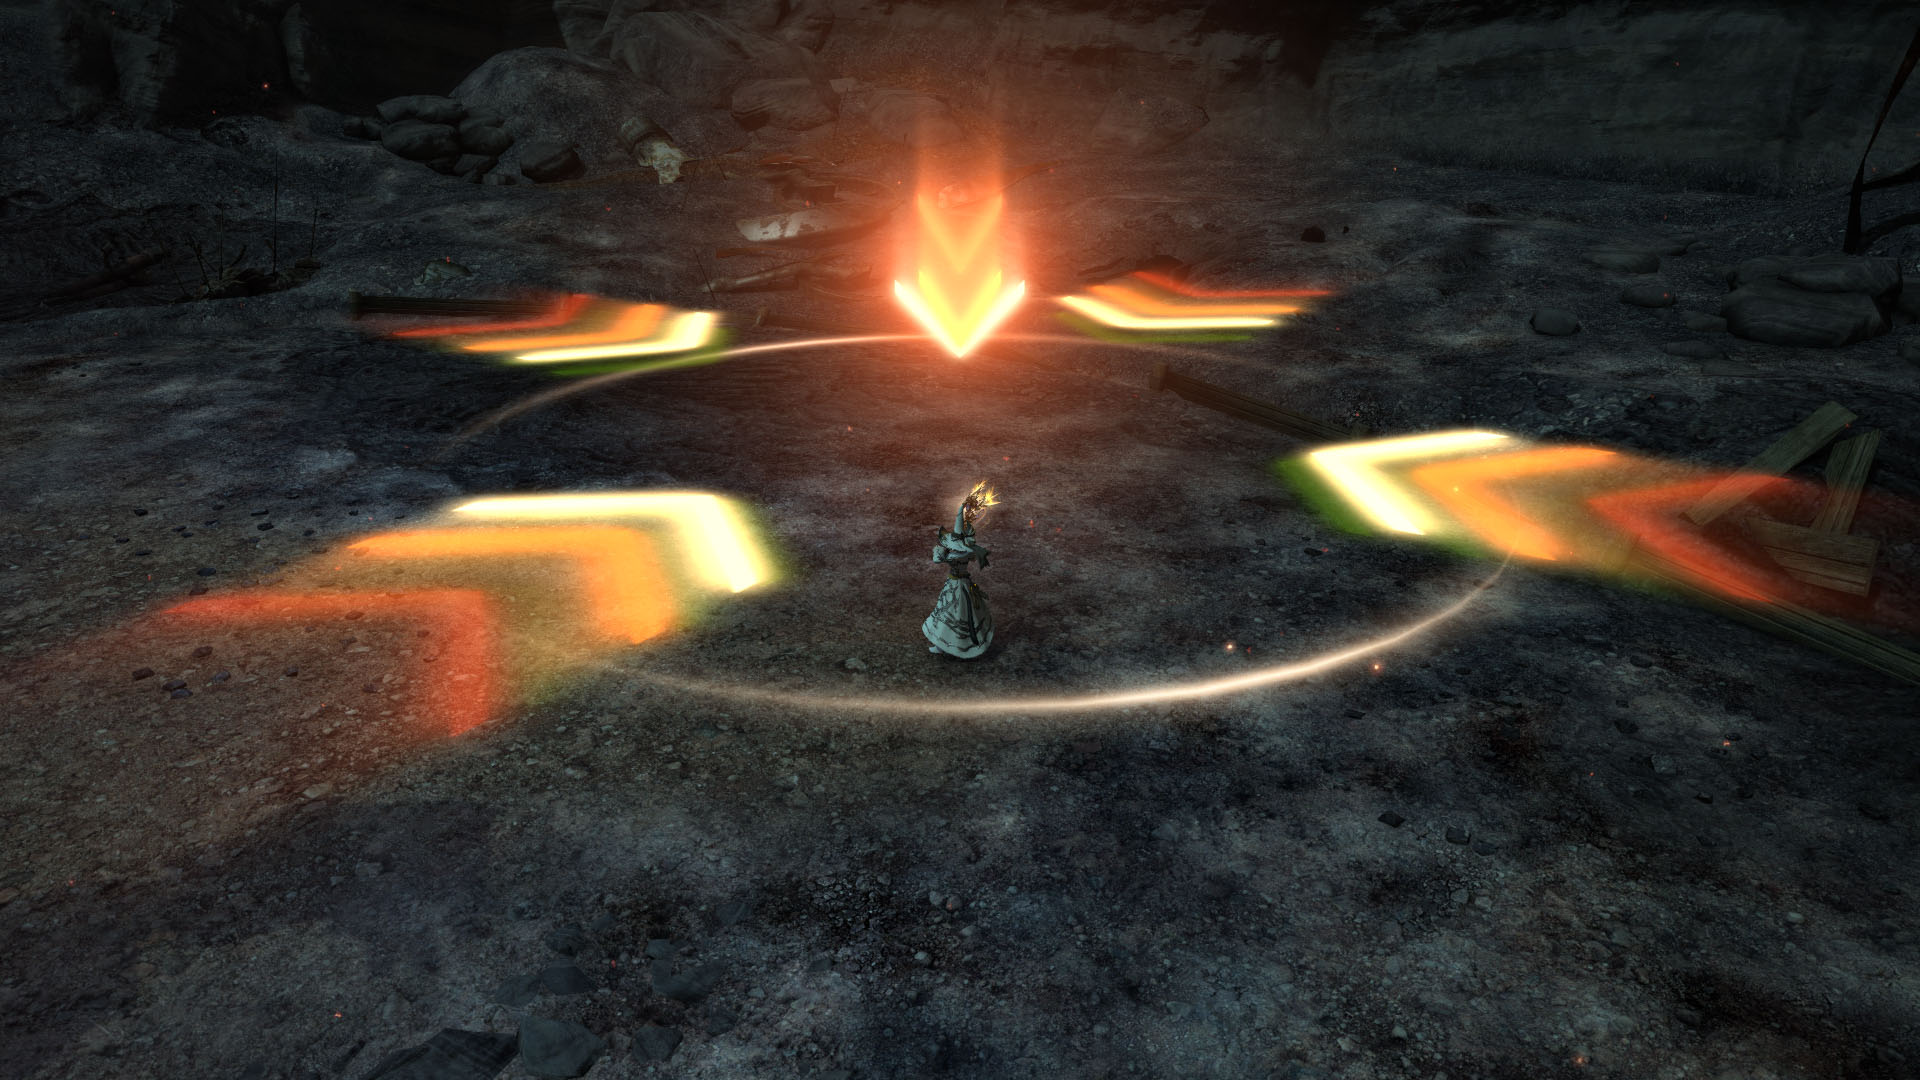
As many players as possible need to stack inside the ring to share damage for an upcoming attack. If not enough players stack, the marked player and anyone else inside the ring may die. The marked player can readjust when they’re chosen, ideally approaching and standing to the side or back of the boss to allow tanks and melee DPS to help soak the damage more easily. Once in position, they should avoid moving sporadically.
If there are two stack markers at once, you need to split as evenly as possible to share damage. If you have a damaging marker that coincides with a stack marker, do not stack. I assure you, SquareEnix did the math—assuming enough players are alive, the stack and all those inside it should be able to survive without you. Occasionally, fights might require you to know whether the stack resolves first or the damaging marker(s) do. You’ll figure that out on a case-by-case basis, but generally always assume you will not be stacking if you’re chosen for a different mechanic.
There is a variation of the traditional stack marker that instead has three arrows on each side of the player pointing toward them. This is a line stack. Instead of needing to be in the circle, players only need to be in the pathway indicated, even if they are not directly between the arrows.
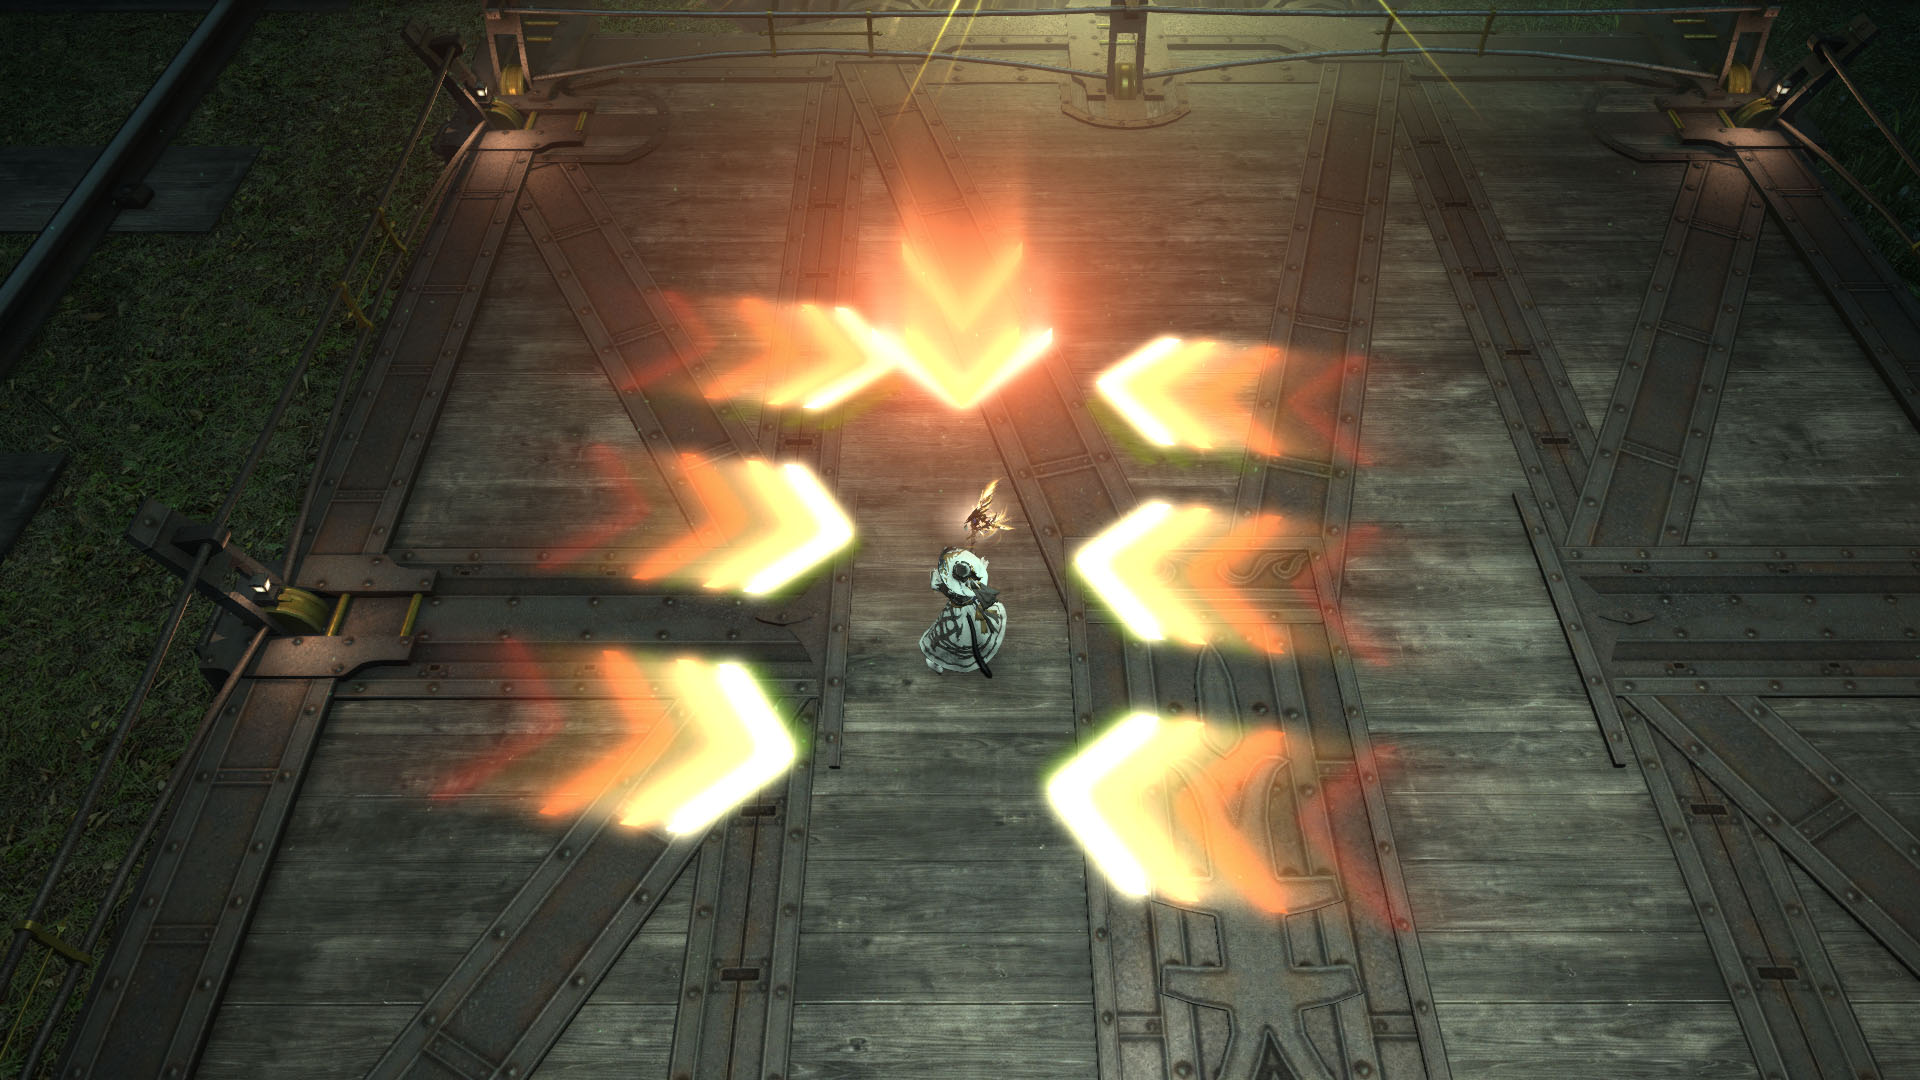
Examples:
These vary widely in appearance, but a basic meteor circle usually consists of a circle on the ground with one or more beams of light in the center. Sometimes there’s a column inside a circle—these are known as towers. Sometimes there’s a fairly plain circle on the ground that might have an orb inside, or, as the name suggests, a meteor falling slowly from the sky.


Players need to split up and stand in these to soak the damage of each individual meteor, or else they will explode and deal heavy raidwide damage or give everyone a debuff. Typically anyone can stand in them, but rarely, a tank might need to soak the damage. How punishing it is to miss circles depends on the content type. In an alliance raid, you can usually survive missing one or two, but in a savage raid, missing even one is generally a wipe.
Some meteor circles have multiple semicircle-like shapes inside that glow when you stand in the circle or other counter indicators. This means you need more than one person to stand there or else it will be considered a failed soak, and, like a failed stack marker, if there’s a player inside, they may die from taking the brunt of the damage.
Examples:
The buddy system, mini stack, or Dorito markers are red triangles pointing down over a player’s head with a small red circle around their feet.
This indicator means you need to find someone else with the same maker and stack with them. You only need to stack with one other person, but you will not be punished for stacking with more than that. Players without the marker should stand away from those with it.
Examples:
Hide mechanics usually manifest in the form of boulders, ice blocks, or pillars on the ground. Sometimes they’re dropped randomly or in set patterns and other times players are chosen and might be able to decide where the object is placed. These objects are often generically called meteors, but I’m calling the mechanic ‘hide’ to avoid confusion with meteor circles/towers.

As the name suggests, you need to hide behind these objects to avoid extreme damage or instant death to an upcoming mechanic. The mechanic generally has a long cast time or the objects are placed far in advance to let you know the attack is imminent and give you time to hide. If the object is located inside or overlapping the boss’ hitbox, it will not protect you from the attack. Make sure you’re behind a safe object, even if you have to leave melee range.
Examples:
SquareEnix likes to troll its players and has created instances where objects you might think you should hide behind will actually fall over and kill you. Here’s a list of those ‘lol nope’ encounters:
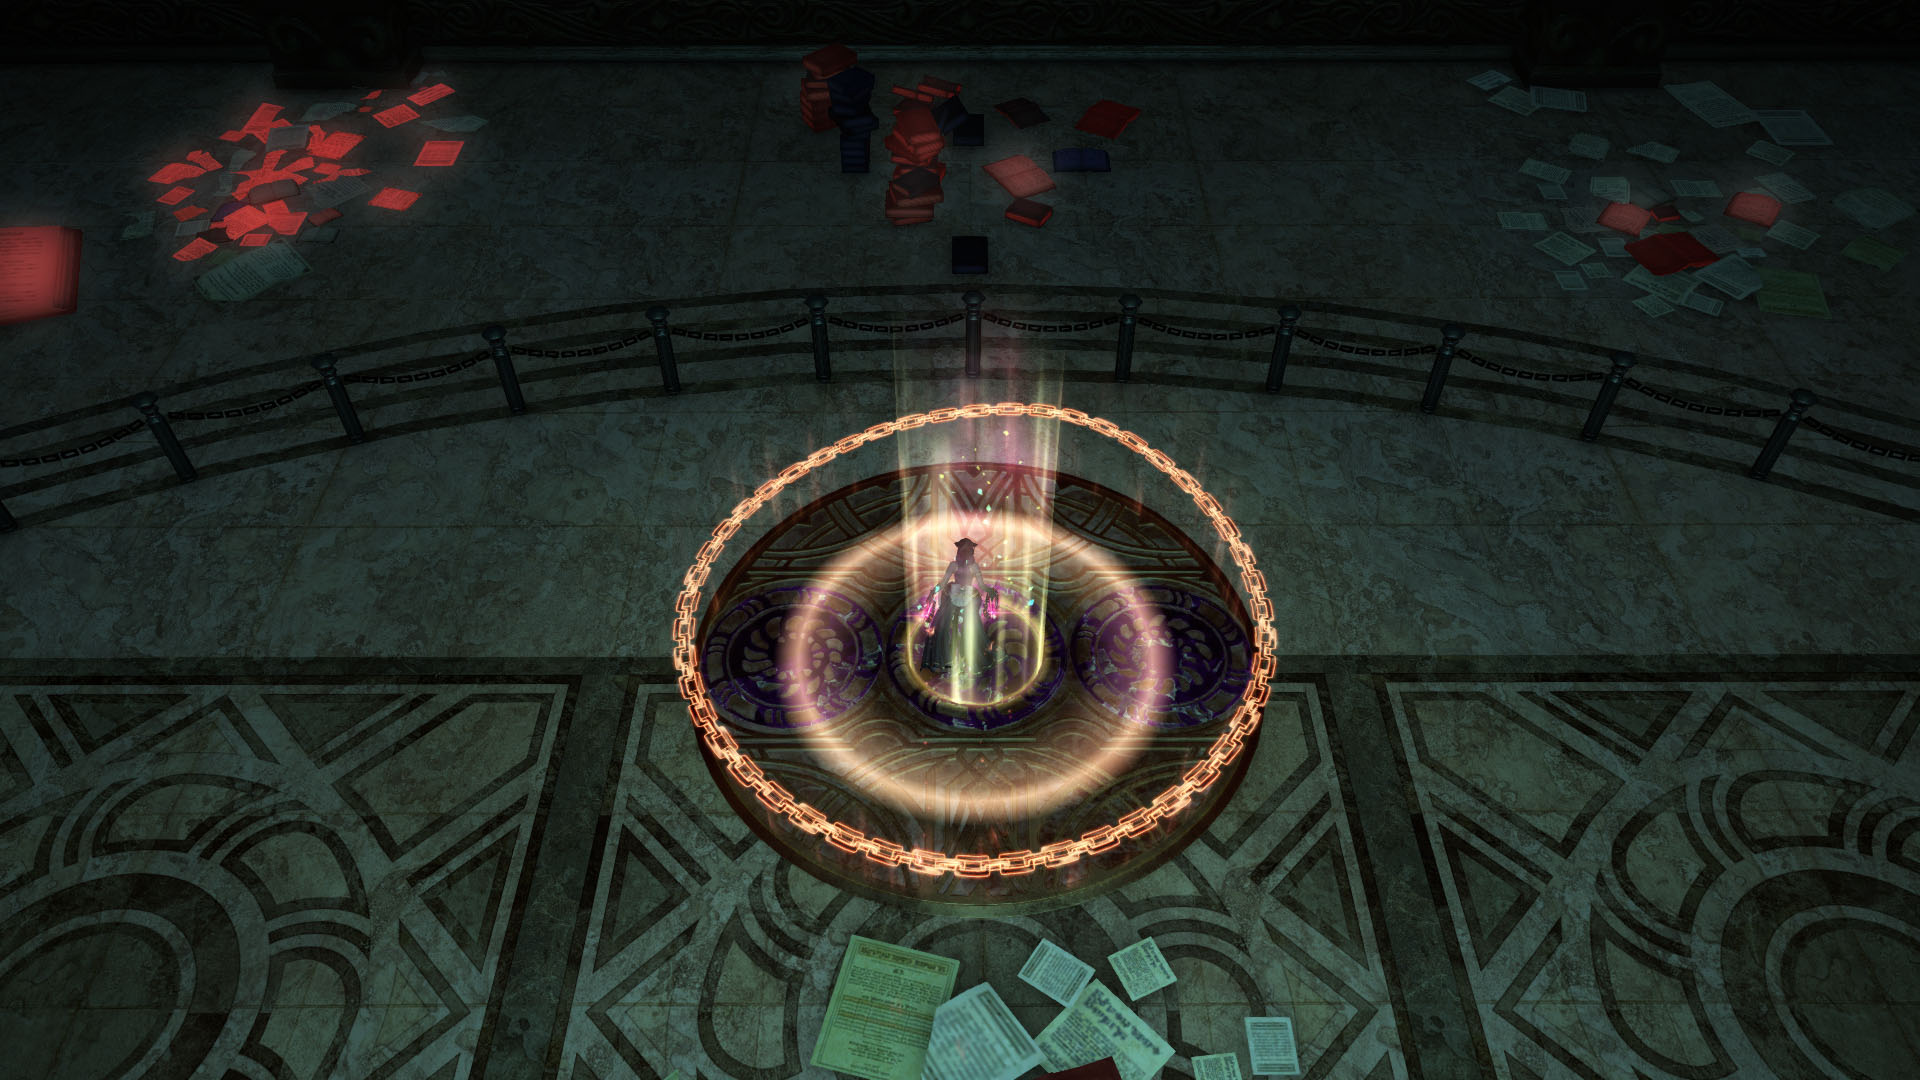
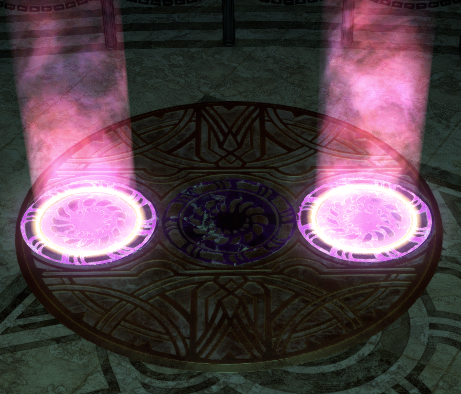
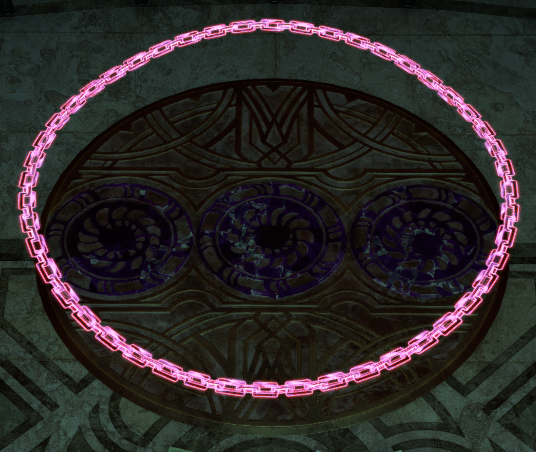
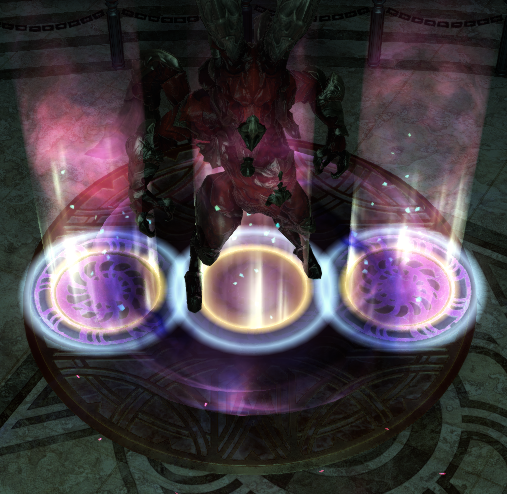
A summoning circle is a large circle with multiple smaller glowing circles within it.
A number of players equal to the number of small glowing circles must stand inside the large circle simultaneously to seal it or else an additional enemy will be summoned by the boss when the cast finishes. The small circles will stop glowing, change color, and/or a ring of chains will appear around the circle when it’s been sealed. Players can exit the circle after this.
Examples:
About Phoenix Uprising • Recurring Series • Support the Site • Contact • Editorial Guidelines • Privacy Policy
© 2022 Phoenix Uprising. All rights reserved.
About Phoenix Uprising • Recurring Series • Support the Site
Contact • Editorial Guidelines • Privacy Policy
© 2023 Phoenix Uprising.
All rights reserved.