

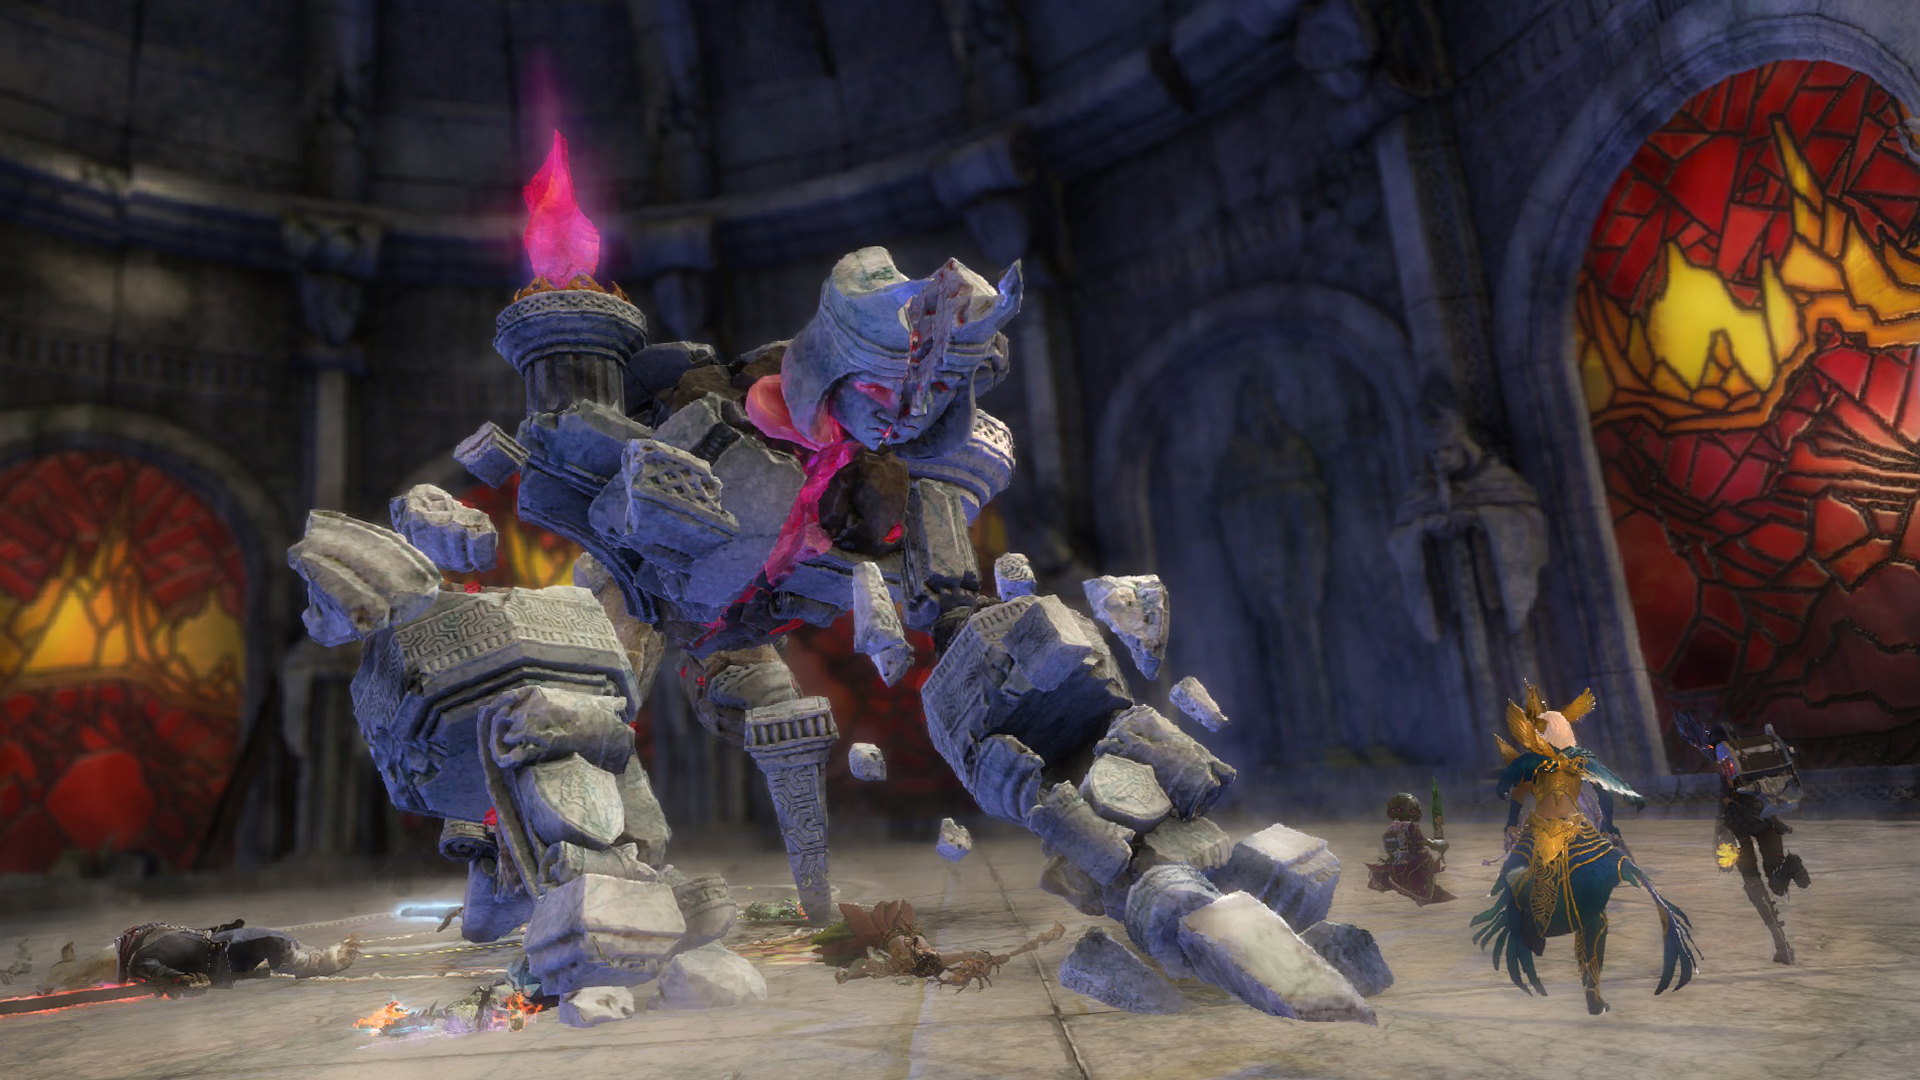
Welcome to my guide for the Guild Wars 2 raid boss,  Keep Construct (KC), the second encounter in Stronghold of the Faithful (Wing 3). This is a detailed guide on the mechanics of the fight including various strategies that cater to everyone from beginners to experienced raiders. If you’re brand new to raiding, I recommend reading my Path to Endgame guides first.


The Keep Construct has more health than any other raid boss and the majority of the damage you do will occur in short 20-second burn phases. All of your DPS players should use power builds to take advantage of these short bursts, and because the boss has very low  Toughness.
Keep Construct's core through ley rifts. Keep Construct's defiance bar once every main phase, three or more times total. Condition Cleanse: There is a lot of outgoing
  Confusion during the fight, so some cleanses can be helpful.
 Revival: This can be handy if players are careless with mechanics or fail to collect enough orbs to reduce
  Magic Blast's damage enough.
The Keep Construct cycles through five phases, each with different objectives. You will repeat phases 1–4 at least three times, while phase 5 will only trigger twice at 66% and 33%. Ideally, you only want to have 14 phases total, since repeating the first four phases is time-consuming and increasingly dangerous as the fight progresses.
The Keep Construct has two effects:
 Gaining Power: A buff that increases outgoing direct damage by 10% and condition damage by 3% per stack. Keep Construct gains one stack every minute.
 Xera's Embrace: A buff that protects Keep Construct's core. It starts the fight with two stacks of this buff and they are removed by having mesmer projections explode on the boss.
 Keep Construct's attacks are well-telegraphed and easy to avoid, but like other bosses, it gains more attacks throughout the fight, and its existing attacks are upgraded.
Keep Construct will tether to the nearest player, leap into the air, and drop, indicated by a large orange AoE circle. This does moderate damage and causes a three-second  Knockdown for players caught in the attack. Anything works to avoid it, including running out of the circle, but you should delay a
  Dodge by a second or two after it disappears to get the timing right.

Also called: blender
Below 75% health, Keep Construct will occasionally sit down and create a small swirling circle at its base. It will then start slamming its arms down and create a conal orange ‘blade’. This blade impacts an area, rotates ~15°, and then impacts a different area.

Players standing in the blades as they impact will take moderate damage and gain five stacks of Confusion and  Torment. There will be a small safe slice to stand between blade impacts, so if you’re right outside the border of one blade, you shouldn’t be in the next one either when it appears. The central blender area does continuous damage in addition to racking up conditions, making it especially dangerous. No one should stand under Keep Construct as it performs this attack unless they’re using a skill like or , as they will lose health rapidly.
This attack will gain a blade every 25% health, capping out at three blades, making it more difficult to avoid every impact.
Below 33% health, Keep Construct will leap into the air, becoming untargetable, and drop debris into the room below, indicated by medium gold AoE circles. Players hit will take a little damage and be  Stunned for one second.
There are eight statues around the room, four on the east side and four on the west side. Throughout the fight, these statues will glow, shatter, and spawn a named mesmer projection that will immediately  Fixate on a random player. This player will have the signature purple fixate diamond over their head, a purple crosshairs icon on their buff bar (
 ), and a white tether connecting them to the projection. The projection will approach the player and follow them wherever they go.

Although the projections each have different names, they all have the same basic, non-threatening attacks, meaning it's safe for them to face other players.
When you kill a projection, it creates a brief white AoE which will remove one stack of Xera's Embrace if Keep Construct is standing in it. For this reason, players should always bring projections to the boss (or vice versa) to cleave them together. Twenty seconds after a projection was killed, another statue on the same side will break open and spawn another.

If two projections get too close (their tethers can safely cross), they will start walking toward one another. If they manage to get together before you kill one of them, they will merge and form an Insidious Projection.
These projections are bright red and gold, have a lot more health than their named counterparts, and enhanced abilities. They corrupt boons and their  Overhead Smash, an attack indicated by a gold semicircle with a three-second cast time, steals boons from any player hit. Although you can kill them, they are deadly and take precious time away from focusing on the boss and the fight’s mechanics, so many groups will choose to reset instead of dealing with one.
The goal of these phases is to remove Keep Construct's stacks of Xera's Embrace and expose its core.
You can enter the room and skirt around the outside without starting the fight. Squads usually go halfway around the room to the left or right, situating themselves between the statues.
Keep Construct aggros on to the player with the highest Toughness. Your tank should run in or attack from range and then bring the boss about halfway between the middle and the wall. You’ll have 12 seconds to attack Keep Construct before two statues, one on the east and one on the west side light up. At this point, your tank should take it to the statue on whichever side you started on.
When the projection spawns, kill it. As long as it was near the boss, this will remove one stack of Xera's Embrace. The player who was Fixated by the projection on the opposite side should be fine staying with the group, but if their projection starts getting close and the first isn’t near death, they should move away to prevent a merge.
When both stacks of Xera's Embrace are removed, Keep Construct's defiance bar will unlock. You must break this to expose the core and proceed to the next phase.
Besides the attacks listed above, Keep Construct has two mechanics it can choose from during these phases. They will both end prematurely if you phase.
Everyone in the squad will receive a huge, orange, expanding PBAoE. When the inner circle meets the outer ring, it will explode, causing that player and anyone else standing in it to lose 20% of their maximum health. Players need to spread out a fair bit to avoid being caught in another AoE, but the AoEs themselves can safely overlap.

If this mechanic occurs, it’s recommended that everyone spread out except the currently Fixated player and the tank. This ensures the projection’s explosion hits the boss if it dies to conditions or people attacking at range. If there are two Fixated players, the one Fixated by the projection from the opposite side of the room the squad was standing on should run away, while the other should stay.
If Keep Construct's defiance bar is unlocked when this attack occurs, you can prioritize breaking it instead of running away in order to phase.
This mechanic is borrowed from McLeod the Silent, the final boss in Siege the Stronghold. Many  Radiant and
  Crimson Phantasms will spawn, each with a white or red symbol over their head. Players will also gain matching symbols and must kill any phantasms they are attuned to. Any phantasms left alive will explode and deal a massive amount of damage to players.

Since you’re given plenty of time to kill the phantasms, most groups choose to ignore this attack completely and try to advance to the next phase. If, however, one of the first two projections’ explosions missed Keep Construct, you’ll need to perform the mechanic to prevent a wipe.
When you break its defiance bar, Keep Construct will break apart into many pieces and rise into a swirling cloud near the ceiling. At this point, its core will be exposed: a large pink and gold orb floating in the center of the room. Three of Xera’s phantasms will spawn and start channeling a spell to protect the orb. Each of them will have a slowly shrinking green circle under them. At least two players must stand in each circle to prevent the phantasms from finishing the spell. If the spell succeeds, Keep Construct will regain its core, land in the middle of the room,  Invulnerable, and kill all players.
The phantasms spawn between the center of the room and the wall, and an equidistant 120° from each other. Two of them are near the second statue from the entrance on the east and west sides, and the third is at the southern exit of the room.

Typically squad leaders will mark the locations before the fight and might assign three players to each, so if a projection Fixates a player, they can move to a different marker if necessary. The Fixated player should bring it to the marker on the same side of the room as it spawned. E.g. if it spawned on the left side, you should bring it to the  Arrow marker using the above diagram. If you drag it across the room, it might be near the next projection that spawns. Any players on the marker with the projection should damage it as much as possible.
If you interrupt the spell, the fight will progress to Phase 3. If the projection is still alive, finish it off.
Keep Construct's core will drop to the ground and become targetable. A red ring will also appear around the outside of the room and five unstable ley rifts will spawn near its inner edge. The red ring will pulse moderate damage to any player standing in it.
Pushing the core through a rift causes the boss to gain one stack of  Compromised in the next phase, a debuff that increases incoming damage by 75% per stack. If the core is pushed into the red ring, it will disappear and the phase will end prematurely.
During this phase, retriever projections will also spawn. They will run toward the core and attempt to snatch it back. If one succeeds, the phase will end prematurely. The retrievers have defiance bars that you can break to Stun them for a short duration.
Any direct damage will push the core a short distance on a one-second cooldown, but it is also susceptible to hard crowd control (CC), which can help move it along faster. Typically groups assign one player to push the core for optimal control.  Druids are almost always used for this role since (Staff 1) pierces, meaning if any retrievers get between them and the core, the attack will still hit. Note that there is an odd invisible box in the middle of the room where the core spawns that prevents projectiles from hitting the core. This means a direct attack is needed to move it out initially, but projectiles will move it subsequently assuming they don’t hit a retriever instead.

Your designated pusher should ideally not be assigned to a green circle in the previous phase. Instead, they should wait in the middle to start pushing the orb immediately. If you have fewer than 10 players or there’s an emergency, they should, of course, go to a green circle if it means preventing a wipe.
The other nine players can wait in the center or near an upcoming rift to help  Pull the core to it. A
  Mesmer can use → (Focus 4) to drag it a long distance. Be careful using a Pull such as , since you will push the core back initially when you tether it with before you can pull it.
Projections will continue to spawn throughout this phase, as in the last one. Since their spawn timing should be staggered at this point, you can bring them to the middle of the room and kill them there. If your pusher is Fixated, the group should kill it carefully, minding the core.
How many rifts you push the core through depends on your group’s DPS. Groups with exceptional DPS may only use one rift while groups with good, solid DPS might use two or three, and groups with low DPS may need all five.
Keep in mind that Keep Construct will use Hail of Fury in the last main phase (under 33%), meaning you won’t have damaged it as much as in previous phases. Therefore you might need to push the core through an extra rift to kill the boss before the next phase, Core Retrieved, ends.
When the core is retrieved, pushed out, or pushed through all five rifts, this phase will end. If you have access to any offensive or utility boons ( Might,
  Fury,
Fury,  Alacrity, and
  Quickness), stack them on your group right before the phase ends to prepare for Phase 4.
If the core wasn’t pushed through any rifts, Phase 4 will be skipped and another main phase will begin.
Keep Construct will reabsorb its core and drop to the ground, regaining two stacks of Xera's Embrace, and gaining stacks of Compromised equal to the number of rifts you pushed its core through. This is a standard burn phase: players should focus solely on the boss and unleash as much DPS as possible. Keep Construct is considered Stunned and Knocked Down for the duration of this phase, meaning is quite potent.
Keep Construct will not perform any of its attacks or other mechanics, but projections will still spawn. If the Fixated player is standing on the outside of the Keep Construct's hitbox, they might need to go through it to the other side so the projection stops inside its hitbox and can be cleaved down. Time and DPS are too valuable to waste on retargeting and moving away toward the projection. Any projections killed on the boss during this phase will remove a stack of Xera's Embrace.

This phase lasts 20 seconds. If Keep Construct hits the 66% or 33% health thresholds at any time during the phase, it will become Invulnerable and Phase 5 will begin.
If you are unable to reach the threshold, it will revert back to a main phase and Keep Construct will immediately use  Phantasmal Blades, assuming it is below 75% health. Any stacks of Xera's Embrace lost will carry over. If the boss is a few percent from a threshold, you can attempt to ignore mechanics and damage it down to begin Phase 5.
If you’re ~5% or more away from the threshold, you should probably remove the remaining stacks and break Keep Construct's defiance bar again to restart from Phase 2. Assuming you’ve been taking care of the projections on time and their spawns are still staggered, you can stay in the middle of the room to do this. In the subsequent Phase 3, you can push the core through fewer rifts this time depending on how much health is left.
This phase begins when the Keep Construct reaches 66% and 33% health, whether that occurs during a main phase or burn phase. It will gain  Xera's Boon, rendering it Invulnerable, move to the center of the room, and hold its arms straight out. No projections will spawn during this phase.
Many red and white orbs will start drifting toward Keep Construct from the outside of the room. Every time the boss absorbs an orb, it will gain a stack of  Magic Blast Intensity, which increases the damage of its upcoming attack. The stacks cap at 35, but 15+ stacks are generally enough to cause some players to go
  Downed when the attack hits.
Players will also receive Radiant Attunement or Crimson Attunement and a white or red colored symbol over their head. Players can intercept orbs of the corresponding color, denying them from reaching the boss. If a player intercepts an orb of the wrong color, it will pass through them. Orbs of both colors will damage players a little regardless.

During this phase, it’s advised not to stray too far from Keep Construct to catch the orbs as you’ll also be running away from other players and any defensive boons or healing you might receive. Players with the same attunement should also spread out to ensure they intercept as many orbs as possible.
After 30 seconds have elapsed, the remaining orbs will disappear and Keep Construct will use Magic Blast, the attack it has been charging up. If it gains a lot of stacks, be prepared to burst heal the squad and resurrect anyone who goes down.
This begins another main phase and resets the statue projection spawns (so two will spawn 20 seconds after the phase begins). Keep Construct will regain two stacks of Xera's Embrace and immediately begin using Phantasmal Blades. Your squad may stay near the boss to continue DPSing, but this can be dangerous due to the blades. To combat this, you can stack  Barrier or use skills like a Druid's (not in Celestial Avatar) or
  Renegade's combined with (Legendary Renegade Stance). To play it safe, you can back away toward the wall and DPS at range. Either way, after 12 seconds have elapsed, you should all head to the glowing statue to await the projection spawn.
At this point, you’ll filter through the phases again as outlined above until Keep Construct dies. Ideally, you’ll want to be able to do enough damage to reach the 66% and 33% health thresholds during the first two burn phases, and enough to kill the boss during the third.
If you don’t kill Keep Construct within 10 minutes, it becomes  Enraged and does 200% more damage.
About Phoenix Uprising • Recurring Series • Support the Site • Contact • Editorial Guidelines • Privacy Policy
© 2022 Phoenix Uprising. All rights reserved.
About Phoenix Uprising • Recurring Series • Support the Site
Contact • Editorial Guidelines • Privacy Policy
© 2023 Phoenix Uprising.
All rights reserved.