


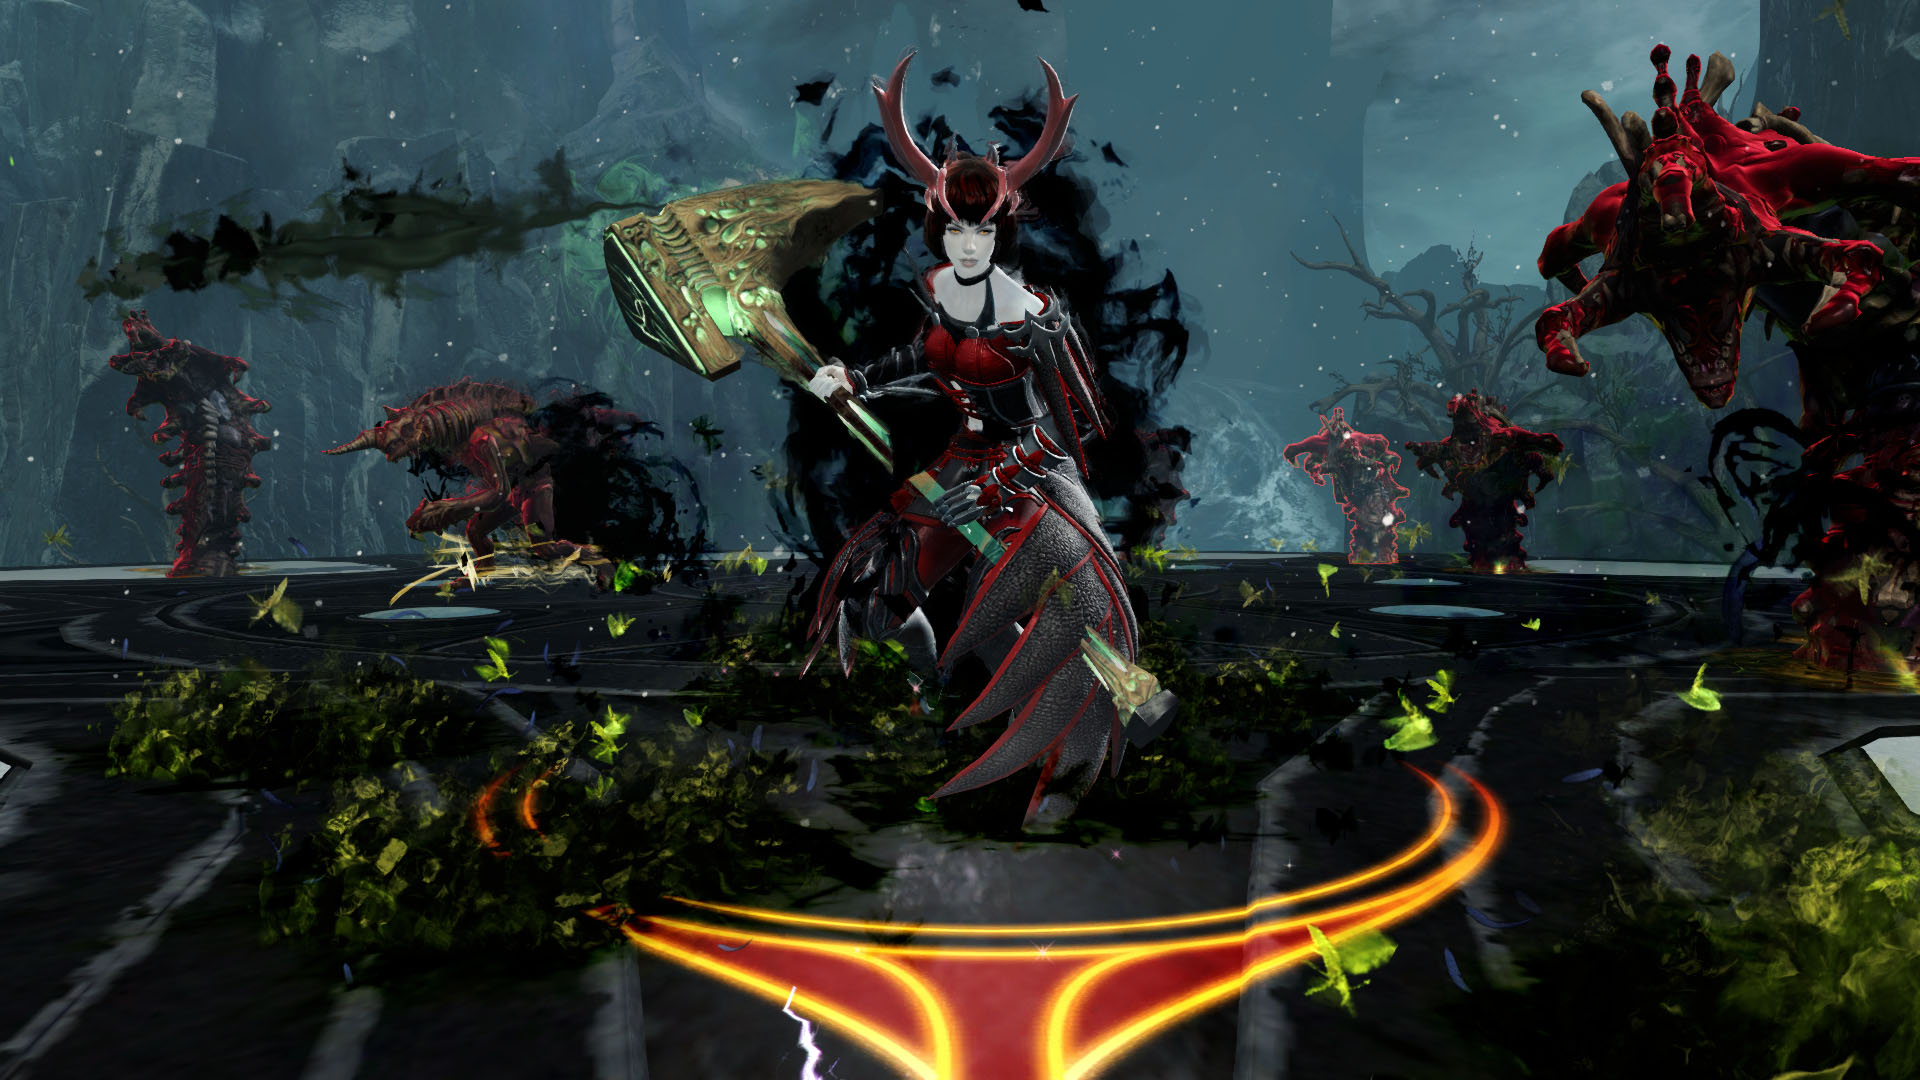
Welcome to my guide for the Guild Wars 2 raid boss,  Soulless Horror (SH), the first encounter in Hall of Chains (Wing 5). This is a detailed guide on the mechanics of the fight including various strategies that cater to everyone from beginners to experienced raiders. If you’re brand new to raiding, I recommend reading my Path to Endgame guides first.


The Soulless Horror is easy in theory, but with a few tricky mechanics that can get the better of you if you’re not careful. Like other bosses such as Slothasor or Cairn, there are no distinct phases, but there are new or more difficult mechanics as you progress. This is the first boss that requires two tanks.
All of your DPS players should use condition builds because there are no phases, meaning conditions will tick from start to finish. Soulless Horror has a fairly quick attack speed and can move around frequently depending on luck, so  Confusion and
  Torment are potent. Power DPS will struggle to upkeep their bonus as well.
Gliding:  Glider Basics mastery. Every player needs this to get to Soulless Horror's platform. You can also use any Path of Fire mount.
 Knockback and/or
  Launch: This is necessary to handle the
  Tormented Dead minions that spawn throughout the entire fight. Soulless Horror's defiance bar about once per minute from 66% health and below.
 Condition Cleanse: Soulless Horror applies conditions frequently and they’re all but unavoidable, so cleanses will take some pressure off your healers in the long run.
 Immobilize: Squads might want to stop the Tormented Deads from running back toward the group, especially if your pusher is inexperienced or slow.
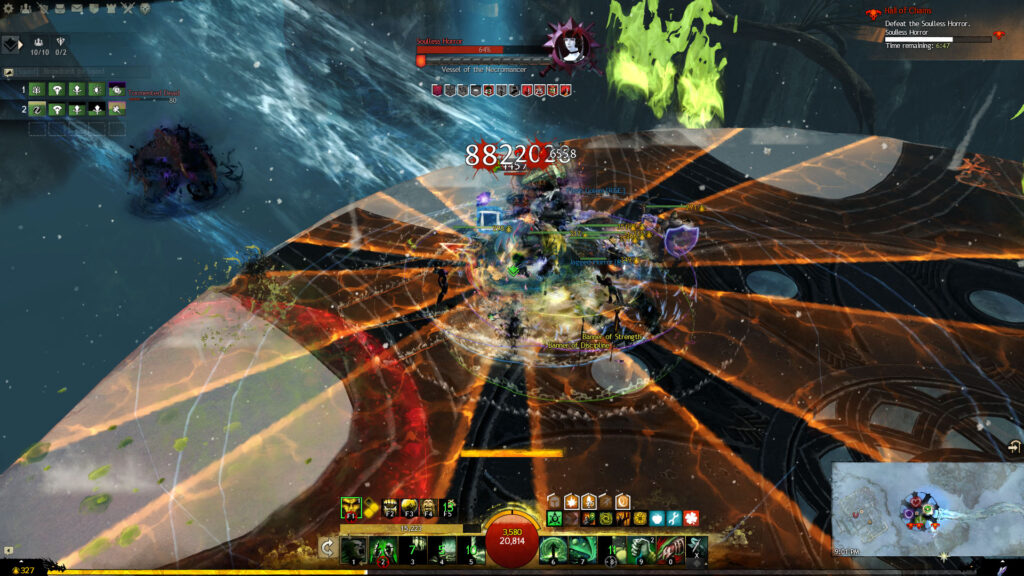
The Soulless Horror is situated in the middle of a floating platform. At 90%, an outer ring of the platform will turn yellow-orange and crumble away three seconds later. This will happen again at 66% and 33% health. These three thresholds dictate many more of the mechanics as well.
When you reach the edge of the cliff overlooking the Soulless Horror's platform, you’ll see two glowing runes on the ground. The two players who interact with these runes will receive the  Exile's Embrace effect and a special action skill,
  Issue Challenge. You cannot jump or glide to the platform without grabbing both runes; if you try, everyone will be killed in midair.
Whoever took a rune first will tank initially, indicated by a Fixate diamond overhead. Every 12 seconds starting at 7:54, the current tank will receive one stack of  Necrosis, a debuff that increases incoming damage by 10% per stack. At about three stacks, the first tank should tell the second to take aggro. The ‘off-tank’ can do this by activating their SAK. This puts the skill on a 45-second cooldown (affected by
  Alacrity, as usual). After that, whoever is the current off-tank can take it when their skill is off cooldown.
Although tanks with high  Toughness and a good healer can take more than three stacks, there is no reason to. Even if you only have 33% Alacrity uptime, the current tank will get their third stack as the off-tank’s cooldown runs out. Tanking starts to get dicey at four or five stacks and painful at six.
The tanks should always face Soulless Horror away from the group toward the outside of the platform. Tanks will also have to move around during the fight. Soulless Horror wields a hammer but one of her auto-attack chains has a long range. If she doesn’t move right up to you, make sure you scooch in toward her so your healers can catch you in their AoEs.
Starting at 7:50, Surging Souls, more commonly known as walls, will start spawning. They are indicated by rectangular orange AoEs with walls of bright green flames sprouting up from them. They spawn in one of the cardinal directions and move slowly to the other side of the platform before disappearing. Like Sabetha’s flame wall, being hit by a Surging Soul will kill you. You cannot  Dodge,
  Block, or go
  Invulnerable to survive it. You can, however, teleport or shadowstep through one.
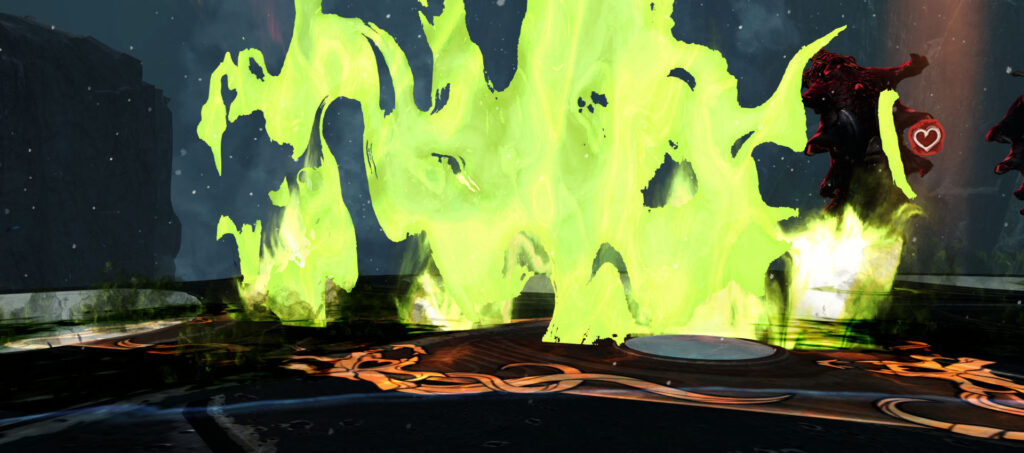
They consist of segments one-fifth of the platform's full diameter in width. Before 90%, there will only be two segments. From 90% to 33%, there will be three segments, and after 33% there will be four. The segments are configured in different patterns, but there will always be a safe spot to stand. Both the direction a wall starts in and the configuration of its segments are random.
The trickiest configuration is three segments together because you’ll only have a small edge on either side of the platform to stand on. These can also be dangerous if you’re approaching a threshold when more of the platform is about to break away, so be sure to only stand on the edge as long as you need to before moving back in.
A new set of segments spawns as soon as the last one disappeared. This means they become more frequent as pieces of the platform crumble away, with 18 seconds between walls initially, 16 seconds after 90%, and only 13 seconds below 33%. When a health threshold is reached, the timer will reset and the next wall will spawn ~10 seconds later.
If you do not see the flames, make sure you have your character model limit (found in Graphics Options) set to medium or higher. Each segment is also marked on the minimap by a red boss skull icon. I recommend putting down four squad markers as well, so it’s easier to communicate where to go when you need to move.
At the beginning of the fight, there are eight elite  Flesh Wurms scattered in an arc. They’re usually concentrated on the north and south sides, with only one or two in the east, and there are never any on the west side below the cliff. These Flesh Wurms spit projectiles at random players on the platform.

Once they’re killed, they never respawn, so they’re of little consequence. You do want to alleviate some pressure as soon as possible though, so start tanking on the north or south side and have a  Scourge use or have your DPS cleave and kill them. The first time you need to move for a wall, go to the opposite side so you can kill those as well.
Whirling scythes with small red PBAoEs will wander around the platform. Their movement is random but they will always travel in straight lines. They spawn periodically and three can be active at one time. Getting caught in their AoE will corrupt all of a player’s boons into conditions.

You can’t kill them, so your only recourse is to sidestep them if they get close. They usually don’t matter unless a couple of them intersect near the group or you’re running out of playable space thanks to the next minion.
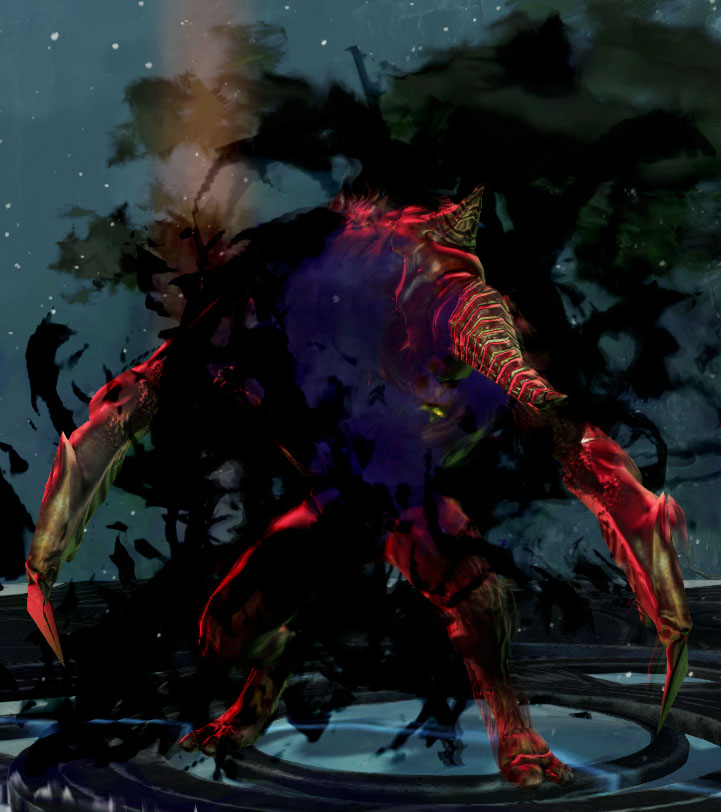
Tormented Dead look like giant flesh golems. Before the fight starts, you can see them spawning on the platform, leaping into the air, and exploding against the red barrier; this is more or less what they do during the fight.
When she hits 90%, Soulless Horror will say “Crush these abominations.” Every 20 seconds after that, a Tormented Dead will spawn in the middle of the platform. These minions will always follow the off-tank. They degenerate health but can also be damaged and CCed by players. When they die, they create a soul rift, a huge red AoE that corrupts boons and lasts one minute.
The most dangerous boons that can be corrupted by this AoE or the scythes are  Swiftness →
  Crippled and
  Stability →
  Fear. This is due to the mobile nature of the fight and the likelihood you’ll end up in a wall or running off the platform.
The best way to handle this is to have someone Push the Tormented Dead toward the outside of the platform and have a Scourge use so they die almost instantly. They can be Knocked Back to the edge of the original platform, even when the edges have crumbled away. With some skillful pushing, only ⅓ of the AoE might cover the platform, especially later in the fight.
The ideal pusher is a  Healing Druid with a longbow equipped so they can use (Longbow 4) to Push them out fast. They should also consider bringing one or more of the following:
Push
Soulless Horror or the Flesh Wurms
I can’t overemphasize how useful one or more Condition Scourges with are, but you can handle this mechanic without them. Your pusher will generally allow the Tormented Dead to come near the group or Push it through the group so it’s damaged some before being pushed out fully.
Make sure everyone else avoids using hard CC (particularly Pulls) and Immobilize most of the time, especially if a Tormented Dead is nearby. This can cause the Dead to get hung up on the group and explode in a bad spot. Everyone should be aware of the Dead and if you hear someone say, “Dying on us,” or “Move away!” get away fast!
In addition to her minions, Soulless Horror has several dangerous attacks. For her auto-attack chain, she can either use  Slice or
  Corrupt the Living. Both attacks create many small orange circles that sprout
  Fingers of the Dead. These claws do a little damage to anyone caught in them.
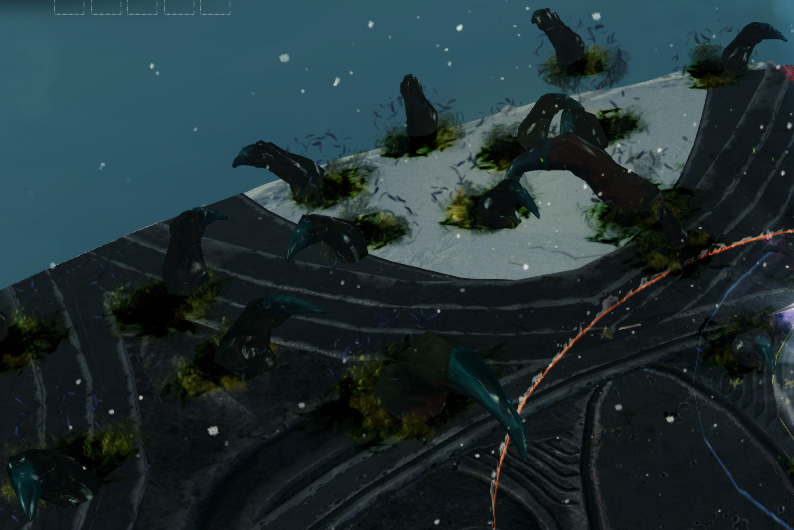
Slice is a charged overhead hammer attack in which she creates the AoEs in a cone. She’ll then release a stream of green fire, causing the Fingers of the Dead to pop up as the flames reach them in turn. She might get stuck momentarily in one spot while casting this.
For Corrupt the Living, she swings her hammer in an arc, creating a medium PBAoE indicated by a thin red ring. This applies  Poison and Torment. Everyone will usually get hit by this as it has a short cast time and is difficult to Dodge or Block. Healers should try to Cleanse the conditions quickly.

The AoEs all spawn outside of the ring and the Fingers of the Dead pop up as soon as it goes off, so you won’t get hit by them as long as you’re stacked with the group.
A large expanding PBAoE will appear under Soulless Horror. When the circle fills, the attack goes off and deals medium-high damage to anyone standing in it. This is followed by a wide ring that appears outside that circle and immediately does extreme damage to anyone caught in it.

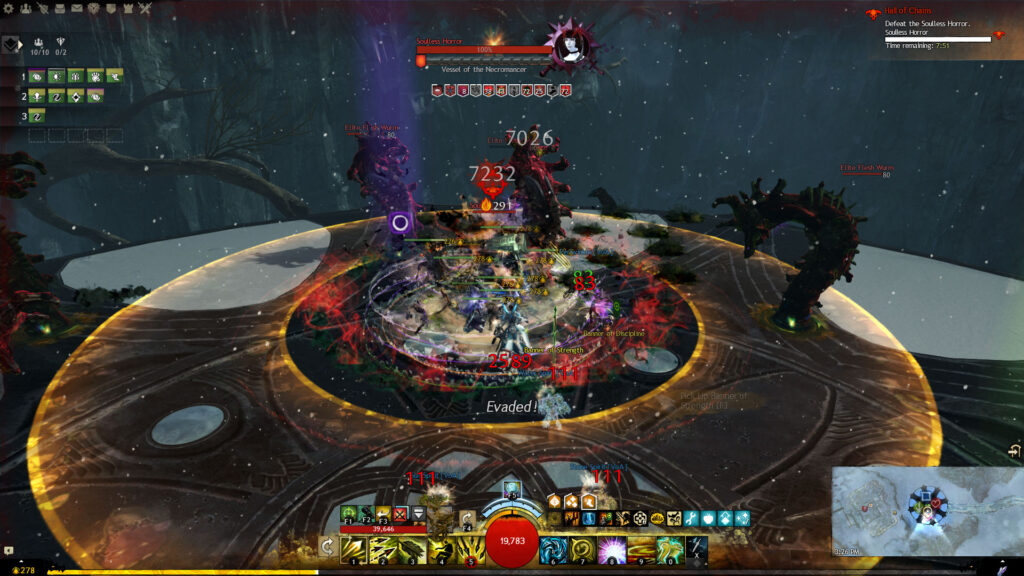
It’s easy to Dodge or Block the first circle since the tell is so long. Don’t get caught in the follow-up ring, especially if you’re running to avoid a wall or Tormented Dead AoE.
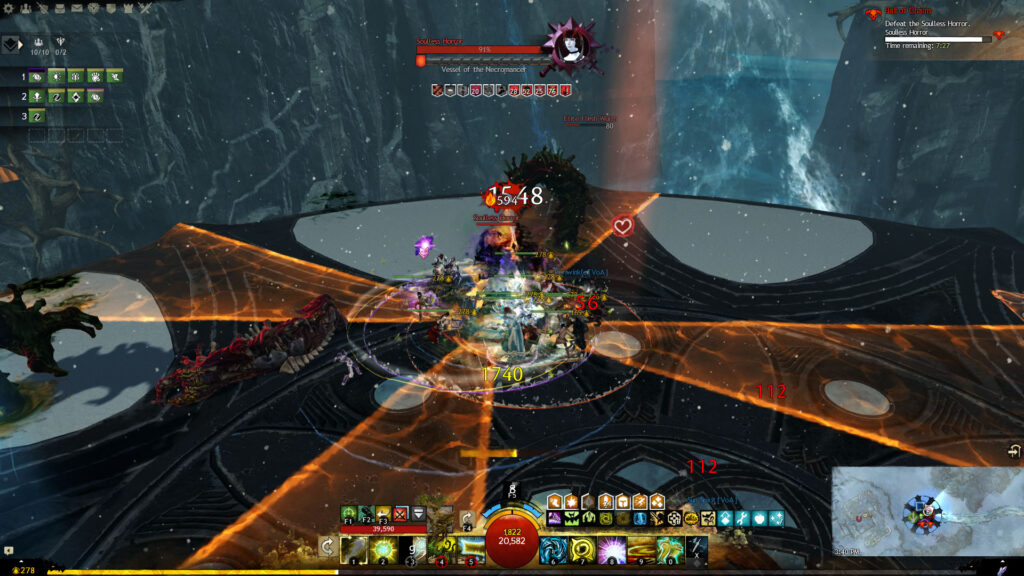
Starting at 7:30, Soulless Horror will use Quad Slash. She’ll create four conal AoEs that do a little damage three seconds later. She follows this with the same pattern, rotated 45°. Stand between the blades to avoid it and then sidestep to avoid the next set.
At 66%, Soulless Horror will say, “The dead hunger,” and use Death Bloom for the first time. This attack is like Quad Slash, but she’ll create all eight AoEs at the same time. If you’re right next to her, there is no room to stand between the blades. You’ll have to back up a fair bit, Dodge, or Block to avoid it. These AoEs do a lot more damage than Quad Slash, so try not to get hit. She’ll use it every ~28 seconds unless she's doing something else.
Right after the first Death Bloom at 66%, Soulless Horror will levitate and red and green energy will swirl around her. Her defiance bar will also unlock. If it isn’t broken within just shy of seven seconds, she’ll inflict everyone with Fear and the Howling Death effect. Even if you aren’t Feared off the platform, everyone will take up to 100k damage a couple of seconds later, wiping the squad. There is no way to avoid or mitigate this damage except by breaking her bar to interrupt the attack.

She’ll use Howling Death after every other Death Bloom, so the first, third, and fifth, etc. Therefore you’ll need to break her bar at 66% and about every minute thereafter.
If you don’t kill the Soulless Horror within 8 minutes, she becomes  Enraged and does 200% more damage.
About Phoenix Uprising • Recurring Series • Support the Site • Contact • Editorial Guidelines • Privacy Policy
© 2022 Phoenix Uprising. All rights reserved.
About Phoenix Uprising • Recurring Series • Support the Site
Contact • Editorial Guidelines • Privacy Policy
© 2023 Phoenix Uprising.
All rights reserved.