


Welcome to my guide for the Guild Wars 2 raid boss,  Cairn the Indomitable, the first encounter in Bastion of the Penitent (Wing 4). This is a detailed guide on the mechanics of the fight including various strategies that cater to everyone from beginners to experienced raiders. If you’re brand new to raiding, I recommend reading my Path to Endgame guides first.


Cairn is generally seen as an easy raid boss, but if you’re not careful, you can experience a domino effect of  Downs. Cairn is considered to be in a constant state of movement, so Torment will always tick for extra damage. The fight has no phases, making condition damage builds highly effective.
No one should have  Projectile Reflection, although projectile destruction and conversion are fine. Be careful of sneaky reflects such as , the final skill in a
  Daredevil's staff auto-attack chain.
 Glider Basics mastery. Every player needs this to get to Cairn's platform.
 Revival: Players might go Down while away from the squad or multiple players can go Down to
  Shared Agony, so revivability is useful.
Before reaching the cliff overlooking Cairn's platform, players will pass through a waterfall and gain a special action skill called  Celestial Dash, which works similarly to a
  Druid's (Staff 3). It is a ground-targeted ability with 1,200 range that transforms you into a wisp and quickly moves you to the selected location. You
  Evade all attacks during the animation.
When the fight starts, players will gain one stack of a debuff called  Unseen Burden every second. This slows your movement speed by 1% per stack and stacks up to 99. These stacks can be removed and shouldn’t be an issue. You can monitor your stacks by looking at the purple clock icon on your effects bar. This debuff does not affect your movement speed during
  Dodges, mobility skills, or the aforementioned Celestial Dash, so use these to your advantage.
At 7:37 and every 20 seconds thereafter, the farthest player who does not already have it will gain the debuff Shared Agony, indicated by a purple chain icon on their buff bar. This player will receive a red PBAoE and take 10% of their maximum health in damage every three seconds. This damage cannot be  Blocked, Evaded, or mitigated via
  Protection or other damage reduction, but
  Invulnerability will negate it.

Every three seconds, when the agonized player takes damage, the game will check if there are other players in the red circle. If there are, they will each take damage as follows:
Shared Agony.Because of this, agonized people should immediately move away from the group. When multiple people have the debuff, they should be careful not to stand in each other’s circles, although they may overlap. Downed players with Shared Agony and people in their circle won’t take damage, so it's safe to resurrect agonized players should they go Down.
Shared Agony lasts for one minute, meaning a maximum of three people can have it at once. When a fourth player gains the debuff, the player who had the debuff for the longest loses it.
There are three ways to deal with this mechanic:
Cairn's mechanics  Knockback varying distances, meaning sometimes a player may get the debuff accidentally even when someone was trying to bait it. Cairn's programming into never giving out agony by having all players stand inside of or intersecting its hitbox. This can be difficult to pull off as you’ll need to avoid every
  Displacement circle (and not move away from Cairn to do so). You also must use the No Greens strategy described below to handle the
  Spatial Manipulation mechanic. If you’re attempting this strategy and someone does get agony, it can be dangerous if you brought fewer or no healers.
 Cairn is situated in the middle of a floating platform. It will never move, except during one attack. If you fall from the platform, you will die.
Speaking to Glenna after the conversation at the beginning of the instance and choosing “All right. Lead the way,” will cause her to start running down the hill. When she reaches the cliffside overlooking the platform, she will say, “Do you see that?” and Cairn will spawn shortly thereafter.
You can have nine people wait on the empty platform while one player triggers Glenna and runs down ahead of her if you wish. This way everyone will be able to start killing Cairn as soon as it spawns. If you resign on the platform and are resurrected there before the fight starts, you will lose your special action skill. You have to respawn at the start and run through the waterfall to reacquire it.
Otherwise, the fight will begin as soon as the first person lands on the platform. If you wipe, Cairn will remain spawned the next time you go down the hill.
Cairn does not have a  Toughness tank. It always performs its auto-attack chain facing the farthest player. The first part of its chain is Impact, in which it swings its left arm, then right arm. This will only hit players in close proximity.
The second part of the chain is 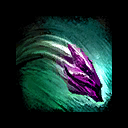 Meteor Swarm. Cairn will swing its left arm and create a fan of spiky pink projectiles (colloquially called starfish) that do a little damage, Knockback players a short distance, and add stacks of Unseen Burden. The projectiles will not hit nearby players within the glyph in the center of the platform unless they are Reflected. There are two strategies to deal with this.

You can have a kiter stand on the outside of the platform opposite the squad to bait Impact and Meteor Swarm. The kiter will have plenty of room to strafe between starfish or Dodge them, but they need to be a healer since they will be on their own and forced to take constant agony. Good options include a Druid since they can convert projectiles with (Staff 5), a  Tempest with a staff, or a
  Revenant using (Legendary Centaur Stance).
This strategy prevents the melee stack from taking any damage, but you lose that player’s healing and boons since they’re so far away. It’s also dangerous for other players to resurrect them if they're Downed out there.
A more common tactic is to have everyone stack in the center glyph. Agonized players can move around to the opposite side but remain close enough so they are not hit with projectiles. This enables everyone to attack at melee range and share boons more easily. Often squad leaders will place a marker where the main squad will stack and three more markers where agonized players can stand.
Also called: Teleports
Every four seconds, Cairn will create three starry black circles with red-orange borders nearby. Two seconds later, these AoEs will detonate, teleporting any players inside to a random location on the platform within 1,000 range (like the Vale Guardian’s Unstable Magic Spike). If you are standing in one, a gold-orange border will appear around your screen.

Early in the fight, you can walk out of the AoEs, but as you accumulate more stacks of Unseen Burden, it’s better to Dodge or Evade them instead. If you are teleported, you should immediately run back toward the center of the platform, Dodging if you see Cairn throwing starfish your way. If Celestial Dash is available or you have a movement skill, use it. The longer you’re near the outside of the platform, the worse off you are.
Also called: greens
Occasionally Cairn will cross its arms and bow its head, drawing in golden energy to charge an attack called Spatial Manipulation. When released, it will do high damage,  Float players for two seconds, and add 25 stacks of Unseen Burden. Several starry indigo circles with green borders will appear around the platform. Standing in one gives players
  Gaze Avoidance, protecting them from the attack and removing 25 stacks of Unseen Burden when it goes off. You can also use Invulnerability to negate all effects.

Cairn begins the fight with a single auto-attack chain and then creates one medium green circle to show players how the mechanic works. Apart from this first green, there are three different types of Spatial Manipulation.

The green circles spawn when Cairn starts charging the attack. Each one will have a number of orbs over it: either four, two, or one. The orbs indicate the minimum number of players that must be standing in the circle for its protection to take effect. The circle’s size also corresponds to the number of orbs/players, with the largest needing four and the smallest only one. The circles that need only one and two players may look similar, but there is a slight size difference.
After six seconds, Cairn will release the energy. There is another opaque green circle layer under the starry texture that shrinks to indicate the remaining seconds people have to get in a circle.

The main squad should try to go to the four-player or a two-player circle, saving solo circles for anyone with Shared Agony. The four-player circle is large enough for an agonized player to stand on the edge while others pile up across from them.
There will always be one circle that needs four players and two circles each that require one or two, but the pattern the circles spawn in changes every 25% health threshold. The theme is that all the circles get gradually closer to the outside of the platform, making it more likely players returning to the center afterward will be hit by Meteor Swarm.
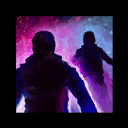
Cairn will teleport five times to different spots on the platform, leaving behind a medium green circle each time. Any players caught in its path will take moderate damage and be Knocked Back 750 units. You can tell where Cairn is teleporting because it will face that direction and a distorted purple-gray rift will appear at the next location. Three seconds after Cairn appears back in the middle, it will unleash Spatial Manipulation.

Everyone should wait until Cairn is back in the middle to move to a green since its pathing may intersect a circle already on the platform, knocking you out of it.
The pattern Cairn teleports in changes every 25% health threshold. The theme is that Cairn's pathing gets gradually closer to the center circle, making it more likely players on the melee stack will be hit and knocked away. Above 50%, Cairn always teleports to the center last, meaning there will be a green circle in its hitbox. Below 50%, Cairn just appears in the middle after its last teleport, meaning all the green circles are scattered out of melee range.
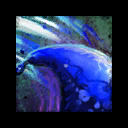
Also called: sword, pool noodle
An arrow will appear from the center to the outside of the platform. Cairn will then slam its right arm down, creating a sword, and sweep it ~400° counterclockwise. Anyone caught will take moderate damage and be Knocked Back 600 units. You can avoid it by Dodging to the left. Those under or just to the right of the sword when it drops risk being Knocked Back twice. Large green circles spawn as Cairn lifts its arm, and three seconds later, it will unleash Spatial Manipulation.

Everyone should focus on Dodging this attack and then move to a green. Alternatively, you can Celestial Dash to a circle to your left as the arm comes around since the SAK has Evade frames.
The pattern the circles spawn in changes every 25% health threshold. The theme is that one fewer circle spawns each time, starting with eight and ending with only five, making it so players may have to travel farther to get in a circle.
The three Spatial Manipulation attacks operate on a cycle. Cairn will always use them in order: Numbered → Energy Surge → Orbital Sweep. From 100–75%, there will be 30 seconds between mechanics. The first cycle after 75% will similarly have 30 seconds between mechanics, but for every cycle after that, there will only be 20 seconds. The cycle will also restart with Numbered greens every 25%, so squads with great DPS might never see Orbital Sweep while those with exceptional DPS might never see Energy Surge either.

Some groups choose to ignore Spatial Manipulation altogether by remaining in the center and using  Stability before the attack goes off. Stability negates being lifted, the damage can be healed immediately, and although everyone will take the Unseen Burden stacks, the only reason to run or move long distances is if you’re going to greens. Some squads may still do the initial green at the beginning and potentially the one after that.
Usually, squads accomplish this with  Firebrands using and
  Epilogue: Unbroken Lines ( 5). Other skills such as (from ) or (shared with ) can also work, but their radii are much smaller so they might not be shared with agonized players. is also an option, but since it creates a road in a straight line and people tend to be arranged circularly, it comes with a similar problem.
The obvious benefit to the no greens strategy is that it allows your squad to be attacking Cairn at all times, significantly increasing DPS. Since agonized players can always stay in the middle too, it’s less likely their heals will be misplaced as they move toward a green. The downside is that it’s harder to avoid Displacement, especially at the end.
Starting at 25% health, a new mechanic will be added at the end of the attack cycle. This mechanic does not precede Spatial Manipulation, but it is nonetheless put on the same timetable as the other mechanics.
Cairn will slam one arm down, then the other, then both at the same time, creating a circular wave of celestial energy that cascades outward, forming two larger waves in succession. Each wave will coalesce into black and pink rock; it causes a long-distance Knockback and heavy damage. It’s possible to be launched by the first wave and then hit again by the third, knocking you from the platform.

You can Dodge this attack, but as the first wave encircles the etched glyph in the middle, you should be safe standing near Cairn. You’ll probably be here already as this is also the safe zone to avoid Meteor Swarm.
If you don’t kill Cairn within 8 minutes, it becomes  Enraged and players can no longer remove stacks of Unseen Burden by standing in green circles.
About Phoenix Uprising • Recurring Series • Support the Site • Contact • Editorial Guidelines • Privacy Policy
© 2022 Phoenix Uprising. All rights reserved.
About Phoenix Uprising • Recurring Series • Support the Site
Contact • Editorial Guidelines • Privacy Policy
© 2023 Phoenix Uprising.
All rights reserved.