

You’ve chosen a profession; you have a general understanding of your build. Now it’s almost time to dive into Guild Wars 2 endgame content. But then you look at the LFG postings and realize you don’t know what a KP or LI is and you’re afraid faking it ‘til you make it won’t cut it.
Of course, you’ll want to read up on the bosses before you attempt them, but there are some mechanics that apply to several or all encounters. Learning them ahead of time will help you avoid panic and focus on specific boss mechanics. This guide gets down to the nitty-gritty of what you need to know, have, and bring going into any raid or strike.
Raids and strike missions are similar in that they are both 10-player instanced content for level 80 characters. They both have encounters that require you to coordinate with your teammates to succeed. However, there are a couple of differences:
A boss is usually one, but possibly two or more big bads you need to confront and kill to end the fight. They may have extra mobs that join them, but the bosses are the ultimate goal. Bosses are usually fought on a platform or in a room, reducing the playable space.
Bosses always have timers. When the timer runs out, you will hit enrage. There are two different kinds of enrage. There may be an instant wipe mechanic that kills everyone in your squad, forcing you to start again. This is known as a hard enrage. But more often than not, bosses will gain an  Enraged effect when the timer ends, also known as a soft enrage. Essentially this means the boss has grown angry fighting you for so long, so it starts doing increased damage (either 200% or 500% depending on the boss) and some of the mechanics may be harder to manage. It isn’t impossible to kill a boss while they’re Enraged, but it won’t be pleasant. Bosses can both gain the Enraged effect based on the timer and have a hard enrage mechanic.
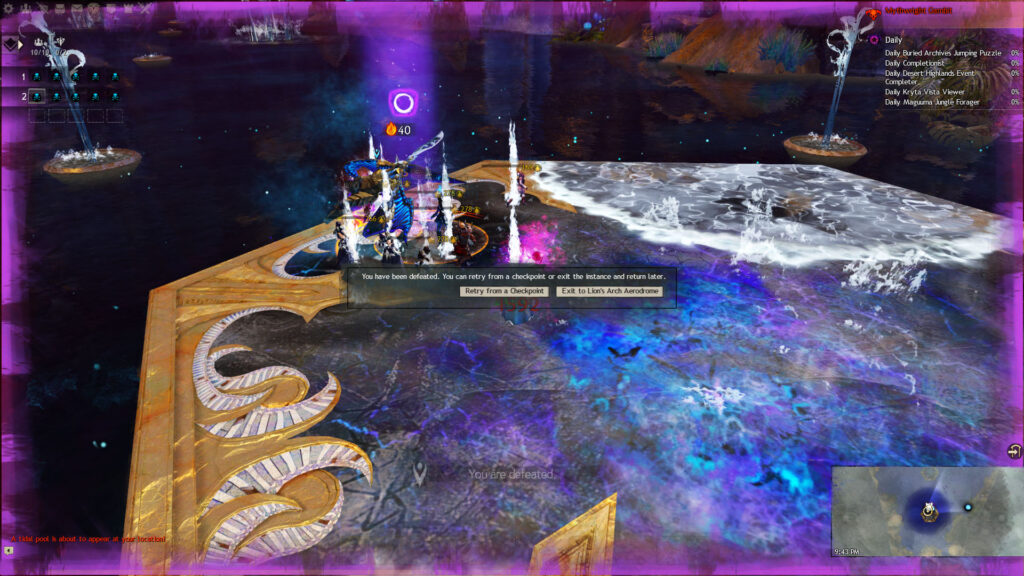
There are also general encounters sometimes known as events: something you have to overcome such as a maze, an NPC escort, or fleeing into a new area. These may be combined with less powerful bosses to make hybrid encounters. Unlike bosses, events usually happen over a large, predefined area. Because of this,  Swiftness, movement skills, and a
  Mesmer's or
  Thief's are invaluable for events.
It is essential that you understand the mechanics in this section to participate and excel in raids and strike missions. I can’t overstate the importance of knowing these things, so if you read nothing else, read this section.
 Dodging is something every profession can do in Guild Wars 2 from level 1. It allows you to evade many types of attacks and it also moves your character faster and farther than running can in the same amount of time.
Above your health orb are two yellow bars. This is your endurance. Dodging once consumes one bar of endurance and it refills over time. There are a few things that affect endurance regeneration:
 Vigor: a boon that increases endurance regeneration by 50%
 Weakness: a condition that decreases endurance regeneration by 50%
 Might on Dodge and increase your endurance regeneration by 10%
There are currently three elite specializations that affect Dodging as well:
 Daredevil (the Heart of Thorns Thief spec) have . They gain an additional endurance bar, allowing them to Dodge three times in succession before waiting for it to refill.
  Mirages (the Path of Fire Mesmer spec) have . They can Dodge in place unless they are
  Immobilized or disabled, whereas every other profession moves while dodging. This is useful to avoid accidentally dodging off platforms and for avoiding brief attacks, but must be combined with regular movement to get away from large or lasting AoEs.
 Vindicators (the End of Dragons
  Revenant spec) have . They leap and damage enemies when they land.
In ideal circumstances, you wouldn’t have to Dodge anything in encounters since that can cause dips in your DPS or interrupt your skill rotation. But encounters are not ideal. You won’t always have players throwing  Aegis on you and you’ll often find yourself Dodging to get somewhere faster and avoid attacks while doing it. Learning the timing of attacks and how long your evade frames last while Dodging is invaluable in raids and strikes.
Below the health bars of champion and above-ranked enemies is something called a defiance bar, or break bar. I’ll be speaking about these only in terms of raids and strikes for simplicity. Sometimes they are grey with slashed lines through them. This means they are locked — crowd control skills will have no effect.
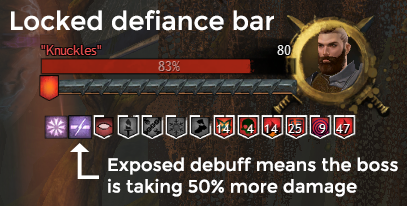
Sometimes they turn blue for a short duration. This means any crowd control skills you use will deplete the bar. If you successfully deplete the bar in time, you will ‘break’ them, avoiding or ending a mechanic or causing everyone to do increased damage to that enemy for a period of time. If it’s the latter, the boss will usually have a visual animation to indicate that it is  Stunned.
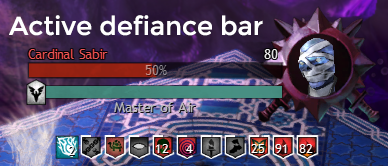
With few exceptions, it is incredibly important to break a defiance bar when it turns blue. If you don’t, it might mean an ally dies, your entire squad wipes, a boss stays  Invulnerable, or you all take a huge amount of damage from an attack. In some circumstances, you may want to delay or avoid breaking the bar to give your squad more time to DPS and force a boss into a new phase.
That said, let’s talk about how to break a defiance bar: crowd control (CC). Crowd control is divided into two types. Soft CC causes an impairing condition and ticks over time, making a small contribution, but also preventing the defiance bar from regenerating. Soft CC includes  Blind,
  Chill,
  Cripple, Immobilize,
  Slow, and Weakness. All of those conditions except for Immobilize and Slow will probably already be on a boss when it’s time to break a bar.
Hard CC would normally cause a disabling physical effect on an enemy but takes a big chunk out of the defiance bar instead. Hard CC includes  Daze,
Daze,  Float,
  Knockback,
  Knockdown,
  Launch,
  Pull,
Pull,  Sink, Stun,
  Fear, and
  Taunt.
Sometimes good crowd control happens to be part of a rotation while other times you might have to swap out skills to deal with break bars. I can’t go over every decent CC skill here, but I do want to talk about some of the most potent:
Thief elite skill. By itself, it only does 150 break bar damage, but it is shared with up to four nearby allies. This means it routinely causes 750 break bar damage in a raid or strike. Guardian utility skill. It pulses five times, for up to 750 break bar damage, but when traited with , it will pulse seven times, for a total of 1050 break bar damage.
 Necromancer utility skill. It does 150 break bar damage, but if the player is positioned inside a boss with a large hitbox, such as Gorseval or Samarog, it can hit up to five times, doing 750 break bar damage. Revenant's Staff 5. It does 150 break bar damage, but it hits 3–9 times, meaning it can do up to 1350 break bar damage against a boss with a large hitbox. This makes it potentially the most potent CC in the game.
Going into downstate happens — it’s unavoidable. But you should know what to do while you’re there or when your teammate is.
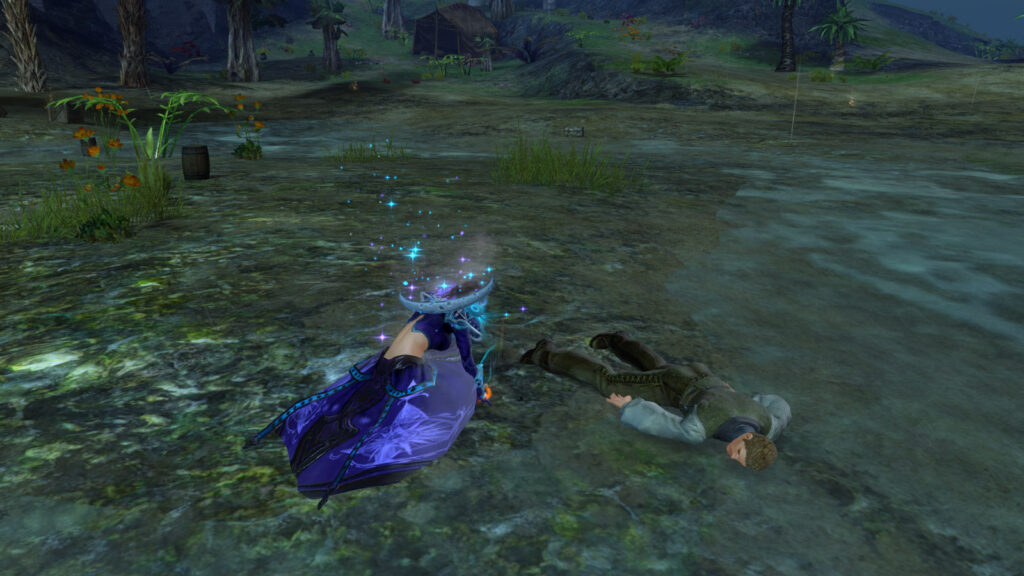
If you’re  Downed:
 Bandage to help yourself up. It’s wasted if you go down in a pulsing AoE or you’re in the thick of things.
  Ranger, use as soon as possible. On a Necromancer, you should focus on using since it helps you get up a lot faster. On a
  Warrior, only use if you’re close to dying or you could save a few others with if you’re up temporarily.
If your teammate is Downed:
Dodging or  Blocking while resing. An exception might be if you have a
  Heal Scourge in your party since they resurrect people with more than 50% health, but check with your commander or group before making this assumption.
 Defeated is better than having two Downed.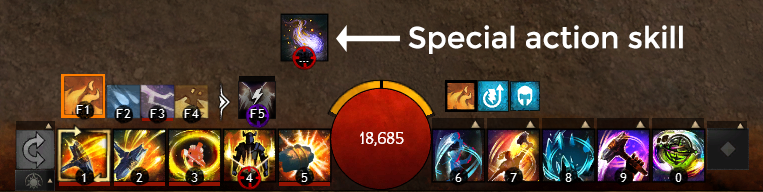
On some bosses, you receive a special action skill (SAK) above your weapon skill 5. You need to bind this skill to an easy-access button because you will need to use it quickly or on demand for most bosses. If you don’t properly use the special action skill you receive, you could screw up a mechanic or even cause your entire squad to wipe.
Raids and strike missions aren’t designed to be easy for most of the player base, so it should come as no surprise that they require a lot of cooperation and communication between players. Most squads will use voice comms of some kind, like Discord. Often, the person organizing the squad will make calls for important mechanics but anyone who’s comfortable with this can do so.
Consumables, including food and a utility item, are highly recommended and some groups may expect them. Every profession and build might have different meta consumables (often just referred to as food) that augment their role. Before going into endgame content, you should make sure you have at least a few of each since they can be the difference between getting a kill or not.
Check which consumables you need prior to choosing a profession using Snow Crows. You can also make shareable ascended food as a Grandmaster Chef (cooking 500). The GW2 Wiki may specify a consumable has the same bonus as another or list equivalents in a “See Also” section at the bottom of the page.
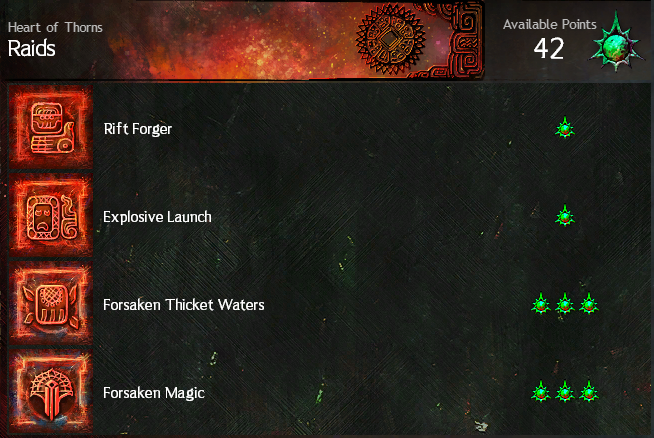
Masteries and raids were both introduced with Heart of Thorns. You may need a mastery during a fight or to progress between encounters. There are also specific masteries that help you progress in the Forsaken Thicket wings. Many encounters require you to use a mount or glide to get to a platform. For these, you may not need the mastery if you have a Mesmer to Portal you across, but you really should get the mastery anyway.
This guide is part of my Path to Endgame series to help Guild Wars 2 beginners take the next steps toward raids and strike missions. I recommend you read Boons, Healing, & Utility next.
About Phoenix Uprising • Recurring Series • Support the Site • Contact • Editorial Guidelines • Privacy Policy
© 2022 Phoenix Uprising. All rights reserved.
About Phoenix Uprising • Recurring Series • Support the Site
Contact • Editorial Guidelines • Privacy Policy
© 2023 Phoenix Uprising.
All rights reserved.