


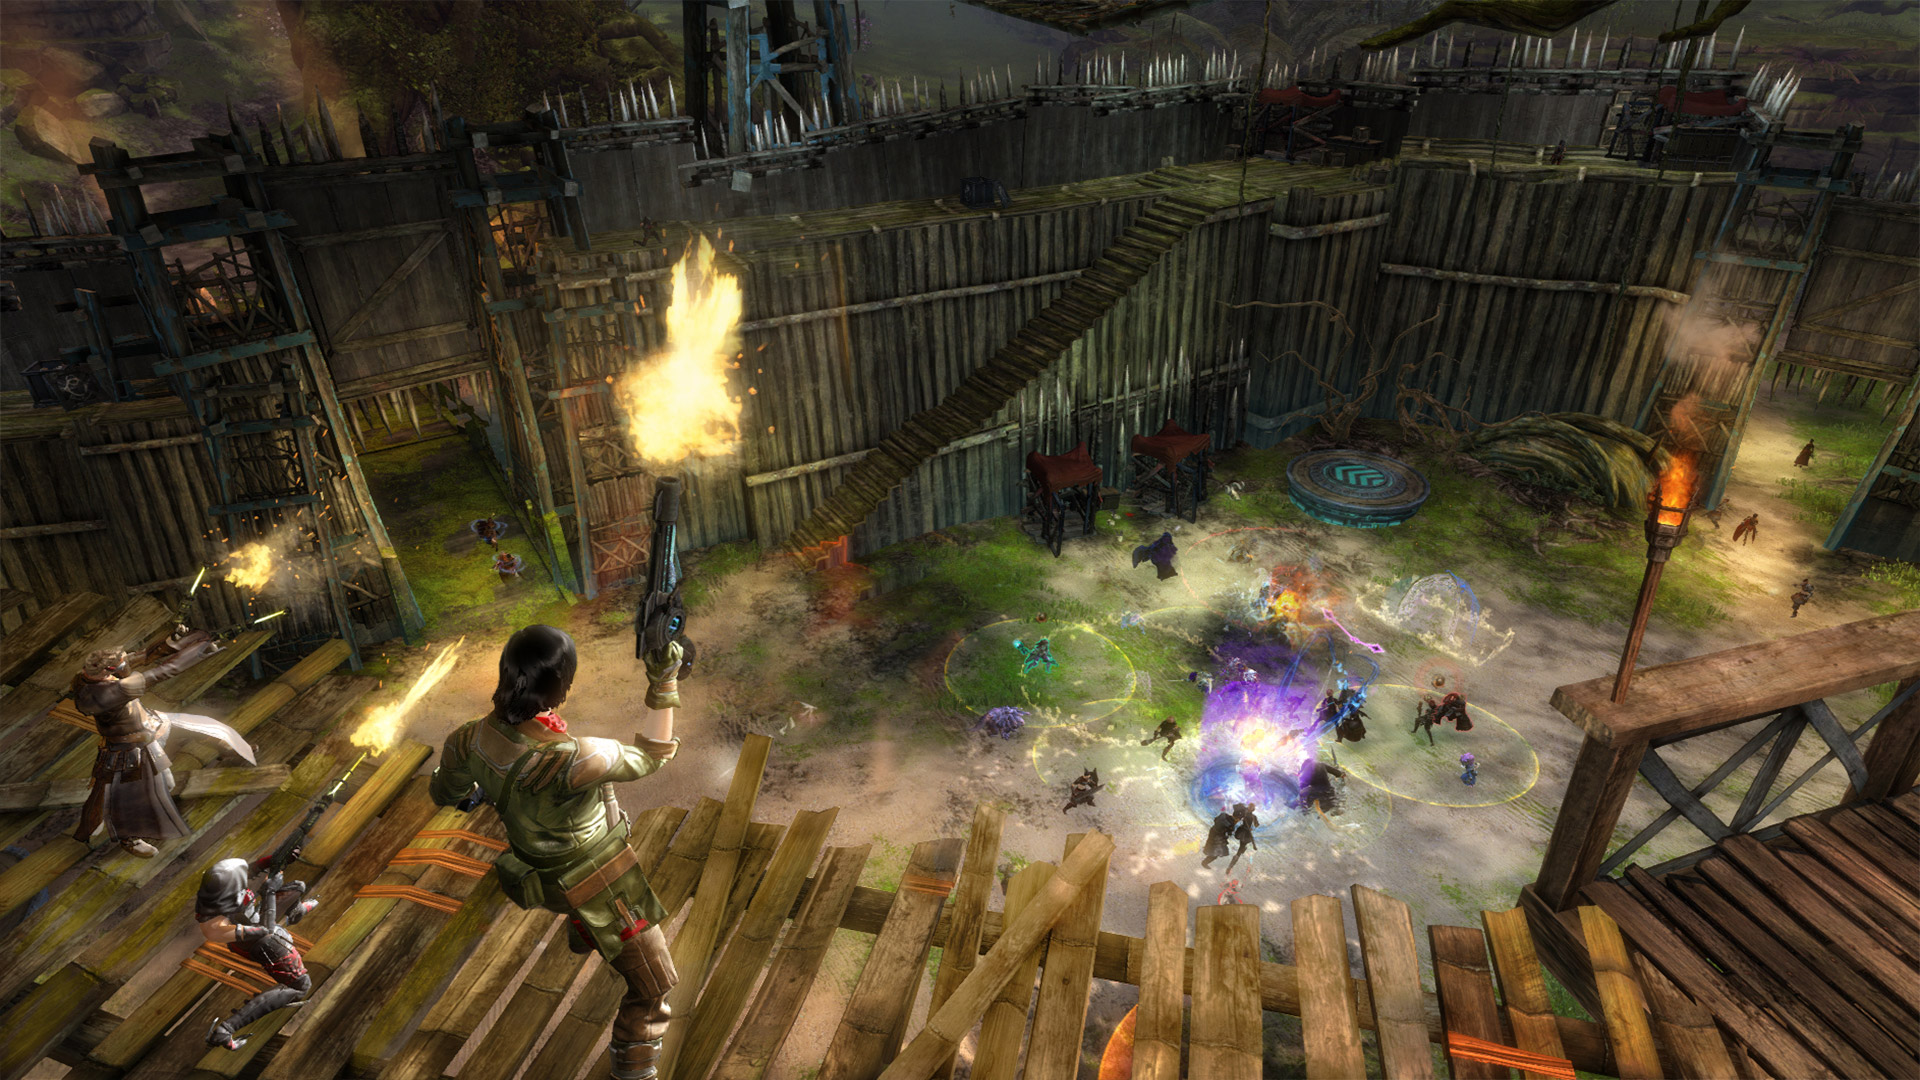
Welcome to my guide for the Guild Wars 2 raid event, Prison Camp (aka Bandit Trio), the second encounter in Salvation Pass (Wing 2). This is a detailed guide on the mechanics of the event including various strategies that cater to everyone from beginners to experienced raiders. If you’re brand new to raiding, I recommend reading my Path to Endgame guides first.
The Prison Camp is a scripted encounter similar to Spirit Woods with three bandit mini-bosses that spawn during the event (thus the ‘Bandit Trio’ alias). Once the final boss,  Narella, dies, the event ends. Since this event still involves killing mini-bosses, you can use a similar comp to a boss encounter.
 Glider Basics mastery. The player(s) responsible for killing the bombardiers should be able to glide, but it’s good for everyone to have.
 Explosive Launch mastery. This is necessary to prevent the player(s) responsible for killing the bombardiers from taking damage when being launched.
 Nuhoch Stealth Detection mastery. The majority of players should have this so they can see the bandit saboteurs, as you must kill them to complete the event.
 Berg, the saboteurs, and the bombardiers.
 Projectile Destruction: You can destroy and reflect the bandit snipers’ attacks.
 Pulls: Since this encounter has waves of mixed melee and ranged enemies, pulls are your best bet to group them and kill them quickly.
Before beginning the event, your squad should clear the groups of bandits outside the prison camp. If you’re attempting a speed clear, you don’t need to kill them, but most groups do for general clears or progression.
The goal of this event is to protect prisoners inside the camp and kill the three bandit overseer mini-bosses: Berg,  Zane, and Narella. The picture below includes labels of all the specific locations in the prison camp.
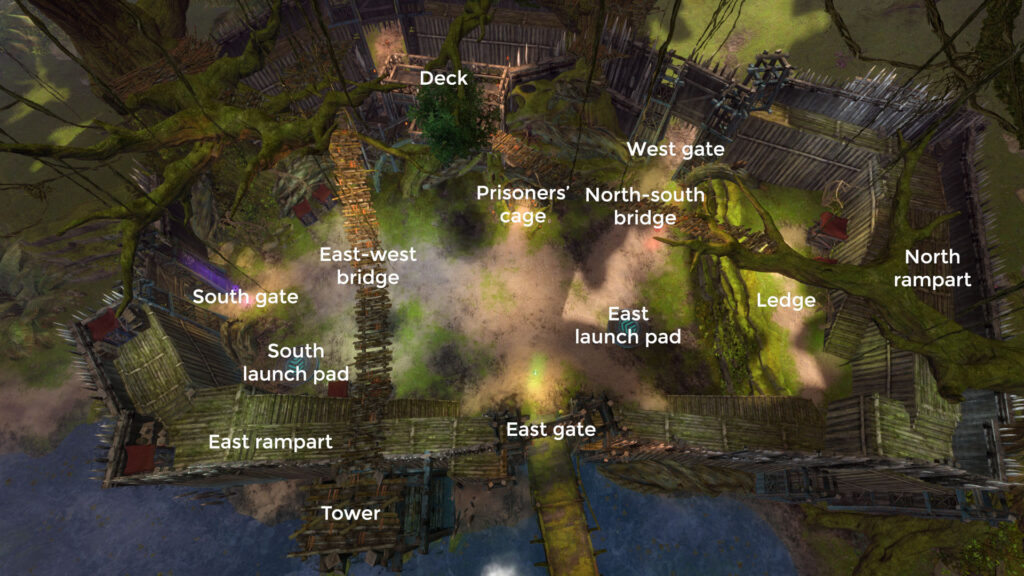
There is a cage in the prison camp on the ground level located near the west gate — it’s nestled in thorns and has several torches outside of it. This is where they’re keeping the prisoners. When the event begins, you’ll be able to see the cage’s ‘health bar’ in the upper right-hand corner of your screen. If the cage is destroyed at any point during the event, the encounter will fail and your squad will need to reset.
There are many things that can damage the cage. Since they all occur on a schedule, I’ve included a timetable below. You don’t need to remember any of the times, as there are warnings before each mechanic occurs.
| Warning | Actual | Mechanic | Location |
| 6:55 | 6:50 |
 Berg Berg |
East gate |
| 6:25 | 6:03 |
 Saboteur Saboteur |
West gate to cage |
| 5:23 | 5:05 |
 Mortars x1 Mortars x1 |
Launchpad outside camp |
| 4:55 | 4:50 |
 Zane Zane |
South gate |
| 4:23 | 4:05 |
Mortars x1 |
Launch pad outside camp |
| 3:52 | 3:30 |
Saboteur |
West gate to cage |
| 3:21 | 3:04 |
Mortars x3 |
Launchpad outside camp |
| 3:21 | 2:59 |
Saboteur |
East gate to cage |
| 2:52 | 2:47 |
 Narella Narella |
West gate |
| 2:51 | 2:29 |
Saboteur |
West gate to cage |
| 2:20 | 2:15 2:05 |
Mortars x2 |
Tower Raised deck |
| 2:20 | 1:58 |
Saboteur |
East gate to cage |
| 1:50 | 1:28 |
Saboteur |
South gate to cage |
| 1:20 | 0:58 |
Saboteur |
West gate to cage |
By default, any bandits that enter the prison camp will run straight toward the cage to try to destroy it unless they are attacked or there are players in their way, in which case they will aggro on them instead.
Bandit sappers will tag players with  Sapper Bomb like in the Sabetha fight. These bombs give players a special action skill that they can use to launch players standing on launch pads or throw at bandits to do damage to them. If a player uses their SAK to throw the sapper bomb at the cage, it will damage the cage as well since the skill’s origin was an enemy.
Throughout the encounter, bandit bombardiers will attempt to set up mortars, usually outside the prison camp. A warning message: “The enemy is preparing mortar strikes,” will appear on your screen ~15 seconds before they start building the mortars. The bombardiers also have crossed swords over their heads to make them stand out.
When they kneel to build the mortars, they will gain a defiance bar. If you break the bar, they will be interrupted and start attacking you instead. If the bar is not broken, the mortars will fire into the camp in quick succession, creating huge AoEs which can damage the cage and inflict heavy damage on players. If you fail to break the defiance bar, you must destroy the mortar, or else your squadmates will face a lot of pressure inside. Whether the bombardiers are interrupted or allowed to set up the mortar, they will never attempt to build another one, so you can ignore them and return to the prison camp after breaking their bar or destroying the mortars.
How many bombardiers and their location varies each time they spawn:
Narella's journal is located).Players in charge of this role can use the two launch pads inside the prison camp to reach their destination quickly. They can also run to the locations, but this is slower. There is a crate of bombs next to each launch pad so you don’t have to wait for a bandit sapper to tag you.
For the first three sets, you can take the launch pad near the south gate, as it will put you near the bombardiers. When they’ve been taken care of, you can take the launch pad to get back in. For the last set, you can take the launch pad near the east gate instead, as it will put you on the opposite side of the bridge from where the first bombardier spawns. You can also take the south launch pad and glide onto the tower mid-launch. The last boss, Narella, might be (almost) dead at this time, so you may not have to do these. Nevertheless, if you see the warning message, you should prepare to go.
Groups usually only dedicate one person to this role, but more inexperienced groups may assign two people to do the last two sets since multiple bombardiers spawn. Any profession can do this task, as long as they have the right weapons equipped or CC skills.
Below is a video of someone doing mortars on every profession to give you ideas about how to handle the bombardiers’ defiance bars. It is, however, from 2016, so you might find a more effective way to deal with them using new elite specializations.
At designated times, bandit saboteurs will enter the prison camp from one of the three gates. A warning message: “Saboteurs incoming. Protect the prisoners,” will appear on your screen ~20 seconds before they arrive. The prisoners will yell out which direction they’re coming from. Unlike the majority of the bandits, saboteurs will ignore players, even if they’re attacked. They enter the camp stealthed (invisible to players without Nuhoch Stealth Detection) and have crossed swords over their heads to make them stand out.
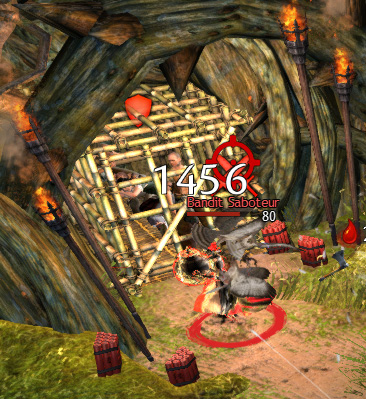
When they reach the cage, they unstealth and start to place a bomb, also gaining a defiance bar. If you break the bar, it will prevent the saboteur from arming the bomb and they will turn their attention to the players. If the bar is not broken, the bomb will explode and do massive damage to the cage. They can still attack the cage like regular bandits if not killed.
They are susceptible to damage and all manner of CC on the way to the cage as well, so it’s possible to kill them before they even reach it. However, they are single-minded in their determination to reach the cage, so if they aren’t  Stunned or
  Immobilized, don’t expect them to linger.
Many groups assign one player to attend to the saboteurs, but it is everyone’s responsibility to ensure they don’t blow up the cage.
By default, the bosses will aggro on players instead of the cage. The first two bosses, Berg and Zane, have AoE attacks that can damage the cage. Narella's attacks will not damage the cage, but she poses the biggest threat to players and things are more hectic while she’s out, so it’s still likely the cage will take damage at this time. See the sections on each boss for more information on how to prevent them from damaging the cage.
Entering the prison camp from one of the three gates or by dropping down from above starts the event. When the event starts, the three gates will close, bandit snipers will spawn on the bridges and ramparts, and other bandits will spawn on the ground.
Certain objects in the environment will also become interactable. These include:
These are intended to help you defeat the bosses later in the fight. You do not need to use these objects (and indeed there is an achievement not to use them), but it makes killing the bosses easier and faster. I’ll number them as I list their locations in the guide.
Squads usually use the launch pad outside the prison camp to get to the tower. From here they will often split themselves by subgroup, with one group staying up top to go across the bridge, and one group gliding down to the ground. If you choose to divide and conquer, here’s what each group can do.
The top group should kill the three snipers along the east-west bridge. After killing those snipers, cross the bridge and two players should pick up the oil kegs there (1+2). There are also five beehives you can try to knock down while doing this:

At this point, you can potentially split up further and have a couple of players glide back under the east-west bridge to the east rampart and kill the two snipers in each corner. The rest of the group (probably the two holding the kegs) can drop down onto the platform below and kill the remaining sniper on the north-south bridge. You can drop a keg using the weapon swap button and pick it up again, but using skill 1,  Throw, will consume the keg. There is another beehive on the underside of this bridge as well (6) that you can knock down.
Once that bandit is dead, the two people carrying kegs can glide over to the grassy ledge and put down the kegs for later use. After that, they can either kill the snipers up there or rejoin the squad on the ground. Everyone else in the top group can now rejoin the squad as well.

The bottom group should drop or glide to the ground and kill the bandits down there. They can also spread out and help kill the snipers on the east or north ramparts. Alternatively, they can run to the east gate and stack in the corner or stack in the corner of the north stairs.
If both groups stack here when they are done killing the snipers on the bridges and bandits on the ground, the snipers on the ramparts won’t have a clear line of sight (LoS) to shoot players. They will start running down the stairs and come around the corner to be able to attack. Sometimes a sniper won’t run down if it was never aggroed on a player in the first place. If this happens, you’ll need to go up the stairs to kill it.
Whether you split up or not, you’ll want to kill all the snipers in the prison camp and start gathering the objects for the bosses if you’re utilizing them. Any beehives already knocked down by players who stayed up top can be picked up and placed near the east gate. If you missed any, knock them down now. There is also a hidden beehive under the platform on the west side to the left of the cage (7) and a beehive over the north rampart in the far right corner (8).
There is one oil keg on the east rampart (3) and two on the north rampart (4+5), one in both the northeast and northwest corners. You can place these oil kegs on the northern ledge with the other two.
You don’t need to do anything with the warg cages yet, but be aware of their locations:
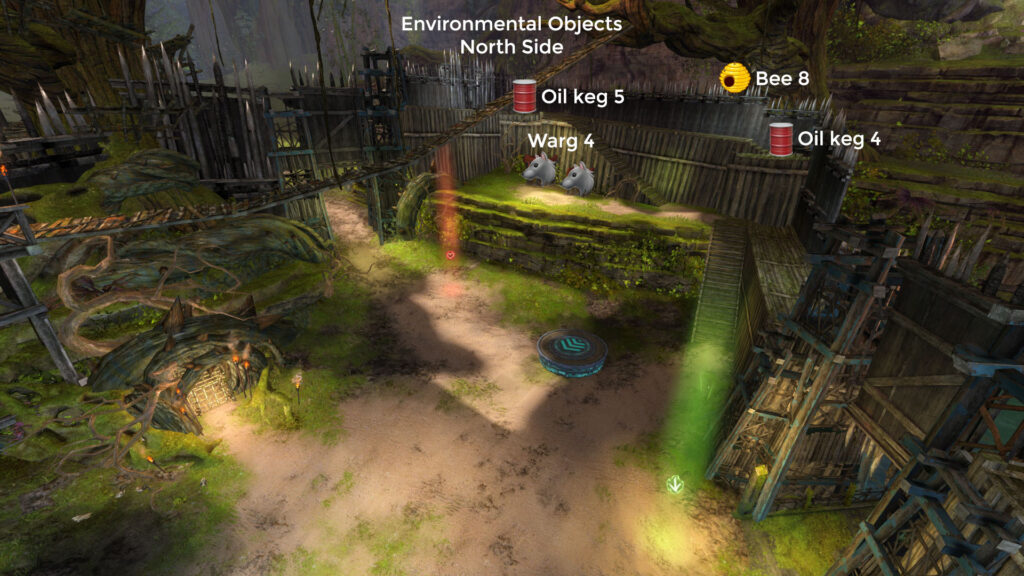

Around this time, the gates will reopen and bandits will start entering in waves. Kill them while you wait for the first boss, Berg.
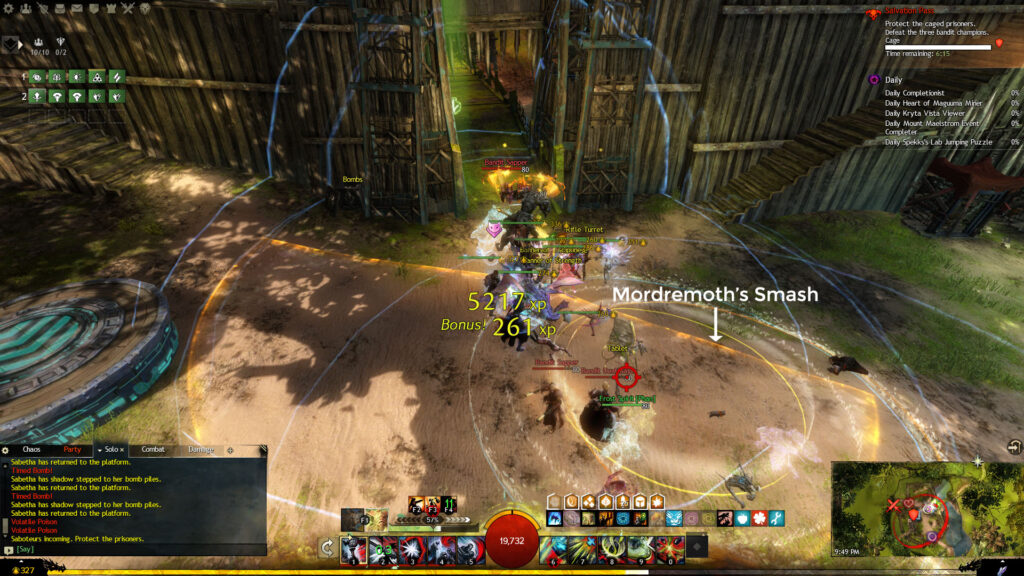
At 6:55, you’ll hear a warhorn sound effect indicating Berg's imminent arrival. He spawns inside the east gate at 6:50. Berg uses a hammer and his signature attack is called  Mordremoth's Smash (ArenaNet totally didn’t duplicate the name of the Mordrem Guard Punisher’s attack). He will lift the hammer over his head and slam it down on the ground in a wide melee AoE arc. Breaking his unlocked defiance bar while he rounds up for this attack prevents it and
  Dazes him for eight seconds.
Berg also happens to be deathly allergic to bees, so it’s a shame there’s an infestation in the camp. One person should pick up a beehive and use skill 1 to throw it at his feet. This splatters honey on the ground and gives Berg the  Not the Bees! effect. This effect increases the cooldown of Mordremoth's Smash from five seconds to 20 seconds and the time you have to break his defiance bar from two seconds to four seconds. While he stands in the honey, he also receives the
  Targeted effect, which causes the attacking bees to do passive damage over time to him. The honey and bees do not affect the players in any way.
Watch under his health bar so you can see when the effects wear off and throw another hive at him. You’ll usually only have to throw 1–3 hives at him before he’s killed. You can save the remaining beehives for later in the fight.
Sometimes Berg leaps to players, so make sure everyone clusters at the east gate. If players stand too close to the cage, it might be caught in his AoE, assuming it isn’t interrupted.
Depending on how quickly you kill Berg, the first saboteur might enter from the west gate. Make sure it doesn’t get a chance to plant a bomb on the cage. When Berg is dead, keep killing bandits in the prison camp and the new waves that enter.
At about 5:00, you can start to stack near the south gate to wait for Zane. There are a few popular stacking locations. One is just inside the gate, another is between the warg cages by the launch pad, and a third is between the warg cages on the west side of the camp. Have one person go up the stairs on the east rampart and prepare to open the warg cages.
At 4:55, you’ll hear a warhorn sound effect indicating Zane's imminent arrival. He spawns inside the south gate at 4:50. Zane's signature attack is  Hail of Bullets. It’s the same as Kernan’s from the Sabetha fight: a salvo of three consecutive pistol shots. The first shot is a 15° cone, the second is 30°, and the third is 45°. Each shot inflicts
  Bleeding and does more damage than the previous.
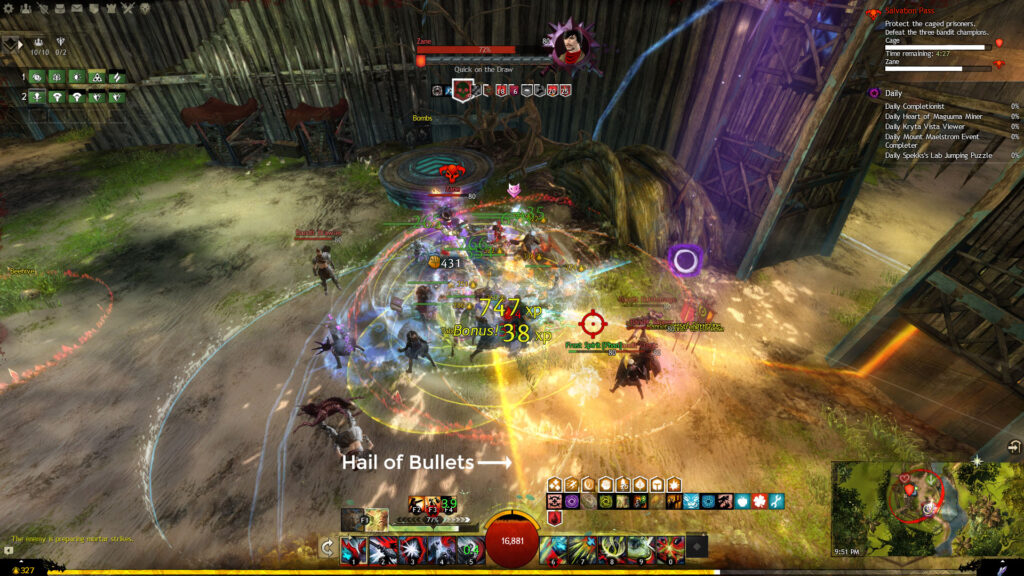
The attack has an extremely long range, does about 20% damage to the cage per shot, and there is no way to interrupt it, so you need to keep Zane facing away from the cage at all times. If you stack between the warg cages on the west side and he follows you there, his shots are incapable of hitting the cage, no matter which direction he faces, as they will all be obstructed.
Zane has been abusing the wargs, and a hungry dog isn’t a loyal one. If you let the wargs out, they will attack Zane (and any other bandits) as long as they are Bleeding. He takes extra damage from warg attacks. How many wargs you release is up to your squad. Some open all eight cages, some only open the six cages on the south side since they are conveniently located, and some only open two or four, opting to save most of the wargs for the last boss, Narella. Any wargs you release will flee the prison camp after 45 seconds.
Zane has another ability called  Unrelenting Assault (similar to the
  Revenant's ) in which he shadowsteps to the farthest target within ~1,000 range, unleashes a few attacks, and leaves behind an AoE field that pulses
  Blind. He uses this attack every ~18 seconds. Unfortunately, this makes it likely he will target your mortar person when they run away to take care of the bombardiers at 4:23. He can also target them as they return and shadowstep up on the east rampart.
If Zane shadowsteps away, it’s usually best to follow him and kill him in the new location, keeping him facing the south gate. The reason is you’ll waste precious time waiting for him to come back to you and a saboteur will be coming in the camp at 3:30 from the west gate. Someone will have to run over to the cage to take care of it, making it likely Zane will face or shadowstep to them.
His likelihood of shadowstepping inconveniently is the reason some groups prefer to tank him next to the gate, so they can attack as soon as he spawns and kill him before something goes wrong. When Zane is dead, keep killing bandits in the prison camp and any new waves that enter.
At about 3:00, you can stack near the west gate to wait for Narella. Alternatively, you can stack by the east gate where Berg spawned. This will make it so that Narella runs down the hill, enabling you to kill her and catch the swarm of bandits nearing the cage in your AoEs. Have one person go up on the ledge and prepare to spill the oil kegs. You can also release any wargs you saved in the cages on the south side now too.
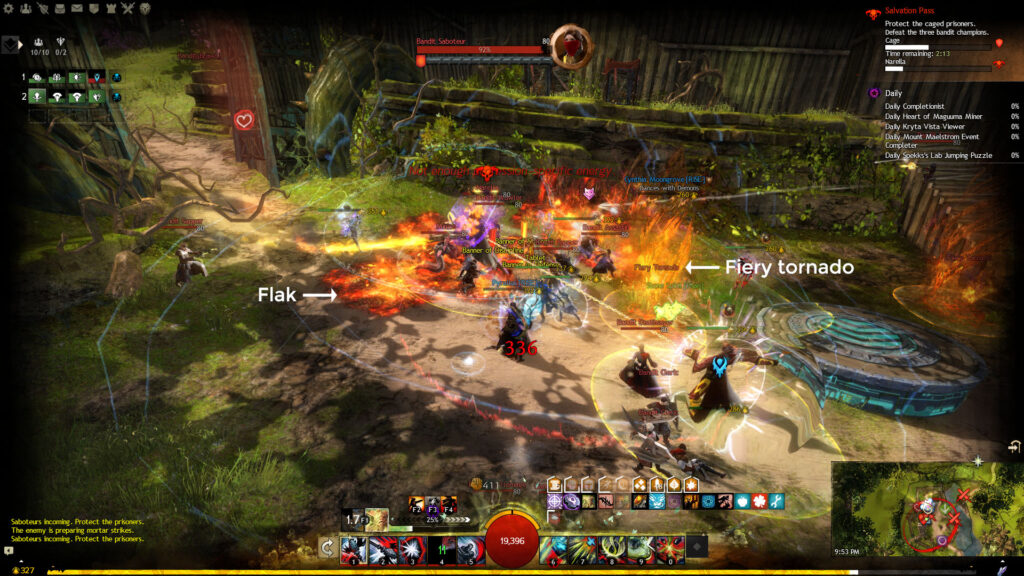
At 2:52, you’ll hear a warhorn sound effect indicating Narella's imminent arrival. She spawns inside the south gate at 2:47. Narella has a flamethrower and her signature attack is  Flame Spray. It’s the same as Kernan’s attack from the Sabetha fight: an ongoing flamethrower barrage that does a lot of damage and inflicts burning. She also uses
  Flak Shot like Sabetha herself, targeting the farthest player and creating a series of three small fire fields that pulse damage and inflict burning.
Narella will also create fiery tornadoes that choose a player and follow them around until they despawn. If caught by a tornado, it will drag you along for a few seconds and pulse damage. You can use  Stability to avoid being caught or a
  Stun Break to release yourself. There is no easy way to tell if a tornado has targeted you; the only sure way is to stand away from other players and see if it comes swirling toward you. If you do notice one following you, do not stand by anyone else or between other people and the tornado since they can be hard to avoid with everything else going on.
Unfortunately for Narella, people who play with fire get their fingers burned. If the person on the ledge picks up an oil keg and uses skill 1 to toss it at her feet, an oil slick will appear. (They can also release the wargs up there if you saved them.) She will ignite the oil slicks herself, but players can do it too by using AoEs that inflict  Burning. Any profession with a torch equipped can accomplish this. Burning oil slicks give Narella
  Slow Burn, which applies Burning every 10 seconds and deals damage while moving. It’s not unusual to see her with 50+ stacks of Burning.
Slow Burn does not stack, so it’s best to space out throwing the kegs every 20–33% of her health. Slow Burn can also affect players, so ranged DPS or melee DPS with quick in-and-out bursts are best.
Unlike Berg and Zane, at least one saboteur will definitely enter the camp at 2:29 while you’re killing Narella. Make sure you don’t neglect it, especially if the cage is close to destruction. If you saved beehives from earlier, throwing one of these on a saboteur will instantly break their defiance bar and give them the Not the Bees! effect. Try to throw out AoEs when you can to kill any bandits running loose too. When Narella dies, the event ends and any bandits left in the camp will run away.
If you don’t kill Narella within the time limit (you have about three minutes after she spawns), the dynamite around the cage will explode, killing the prisoners and causing the event to fail. If this happens, you will need to reset.
About Phoenix Uprising • Recurring Series • Support the Site • Contact • Editorial Guidelines • Privacy Policy
© 2022 Phoenix Uprising. All rights reserved.
About Phoenix Uprising • Recurring Series • Support the Site
Contact • Editorial Guidelines • Privacy Policy
© 2023 Phoenix Uprising.
All rights reserved.