

Welcome to my guide for the Guild Wars 2 raid boss,  Qadim the Peerless (Qadim 2 or QtP), the third and final encounter in The Key of Ahdashim (Wing 7). This is a detailed guide on the mechanics of the fight including various strategies that cater to everyone from beginners to experienced raiders. If you’re brand new to raiding, I recommend reading my Path to Endgame guides first.


Qadim the Peerless, like his inferior self, has a lot of moving parts and set roles. There are no moving or rotating platforms, but he’s still living his best life, being a little more extra than before.
Qadim the Peerless favors  Condition Damage, particularly
  Renegades and
  Scourges for their abundant
  Boon Removal.
  Power Chronomancers and Chronomancer tanks are also encouraged to help with Boon Strip and
  Slow uptime.
 Pylon Kiters: This is a special role responsible for maintaining ‘ownership’ of the pylons so they don’t tether to Qadim. You will need at least three
  Power Deadeyes with rifles, Condition Scourges, or a mix of the two to perform this role. Boon Strip: Qadim periodically gives himself several boons in the final phase that need to be stripped to protect your squad and ensure you’re doing as much damage as possible. Qadim's bar.
 Stability: Although you get by without it if your entire squad is skilled at
  Dodging on time, it’s always good to have to make the encounter easier.
 Qadim the Peerless waits in the Leystone Axis, surrounded by three pylons. There is a dark blue circle with a white ring in the center between each pylon. Both of these are integral to the fight.
Everyone who enters the arena will receive a special action skill, 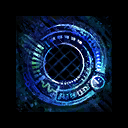 Flux Disruptor: Activate. This is a flip skill; once activated, players will have access to
 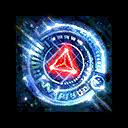 Flux Disruptor: Deactivate to turn it off.
Pylons are either controlled by Qadim or by a player. If and when Qadim retakes one or more pylons during the fight,  Chaos Called will be in effect. It’s an electric current that runs along the ring connecting the pylons and the spokes extending from the center circle to each pylon. It deals moderate to heavy damage and applies
  Burning (2 stacks) and
  Weakness to anyone it passes under, so take care to avoid these lines at specific points in the fight. You can see this before the fight begins since all three pylons are under his control.

Entering the ring connecting the pylons and circles will start the fight. Qadim will shield himself, becoming untargetable and  Invulnerable, and an orange circle will start to fill the arena from the outside in. If it closes in on Qadim, he will use
  Ruinous Nova, killing everyone instantly. To prevent this from happening, players will need to break the defiance bar of each pylon.
When a pylon’s bar is broken, a shrinking green circle will appear under it. A player, known as a pylon kiter, must claim the pylon by using Flux Disruptor: Activate before the circle disappears, or else Qadim will reclaim it. A thin blue ring will appear around a pylon once it’s been claimed. If the kiter leaves this ring, the green circle will come back, and they will need to return to the area, or someone else will need to take over within five seconds. If Qadim reclaims a pylon at any point during the fight, he will regain his shield and the pylon’s defiance bar will need to be broken again to continue.
The kiter will be linked to their pylon with a blue tether and receive the buff  Kinetic Abundance. This is known as a good tether because it constantly applies the four essential boons —
  Might,
  Fury,
Fury,  Alacrity, and
  Quickness.

There are three other aspects to pylon kiting:
Kinetic Abundance buff, will apply a stack of  Erratic Energy to Qadim when they attack him. This debuff lasts six seconds and increases incoming damage by 5% per stack. Therefore kiters should constantly be able to attack at range.
 Unbearable Power, meaning they need to be self-sufficient since they can’t be on the stack to receive healing.
These specific requirements limit the role to a Power Deadeye or Condition Scourge. Technically, a healer with a ranged weapon could also do the job, but this will inhibit their usefulness to the stack. As far as which build is better, a Deadeye will do more damage hands down, but also needs to be able to attack Qadim to regenerate health. If squads have slow CC or trouble maintaining pylons, Scourges might be a better option.
A Deadeye should use the following:
A Scourge should use the following:
Qadim, so they shouldn’t use this skill in their rotation. Soul Reaping for
  Blood Magic (Down-Down-Down), so they can use to survive. They can take instead but will lose the massive DPS increase from .
Before the fight starts, players should distribute themselves among the three pylons, attempting to balance CC. If the squad is in voice chat, the commander can do a countdown and players can initiate by simultaneously using their  Springer's
  Cannonball engage skill. With the
  Forceful Impact mastery, this skill does 200 defiance bar damage. A pylon has 1000 defiance bar damage, so if three people use it, they’ll take care of over half of the bar immediately. The pylon with four players can almost break it entirely.
The pylon kiters are the only ones who should start the fight with an active flux disruptor. When the pylons have been broken and the kiters have tethered, Qadim will become vulnerable. He starts by using  Force of Retaliation. He will gain a quickly-expanding orange PBAoE. When the circle reaches the outer ring, he will release a cascading wave of energy that deals moderate damage and
  Knocks Back players ~900 units. This can be Dodged or negated with Stability.


The tank should use Flux Disruptor: Activate when they get near Qadim. They will become  Fixated, gaining a purple diamond over their head and purple tether to Qadim. This is known as a bad tether because it gives Qadim the
  Backlashing Beam effect. The buff doesn’t affect Qadim, but in turn gives tethered players the
  Sapping Surge debuff, which applies
  Vulnerability and decreases outgoing damage by 25%. The tank needs to remain inside the ring around the center (the one the thin spokes connect to) to maintain Fixation.
The tank will be separated from the stack because Qadim has a relatively large hitbox that players can’t pass through. Healers should drop skills like (Celestial Avatar 2) and on the tank to help heal them up occasionally.
Qadim's auto-attack is 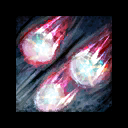 Ether Strikes. He targets the tank with a long conal AoE. When the cone disappears, anyone caught in it will be barraged with small orbs that do a little damage and apply Vulnerability. A Chronomancer is an ideal tank since it can mitigate this attack with and . Otherwise, the tank will need a way to
  Cleanse Vulnerability, or else future auto-attacks will hit a lot harder.

After three auto-attacks, Qadim will use 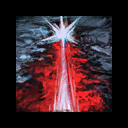 Force of Havoc, creating a long rectangular AoE, often called a carpet or road, in the direction the tank is standing. If the AoE hits a pylon when it’s placed, it will be retaken for Qadim. In addition, the AoE persists for 20 seconds and deals heavy damage over time to anyone standing in it.


The tank should always face Qadim between a pylon and a circle. This will ensure a kiter is never caught in Ether Strikes, and the Force of Havoc AoEs don’t hit a pylon or extend over a circle. The tank can overlap two AoEs by using a channeled  Block or giving themselves
  Distortion and standing in the previous AoE when the next one is about to be laid. Newer tanks should be careful attempting this, as mistiming their movement could easily lead to the aforementioned consequences.
At 95% health, Qadim will launch an orb at the northeast circle. A white AoE with a black cloud over it will appear on the circle, and four seconds later, the orb will land. A pylon kiter should use their teleport ability to intercept it. The orb will attach to them, pulsing damage with Energized Affliction, and giving them a small red PBAoE, which damages other players standing in it with Chaotic Overflow. As soon as the kiter returns to their pylon, the orb will transfer to it instead. This is why a two-way teleport is necessary.
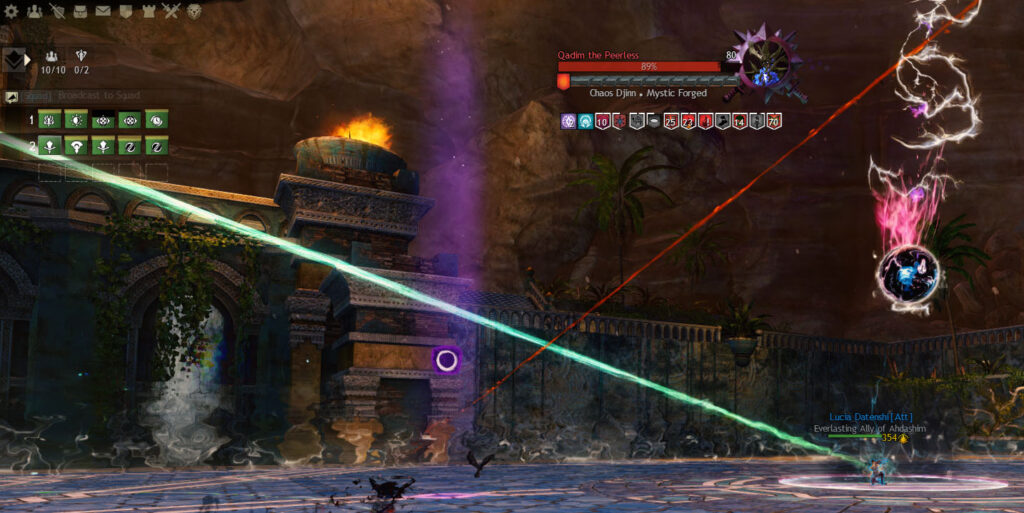
If the orb is allowed to hit the floor, it will detonate, dealing heavy damage and applying  Unbridled Chaos to all players. This debuff lasts for 15 seconds and deals damage over time. The orb will then gain a green PBAoE and slowly travel toward Qadim. It will overload Qadim if it reaches him, triggering Chaotic Surcharge, another explosion that deals heavy squad-wide damage.

A kiter or another player can enter the orb’s green AoE to pick it up. If they go down, they will drop the orb and it will continue moving toward Qadim. They should bring it to a pylon as soon as possible. If the player is not a kiter, they will need to use Flux Disruptor: Activate to tether to the pylon. The kiter should use Flux Disruptor: Deactivate or leave the pylon area. If the kiter deactivated their flux disruptor, the second player needs to remain inside the pylon’s tether area temporarily since there is a five-second cooldown to reactivate the special action skill. The kiter can take over again as soon as they’re able.
Qadim will launch two more orbs in this phase, one at 90% and another at 85%. Each will fall counterclockwise from the previous one (in the northwest circle and then the south). Orb spawns are bound to an instance, so if your squad wipes, the orbs will continue the pattern from the previous attempt. Kiters normally go to the clockwise circle to get their pylon’s orbs, but check in with your commander in case they’re opting to go the opposite direction.
For each orb on a pylon, the kiter will gain a stack of a new buff called  Power Share. Each stack allows an additional player to subtether if their flux disruptor is active. These players get the same boons and will also apply a stack of Erratic Energy to Qadim when they attack him. The tank can get a good tether, and it is beneficial to them since their boons are generally quite low being off the stack. It will not, however, nullify the bad tether in any way.
The tethers are limited in range meaning either the pylon kiter has to be right up against their pylon’s ring or someone on the stack has to back out of melee range to be able to connect. Other players can subtether to the first subtethered player, so they don’t have to be as close to the kiter. Because of this, and for fear players might forget to use Flux Disruptor: Deactivate before future pulls, messing up the initial tether, many groups opt not to take advantage of the additional tethers at all.
Starting at 90% health, Qadim will target a random player with  Rain of Chaos after using Force of Havoc. This player will get a small expanding AoE at their current location and a gold aura around their screen. When the circle fills, lightning will strike the area, doing heavy damage to any players struck. The same player will then get a medium AoE, and finally a large AoE. Players can run out of the first two, but will need to Dodge, Block, or use a movement skill to get out of the third since it’s so large.

If the chosen player is on the stack, they should run away, going off to one side of Qadim, and back up toward a circle between pylons. The stack can rotate a little to the opposite side if necessary, and the pylon kiters should be safe. The tank should remain in their position, but back up as far as possible so the stack has more room to maneuver.
Kiters can simply back up in their pylon area if they’re afraid of hitting someone else. I recommend Deadeye kiters stop kneeling to walk out of the first, and then resume kneeling and Dodge the latter two assuming they have the energy. Kiters can use their teleports, but should only do so if they know they won’t have to get an orb before it’s off cooldown.
At 80% health, everyone will be lifted into the air and large pulsing AoEs will appear beneath them. After five seconds, they will drop, leaving a  Residual Impact on the floor. Four seconds later, lava fields the same size as the AoEs will spawn in each location. These deal heavy damage to anyone standing in them, but they also deal damage to adds that spawn later in the fight. Because of this, squads will usually place them strategically.
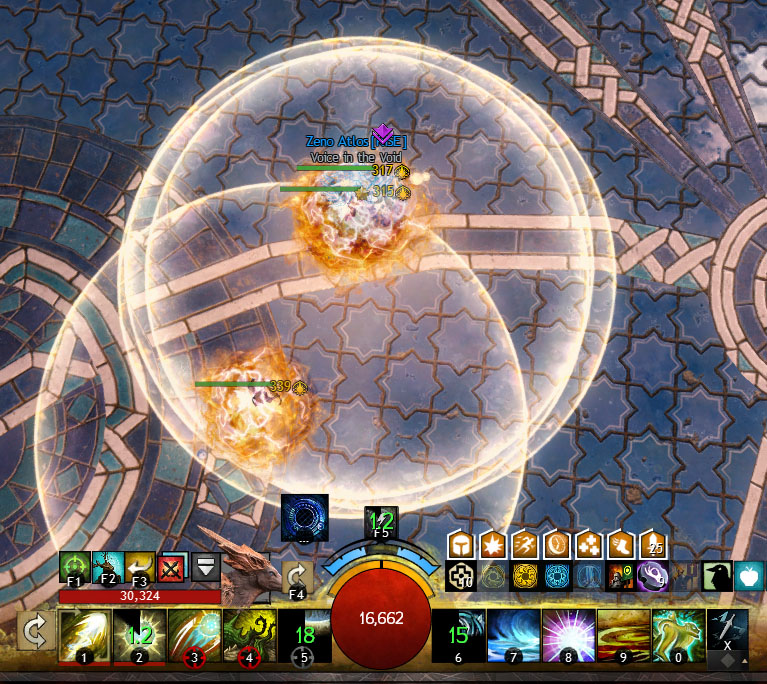
Qadim will retake the pylons during this mechanic, using  Exponential Reprecussion, which deals moderate damage and Knocks Back players near himself or one of the pylons. This attack is irrelevant since players will be moving away regardless.

After the lava fields have been dropped, players should return to the pylon they started at, minding Chaos Called, to break its defiance bar again. Once that’s done and the kiters have retethered, Qadim will use Force of Retaliation again. Everyone should be careful to Dodge or Block the shockwave, lest they be knocked into a lava field.
This phase is largely the same as the first:
Qadim will launch  Shower of Chaos orbs at 75%, 70%, and 65% health. Rain of Chaos again at 70% health.
 There are two additions in this phase.
At 75% health, an Entropic Distortion, also known as an anomaly, will spawn in one of the three circles (the same locations as the orbs). This is heralded by a purple-black cloud on the circle, followed by swirling orange energy. There is no white AoE, unlike the orbs. These distortions will walk toward a player-controlled pylon. Where they go depends on a few factors:
Qadim.If a distortion reaches a pylon, it will steal the tether from the kiter and start attacking nearby players with  Energy Eclipse, which deals heavy damage. The distortion will also gain a stack of
  Flare-Up every two seconds, indicated by a sword icon over its head, just like indicators over players’ heads when they pick up swords during the Conjured Amalgamate fight. If it reaches 10 stacks (the sword fills up), the distortion will overload, using
  Eclipsed Backlash to deal massive damage to every player. If it reaches Qadim, it will still attack and gain stacks of Flare-Up, but obviously has no tether to steal.

Distortions have a buff,  Incorporeal, which makes them immune to damage. Breaking their defiance bar
  Stuns them in place, making them vulnerable and causing them to lose their tether if they already made it to a pylon. While vulnerable, they can be damaged by players or the Residual Impact lava fields. The defiance bar, while fairly weak, does regenerate, so if they aren’t killed quickly enough, they will start walking or attacking again.
It takes two overlapping lava fields to kill a distortion before its break bar regenerates. If players placed the fields strategically, one person, typically a  Druid, will be responsible for going out to CC the distortion while it's on top of the lava. A Druid can use a combination of , , and either their Electric Wyvern’s or Rock Gazelle’s to fully break a distortion. Otherwise, it will take a coordinated effort to kill a distortion before it reaches a pylon and starts wreaking havoc.

Since they spawn in the same location as the orbs, it’s possible for a distortion and orb spawn to coincide. If the distortion absorbs an orb, it will instantly explode. If both a player and distortion are in the circle when the orb lands, it will connect to whoever is closer to the center of the drop location.
Another distortion will spawn every 40 seconds after the first in the circle clockwise from the previous spawn location.
Starting at 70% health, Qadim will occasionally use  Poisoned Power after Force of Havoc, attempting to reclaim a random pylon. His defiance bar will unlock and he will face a pylon and channel a purple beam at it, similar in appearance to the tank’s bad tether. The kiter and all subtethered players will have their Kinetic Abundance buff corrupted into the
  Enfeebled Force debuff. This reduces outgoing damage by 10% and constantly applies Slow,
  Torment, Vulnerability, and Weakness. If the bar is not broken within 10 seconds, Qadim will reclaim the pylon.

At 60% health, players will be lifted into the air again and have to drop more Residual Impact fields. Again, you can place these strategically to deal with the upcoming distortions. The existing lava fields deal no damage to players in the air, so you can technically drop the new fields on top of the old. However, you will start taking damage from the old fields as soon as you land, so you should either have plenty of survivability or be able to double Dodge or use Invulnerability to retreat.
As before, you will need to break the pylons again and avoid another Force of Retaliation.
This phase is largely the same as the previous one:
Qadim will launch Shower of Chaos orbs at 55%, 50%, and 45% health. Poisoned Power anytime during this phase, but it will always follow Force of Havoc. Rain of Chaos again at 50% health.There is one addition in this phase.

At the beginning of the phase, Qadim will track a random player with a red arrow indicator. After a few seconds, he will slam his arms down, launching a narrow purple shockwave along the arrow. He will then repeat this twice more. The attack deals heavy damage to any player in its narrow path and gives them  Chaos Corrosion. This debuff causes the player to take massively increased damage from additional hits in the series. If the attack hits anyone, Qadim will also gain Quickness.
Players should rotate away from the stack and ensure the arrow isn’t pointing toward a pylon. You can jump, Dodge, or Block this attack. If attempting to jump to reduce DPS loss, you should jump as soon as you see Qadim's arms go down. Additionally, another player can stand in front of the intended target and use Invulnerability to absorb the attack. You can survive a single hit, but the debuff will cause you to go down if you’re hit again. If you’re struggling, aim to avoid at least the first two since receiving the debuff on the third hit doesn’t matter.
By the end of this phase, you should have three orbs on each pylon. If you’re taking advantage of subtethers, you can have four people (including the kiter) tether to two pylons, and just the tank tethered to the third since they’ll be alone on one side of Qadim.
The addition of this attack completes his attack pattern for the rest of the fight, as follows:
3x Ether Strikes → (occasionally) Poisoned Power → Rain of Chaos OR  Caustic Chaos
At 40% health, Qadim, growing annoyed with players turning the pylons against him, will use 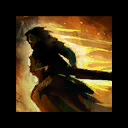 Battering Blitz. He will rush toward the north pylon, dealing heavy damage and
  Knocking Down any players in his path. As soon as they notice his health threshold, the pylon kiter should leave the area immediately and move to the side to get out of his way. Qadim will destroy the pylon and consume its power, leaving a large pylon debris field, a lava field similar to Residual Impact. After this, he will use Force of Retaliation from the pylon.


Players usually gather in front of the pylon to continue stacking boons and healing and attacking Qadim. However, the lava obscures the AoE indicator from Force of Retaliation entirely, so players have a few options to deal with it:
Force of Retaliation. As with Caustic Chaos, use his arms as your cue to Dodge. Stability, such as or to ignore the Knockback.
Qadim will return to the center of the arena, using Exponential Reprecussion around himself and the pylons. Players need only avoid standing in the middle or near a pylon to bypass this attack. After this, everyone can retake the remaining two pylons.
There are two additions in this phase. First, Qadim's interference with Ahdashim’s ley and elemental energies has broken the magical barrier protecting it from the Brand. 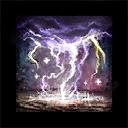 Brandstorm Lightning, indicated by small orange AoEs, will regularly strike players in the arena. This is the same as the lightning in the Cardinal Sabir fight that strikes after killing a wisp on an adjoining platform. You can simply run out of the indicator to avoid it.
Second, Qadim, by consuming the orbs attached to the pylon, has now gained their power. The primary bad tether attached to the tank can now subtether to up to three nearby allies. They will also be infected by Sapping Surge. Players can either deactivate their flux disruptors or stand away from the Fixated player to avoid this.
There are also a few differences from previous phases:
At 30% health, Qadim will use Battering Blitz again, this time toward the southwest pylon. Players should deal with the attacks however they did before and then retake the southeast pylon one last time.
If your squad has exceptional DPS, they might reach this health threshold while Qadim is still at the north pylon. In this case, Qadim will interrupt his normal series of attacks ( Force of Retaliation into Exponential Reprecussion) and instead rush straight toward the second pylon. This is unlikely for the majority of groups.
By consuming the energy of a second pylon, Qadim can now attach a primary tether to a second player, who in turn can subtether to up to three nearby allies. Ideally, one of the defunct pylon kiters should stand in the tank’s half of the arena (but apart from them to avoid Ether Strikes) and take the second tether. They should have the survivability to sustain themselves and slightly lower overall DPS than the players on the stack.
Qadim will also gain  Aegis and
  Resolution every six seconds. Boon Strip is important so players can do their maximum damage.
The northwest distortion now no longer has a pylon to approach and will walk toward Qadim by default. If no lava fields were placed on the path between the circle and Qadim, players will need to CC and kill the distortion, trying to avoid bad subtethers in the process.
At 20% health, Qadim will use Battering Blitz toward the southeast pylon. When he returns to the center and uses Exponential Reprecussion, he will also lock everyone’s flux disruptor. Whether or not they were deactivated, they will be forced active for the remainder of the fight. As such, the player who is Fixated will be the first person to approach Qadim. If your designated tank was Knocked Back by any attack, make sure you let them go first. If someone is mistakenly Fixated, they need to run away from Qadim to break the tether and let the tank get it instead.
Having consumed all three pylons, Qadim will now be able to link primary bad tethers to three players. The two players you would like to bait these tethers should approach Qadim after the tank. As before, it’s best if they stand on the tank’s side, apart from the squad so no one is subtethered. Subtethers may be broken by going out of range of the primary tether.

Qadim will now gain Might, Fury, Alacrity, Quickness, Aegis, and Resolution every six seconds (though at different times due to the primary tethers attaching sequentially). Now is the prime time to pull out any Boon Strip you possess.  Mesmers using a sword should avoid shattering, as all of their clones will repeat the sword auto-attack chain ending in . This will help fill in the gaps of more potent Boon Removal such as , , , and .
Qadim will be unable to use Poisoned Power during this phase since there are no pylons left to tether to.
All distortions will walk to Qadim. If no lava fields were dropped on their path, they will need to be taken care of. Killing distortions in this way will almost certainly spread the bad subtether to multiple squadmates, so players should kill them fast and then return to their previous position. Dropping lava fields between Qadim and the three circles will remedy this issue, but also gives players less room to stand and makes getting Knocked Back by Force of Retaliation from Phase 3 onward especially dangerous.
If you don’t kill Qadim the Peerless within 12 minutes, he becomes 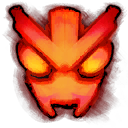 Enraged and does 200% more damage.
About Phoenix Uprising • Recurring Series • Support the Site • Contact • Editorial Guidelines • Privacy Policy
© 2022 Phoenix Uprising. All rights reserved.
About Phoenix Uprising • Recurring Series • Support the Site
Contact • Editorial Guidelines • Privacy Policy
© 2023 Phoenix Uprising.
All rights reserved.