

Welcome to my guide for the Guild Wars 2 raid boss,  Qadim (Q1), the third and final encounter in Mythwright Gambit (Wing 6). This is a detailed guide on the mechanics of the fight including various strategies that cater to everyone from beginners to experienced raiders. If you’re brand new to raiding, I recommend reading my Path to Endgame guides first.


Qadim is a fight with a lot of moving parts. It can seem quite confusing, but once you break it down and do the sections enough, everything will start to click.
Power DPS is superior here because there are many enemies, short burst phases, and Qadim takes extra power damage compared to other raid bosses. Whatever your squad composition, I recommend you don’t mix power and condition damage to make the fight a little simpler.  Daredevils and
 Deadeyes are particularly useful thanks to their stolen skills and ability to perform both roles. Tanking is not
 Toughness-based, so your tank can bring as little or as much as they need depending on their skill level.
 Qadim Kiter: This is a special role responsible for occupying Qadim while the rest of the squad focuses on defeating the monsters from his menagerie. The kiter will want gear similar to a standard DPS build, but with some skills, traits, gear, and/or consumables to enhance survivability.
 Knockback and/or
 Pulls: You need one of these to separate the greater magma elementals from the lava elementals, but I recommend having both on hand. Qadim's and the legendary creatures’ defiance bar one or more times during each phase, and while you don’t need a lot of crowd control, it needs to be fast-acting.
 Boon Strip: You’ll probably want at least a little boon removal for the pyre guardians, or more if you choose to ignore one or more of them prior to each burn phase.
 Condition Cleanse: This can be useful for rampant
 Burning and other random conditions throughout the fight.
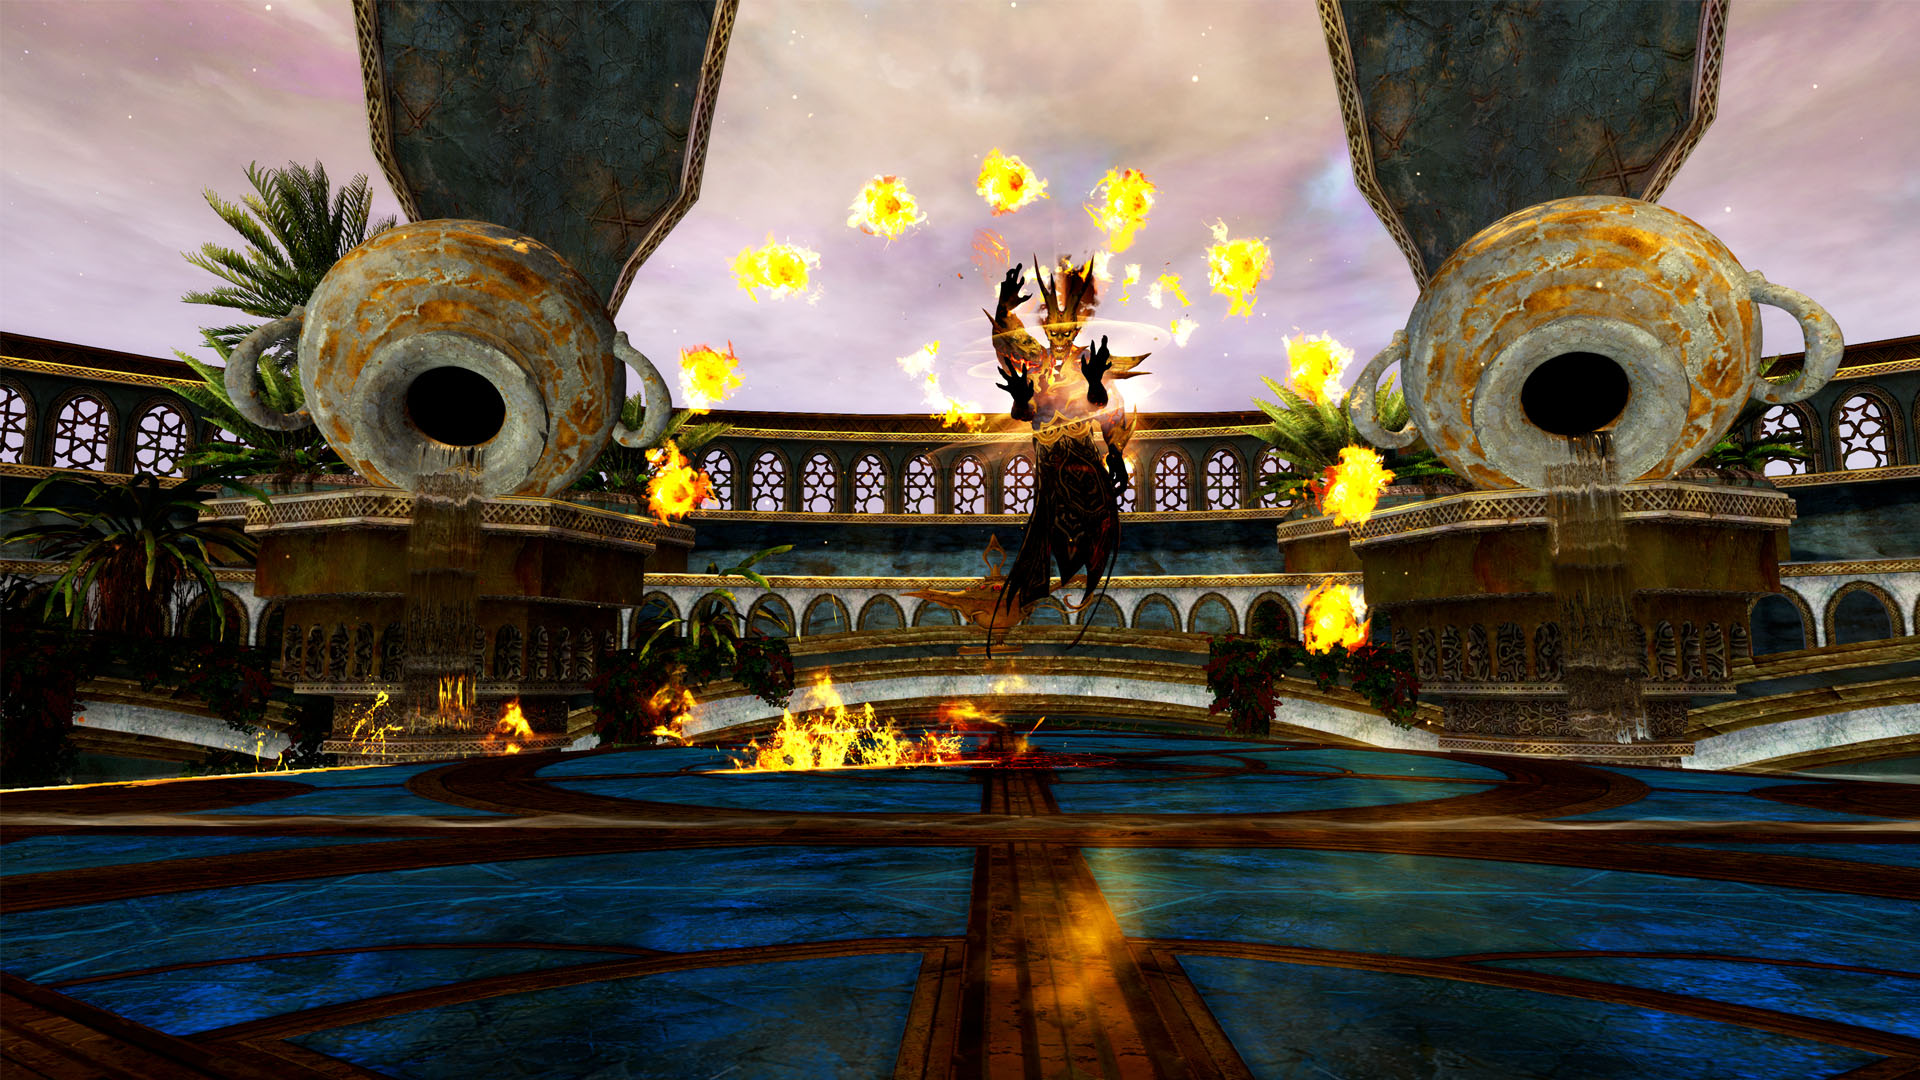
The fight takes place on many triangular platforms that initially form a six-point star. The platforms spin, move, and rearrange themselves at certain points. They can also be destroyed by Qadim if he’s left unchecked. If you fall from one, you’ll bounce back up, allowing you to recover. However, you take additional damage for every bounce, so find the edge of a platform to get up as fast as possible.

Approaching Qadim will trigger a dialogue and start the fight. Qadim will trap  Zommoros in his lamp, which is also his menagerie of creatures. The goal of the fight is to free Zommoros and kill Qadim, but you’ll need to defeat Qadim's pets first. During Phases 1/3/5, Qadim will release a fiery pet and you’ll need to venture into the lamp to free an opposing creature all the while occupying him and his pet on the platform. During Phases 2/4/6, you’ll confront Qadim directly in burn phases.
The most important role in this fight is the Qadim Kiter. Unlike other fights with kiters such as Deimos or Dhuum, your kiter will need survivability and damage to solo kite. The profession most suited to this is a  Thief, but you can also use a
 Condition Scourge. You can have two players (usually a DPS and healer) kite together but avoid this if possible since it will spread your main squad thin.
The kiter will stay with Qadim during Phases 1/3/5. As long as they are with him, he will remain in the center of the platform. Qadim has a  Sea of Flame at the base of his hitbox, causing anyone standing in it to take moderate damage every second. He also has
 Flame Armor, rendering him
 Invulnerable to damage. The kiter will instead focus on other enemies while avoiding his attacks.
Lava elementals spawn on Qadim's platform one by one, starting on the south point of the triangle and going counter-clockwise. They will approach Qadim but the kiter needs to kill them before they get to him. Otherwise, he will absorb them and gain a stack of  Fiery Surge. Per stack, this buff increases his outgoing damage by 20% and attack speed by 2%.
If the kiter leaves Qadim or dies, he will run rampant and destroy platforms. For each platform destroyed in this manner, he will gain five stacks of Fiery Surge.
All of Qadim's attacks target/are aimed at the closest player. If you have a solo kiter, this will obviously always be them, but if you have two players there, the second can bait his attacks if they desire. They should know his attack pattern and areas of effect to attempt this.
Qadim's auto-attack is  Flame Slash. He’ll raise his left or right arms and aim fireballs toward the target, which do minor damage if they hit. Their trajectory is always on a diagonal (left arms to the right side of his body and vice versa), meaning they’ll veer to your side if you’re standing far enough away. This attack also creates a wide but short frontal cone that does minor damage and inflicts Burning. You can also avoid the cone by being far enough out on the platform.
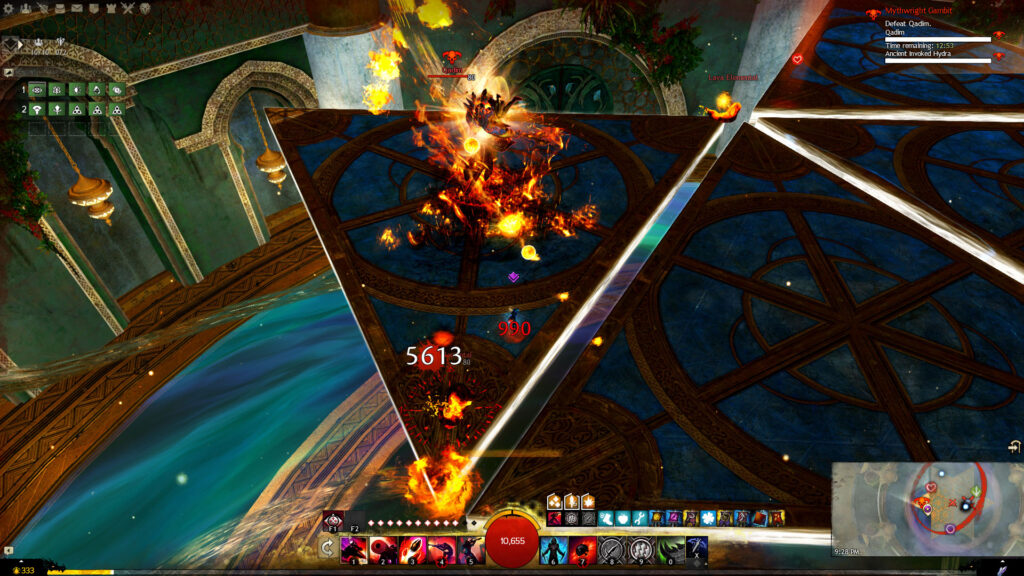
He also uses  Flame Wave. For this attack, he’ll bring all four arms together and create a ring of fireballs in the air. He will then thrust his arms out, throwing all the fireballs at the target, followed quickly by a long but thin cascading frontal cone. The fireballs are homing, unlike those of Flame Slash, but they similarly do only 1–2k damage each. The subsequent wave does heavy damage in addition to a slight Knockback. Failing to avoid at least a couple of fireballs and the wave will almost certainly cause a kiter to go
 Down.
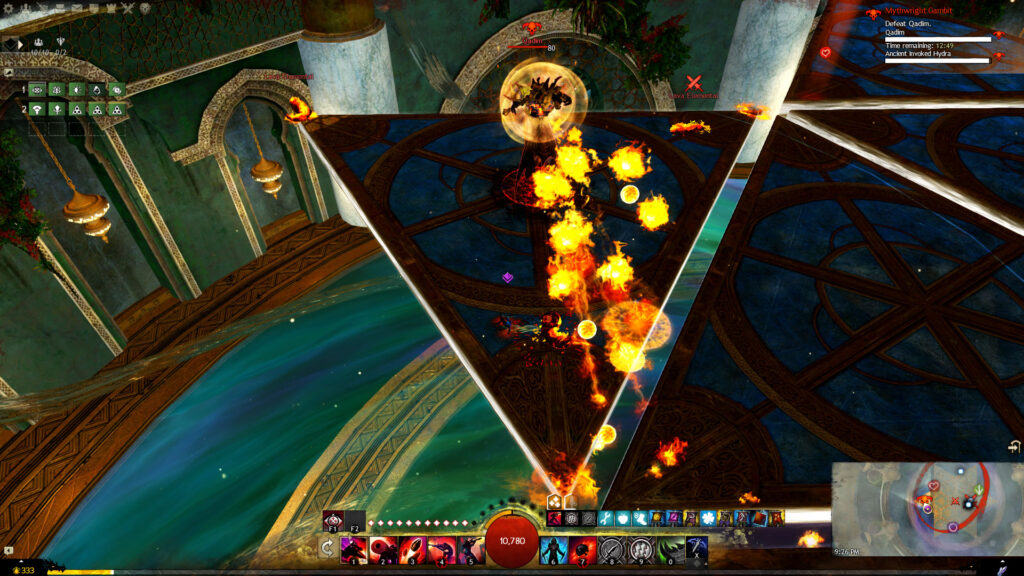
For his third attack,  Fire Dance, Qadim will spin twice. Lines of fire will flow outward, following the primary gold lines that extend to the platform’s corners and the two circles on the platform. These lines deal moderate damage and inflict
 Weakness and Burning (3 stacks).
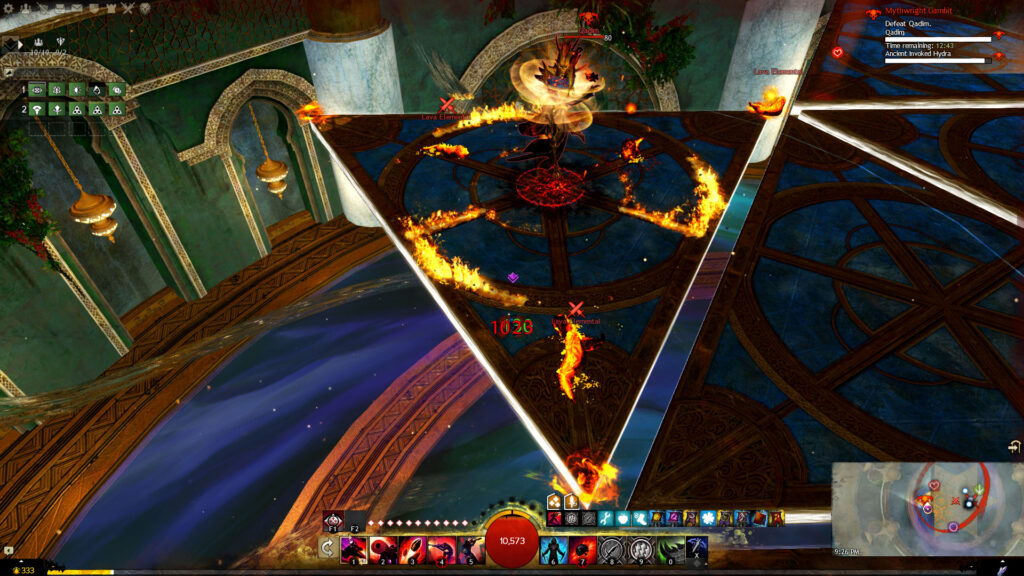
His final attack,  Shattering Impact, places a small red AoE under the target and drops a meteor in that spot about two seconds later. The meteor does moderate damage, inflicts Burning (2 stacks), and
 Stuns anyone hit by it for one second.
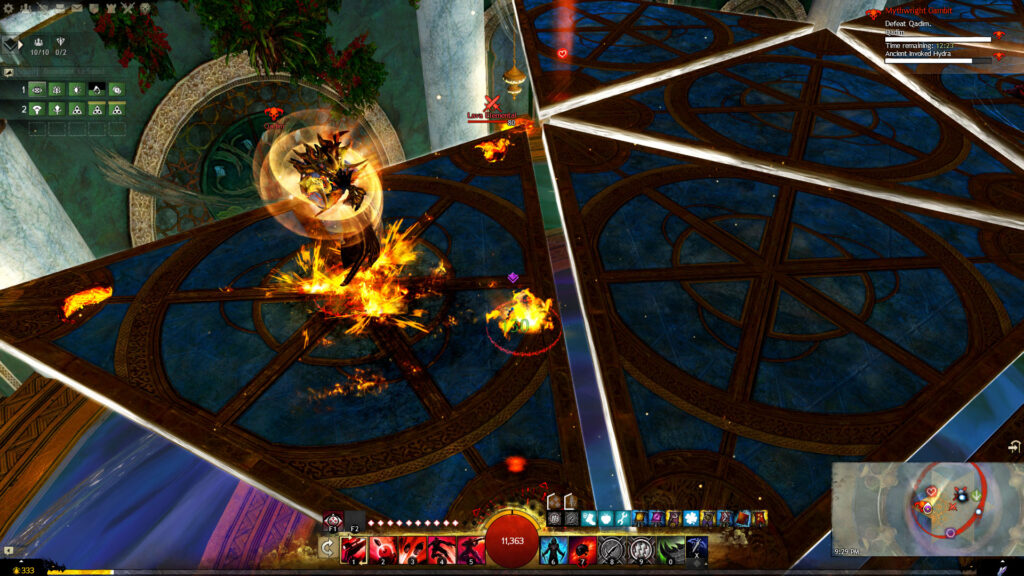
Qadim's attack pattern is as follows:
Flame Slash → Flame Wave → Flame Slash → Fire Dance Flame Slash → Flame Wave → Flame Slash → Fire Dance (a repeat of the first cycle) Flame Slash → Shattering ImpactHe will then create red and black pillars around the outside of the smaller, inner circle (more on this later). Immediately after, he will tether to the closest player and an AoE will start expanding to the edges of the platform. When it reaches them, Qadim will create a lava field on that platform and then teleport to the platform the tethered player is standing on or closest to. The firestorm left behind does moderate damage over time, meaning anyone in it should move as fast as possible. If a player is down on an  Inferno platform, anyone trying to resurrect them should stand on a safe platform to do so if possible.
Thieves can be a Daredevil or Deadeye to do the job. Rifle Deadeyes will have the easiest time of it. You can take (and if you want to be super safe) and in one of the blue areas on either side of the gold spoke near any corner of the platform. To kill an elemental, all you have to do is one and then use , which should kill it.
Rifle Deadeye will be far enough away to avoid the fireballs and cone from Flame Slash. For Flame Wave, you can  Dodge left or right into the opposite blue sector (on the other side of the gold spoke). You should also be safe for Fire Dance as long as you don’t Dodge onto a gold line.
Remember you can always stop kneeling to reposition yourself, and if you’re hit by Flame Wave's Knockback (and don’t go down in the process), you will also be forced to stand. This is also the case with Shattering Impact's Stun, but as you’re moving platforms anyway, it doesn’t really matter. Make sure you’re always kneeling to attack the elementals, or else your damage will be drastically reduced.
Staff Daredevils will take and rely on their extreme mobility to kill the elementals. and should kill an elemental as long as you critically hit it. If you run out of initiative or Dodges, you can fill in the gap with an auto-attack chain or . The downside of this build is that you’ll have to save a Dodge to avoid Flame Wave, while also using it on top of the elementals to kill them. It can also be easy to lose track of Qadim's attacks while running in circles and ensuring the elementals are dead before you move on.
Pistol/pistol Deadeyes will use to kill elementals. They are less reliant on critical hits and positioning to kill the elementals than a staff Daredevil, but they don’t have as much mobility, so you need to take care with your Dodges.
All Thief builds can also  Detonate Plasma from the pyre guardians to help with boon uptime or
 Throw Magnetic Bomb from Qadim to help with CC and Pulls.
A Condition Scourge can also perform the role. You can drop the  Soul Reaping trait line for
 Blood Magic and take and , which will also allow you to pull and mop up players who go down while running toward Qadim during the burn phases. Alternatively, you can keep the regular trait setup and use instead of , but this will decrease your utility on Qadim himself.
You’ll kill the elementals by placing shades between their spawn points and Qadim, using both your shade and weapon skills to load them up with conditions. Remember that since you’re relying on condition damage, you don’t have to stay and make sure an elemental is dead before moving on; just make sure you get enough conditions on them so that they die before they reach Qadim.
Condition Scourges also bring utility to the fight with the aforementioned and for adds. However, as a condition build, their DPS will be lower on Qadim than a Thief unless your burn phases are lengthy. In terms of squad utility, Scourges are a better choice for inexperienced or lower DPS groups with their defensive options. On the other hand, they might find it harder to kite for longer periods of time in these groups since the reliance on condition damage might cause them to get behind on killing the elementals.
When the fight starts, a shrinking green circle will appear around the lamp in the center of the platform. Anyone standing in it when it disappears will be sucked into the lamp and end up in Qadim's menagerie. This happens again at the beginning of Phases 3 and 5.
Since the triangular platforms move and reform, the lamp will not be in the center at the start of Phase 5. Instead, it will be along the southern edge of the platform where the first two legendary creatures spawn. It can help to put a marker on this location so people are aware.
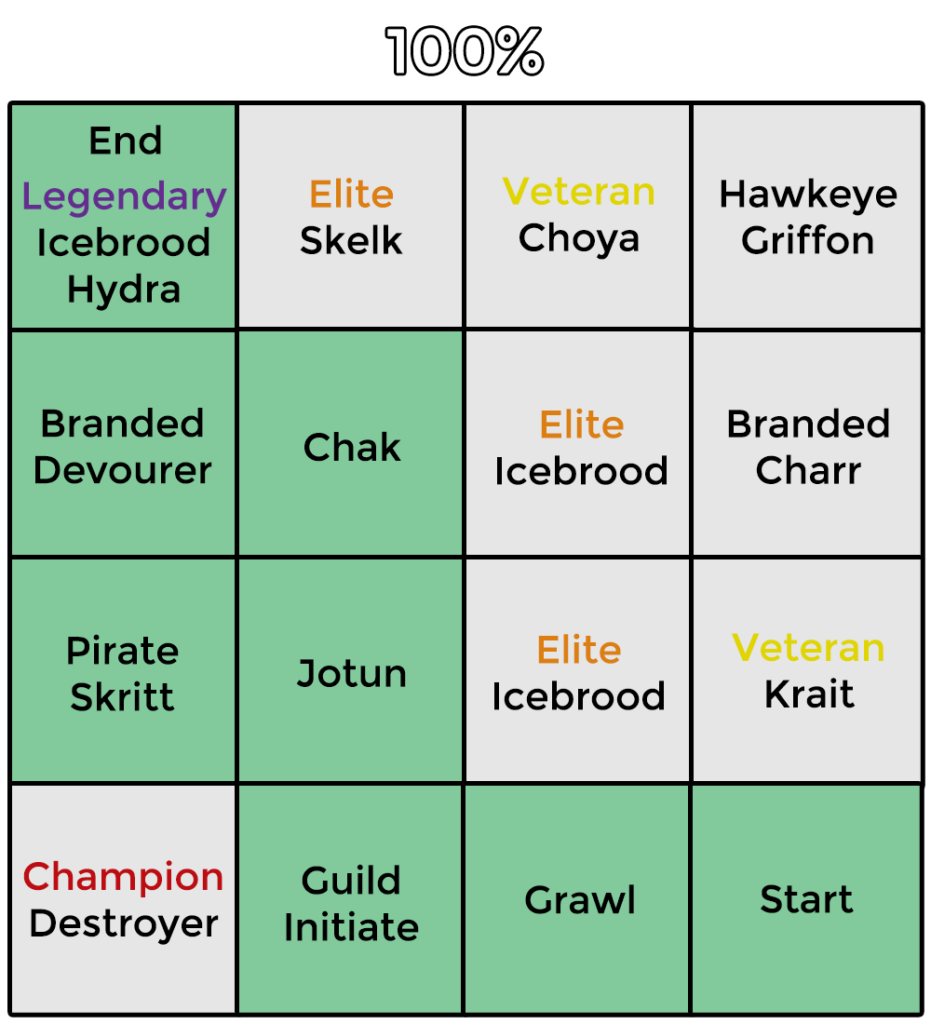
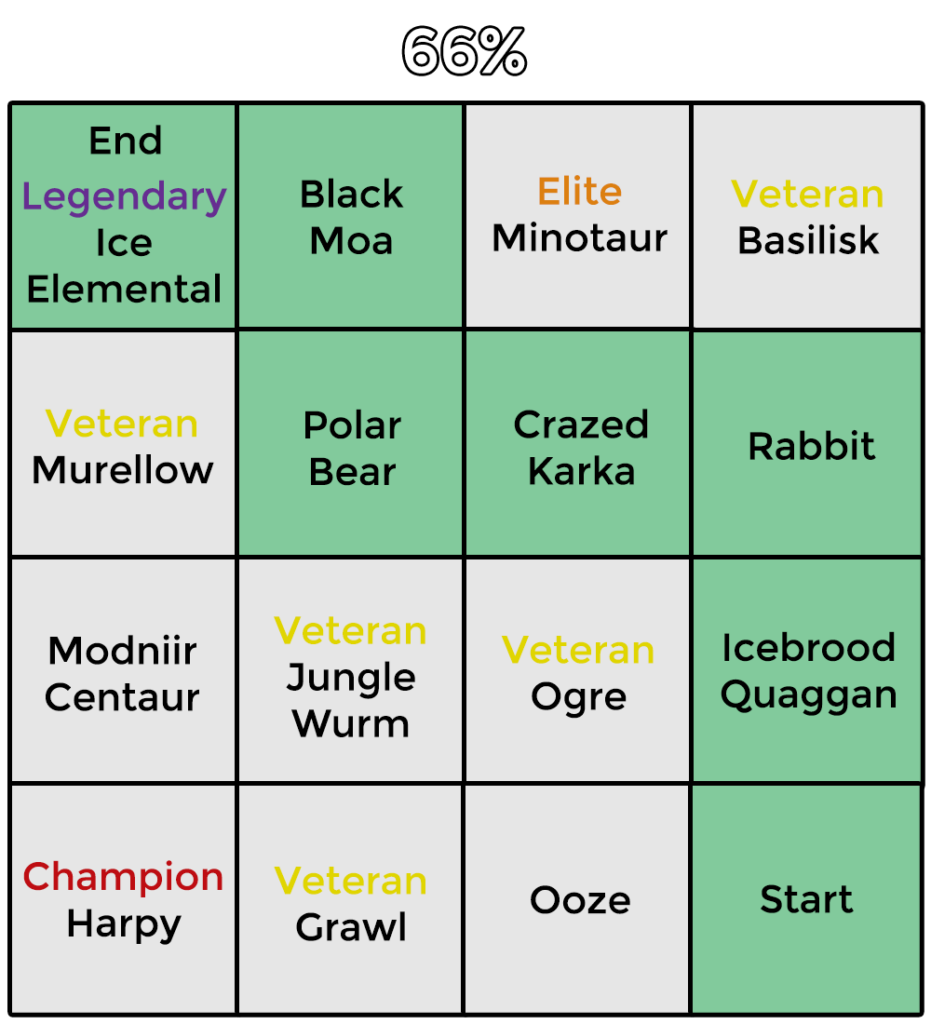
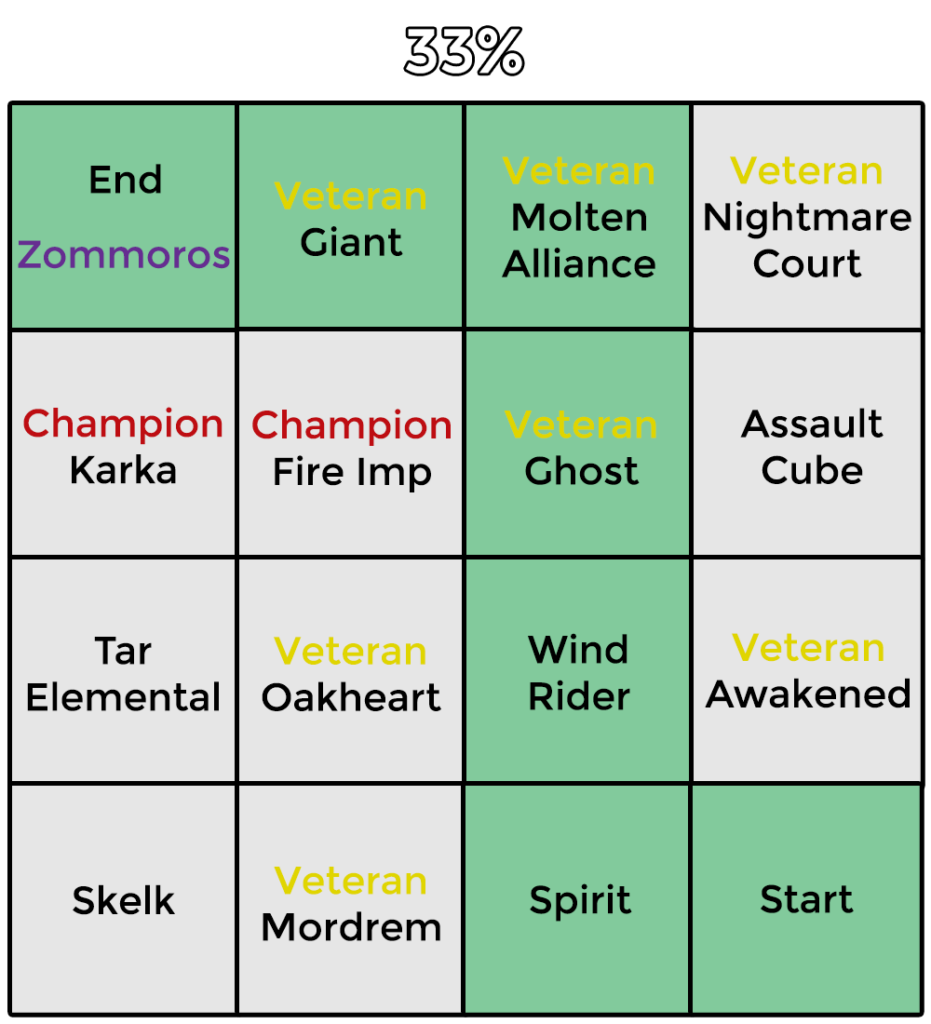
The menagerie is a 12x12 grid of square cages. Except for the first square you start in and the last square with the friendly legendary creature (your goal), each contains normal, veteran, elite, or champion creatures. When the creatures are killed, the cage walls will drop and you can move on to the next cage/square. You always start in the same corner with your goal being in the opposite diagonal corner.
When players enter the lamp, one at random will be targeted with a beam of light. This player will get a PBAoE when the lamp is broken to teleport any other players and the creature up with them.
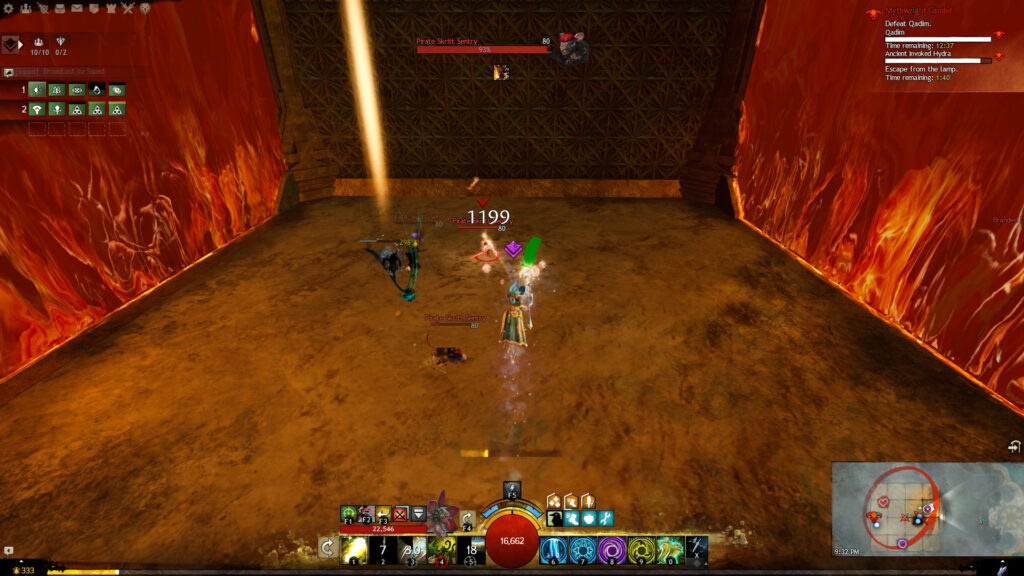
If the lamp is ever broken early and the players are teleported back without the creature, the lamp will reappear when Qadim moves platforms, about 40 seconds after the phase begins.
As with kiting, one or two players can be on lamp duty, with two being more optimal if you have higher DPS among those remaining on the platforms. Several builds can solo the lamp, but the following are some of the most effective:
 Reapers can use (Greatsword 4) to keep groups of mobs blinded, as well as (Greatsword 5) and (optional) to Pull them in and cleave them down fast.
 Scrappers have a lot of built-in sustain. While they don’t have AoE Pulls like a Reaper, they can use or to blind enemies. Daredevils can use (Shortbow 1) to kite and kill mobs at the same time. will also help them avoid attacks while doing damage.
If two players go, you can use two DPS, usually two Daredevils, or a DPS and a support, usually a  Chronomancer to help Pull and CC with and .
For the final lamp, you can’t avoid killing a few veterans and two of those veterans are giants, which can Knockback,  Launch,
 Fear, and
 Taunt players. For this reason, squads should send at least two to three DPS players into the lamp so everything goes smoothly. If you want, you can even send the majority of your squad in, as long as you have enough players to deal with the mechanics on the main platform.
The diagrams below show the lamp layouts at each phase/health threshold. The squares shaded green indicate the optimal path to take to avoid higher-ranked mobs as much as possible.
Your kiter will start the fight by approaching Qadim. Everyone else should stack on the platform where the first legendary creature spawns. A dialogue will begin and everyone will be put in combat. Qadim will summon fiery AoE fields that do moderate damage and persist for a couple of seconds. The kiter can use this time to get situated, while those on the stack can give out boons so the player(s) on lamp duty have some uptime going in.
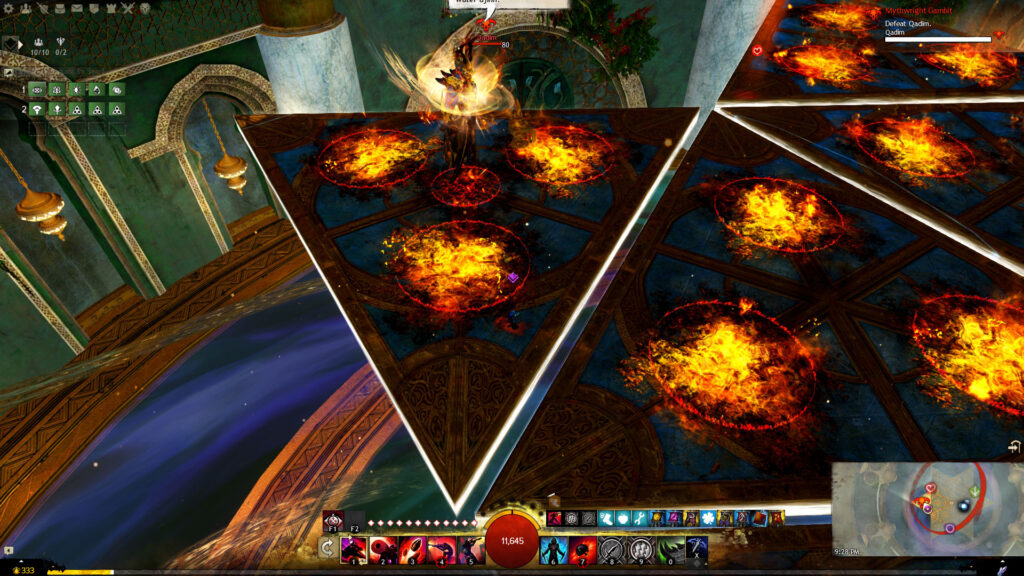
The lamp team can then go into the green circle and start progressing through the menagerie. The short roleplay will end as they are sucked in, so the kiter can start killing lava elementals while the main squad works on the  Ancient Invoked Hydra.
Like Qadim, the creatures will aggro on the closest player. The tank should make sure they are far inside the hitbox without moving to the back and turning the creature around to the group. This ensures players can be inside the edge of the hitbox if necessary and also makes it easier for healers to keep the tank alive. Regardless, as the hitbox is so large, it’s good for the tank to be as self-sustaining as possible.
The Hydra has an auto-attack, special attack, and defiance bar ability. Its auto-attack is  Dual Bite, which applies
 Bleeding (4 stacks),
 Poison (2 stacks), and/or
 Chill, depending on which head(s) the tank is bitten by.
Its special attack is  Elemental Breath. It will rear its heads back and then breathe fire, ice, and lightning, doing heavy damage, Knocking Back players a short distance, and inflicting Chill,
 Cripple, and Burning (2 stacks). The tank can use a channeled
 Block like (Shield 4) or , or
 Distortion to avoid this, or simply move to the side since the Ancient Invoked Hydra can’t turn while breathing.
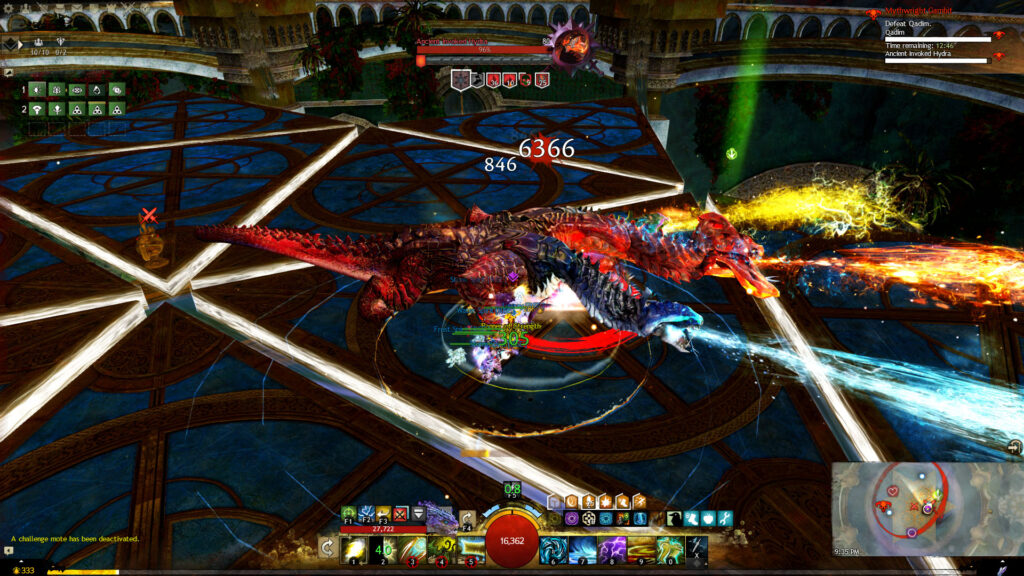
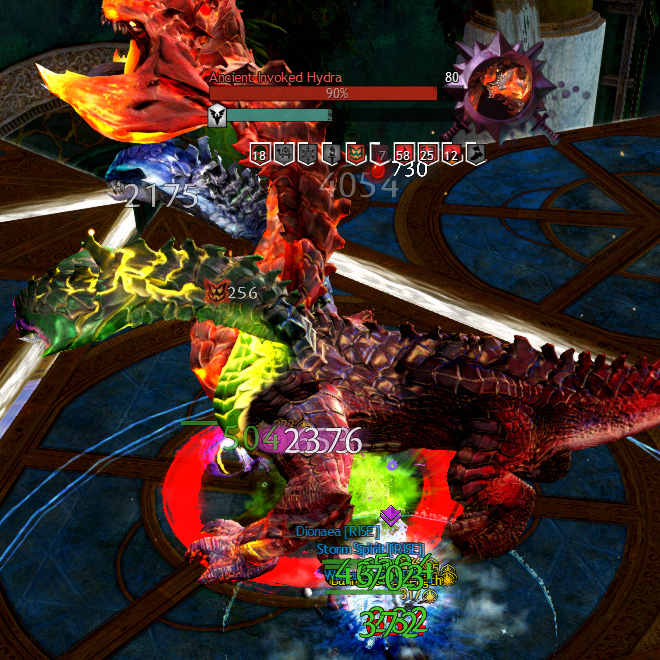
Its defiance bar ability is  Fiery Meteor. It will lift its center head straight up and its defiance bar will unlock. Players only have a few seconds to break the bar before the Hydra gives itself
 Protection,
 Regeneration, and
 Might (5 stacks). It will then summon a continuous stream of meteors on top of every player on the platform (including the Kiter) until the bar is broken. The meteors
 Daze and inflict heavy damage. While they can be Dodged or Blocked, they drop fast, so you might not have time to react. If you have any cast time or wind-up CC skills, you should queue them before the bar unlocks.
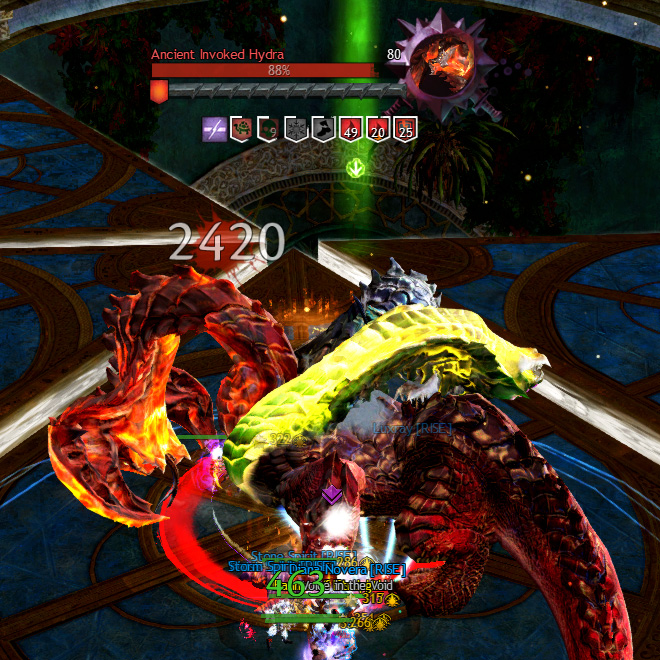
At the end of the Hydra's attack chain, it will teleport one platform over in the direction it was facing (the one the tank is closest to).
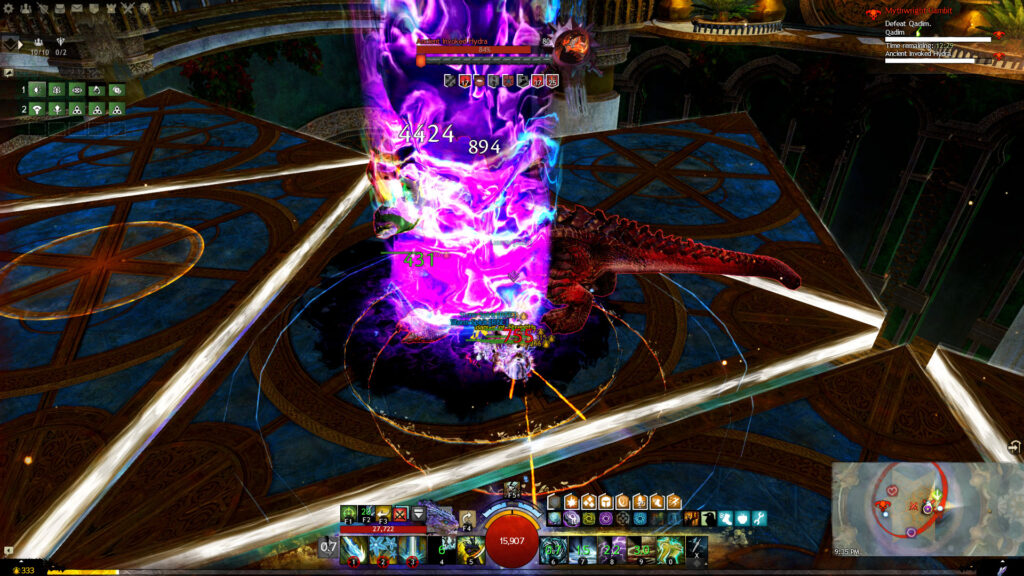
The Ancient Invoked Hydra's attack pattern is:
2x Dual Bite → Elemental Breath → 2x Dual Bite → Fiery Meteor → 2x Dual Bite → Teleport
If no one is near the Hydra, it will spit fireballs at players.
When the Hydra would use Elemental Breath a second time, Qadim will use Inferno again. He will also use  Swap, teleporting anyone standing in the Hydra's hitbox to Qadim's platform. You can’t Block, Dodge, Evade or use Invulnerability to avoid the teleport. You will have a gold-orange aura around your screen if you’re in danger of being teleported.
Qadim tethers to the closest player after this, so anyone accidentally teleported might be chosen instead of the kiter. The tethered player should jump to the next platform and wait for Qadim to come over before returning to the squad, otherwise, they risk dragging him along with them. If the tank is teleported, they should say something so a healer can temporarily take over.
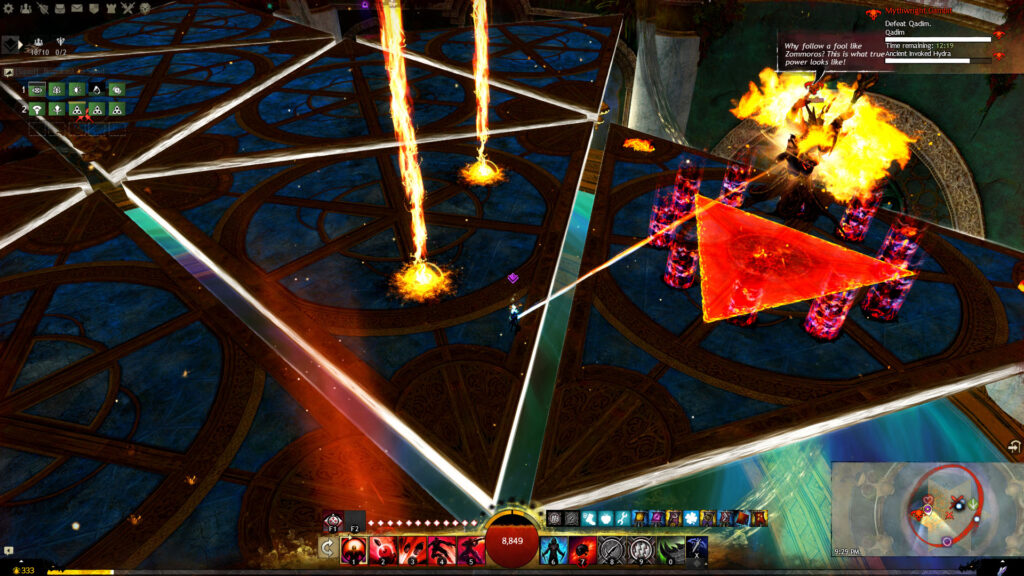
When the players in the lamp have reached the friendly creature, they should call out or type in squad chat to say they’re ready. Someone with ranged attacks should damage the lamp to break it open. Make sure you don’t break it early!
When the lamp’s been broken, the player with the beam will get a large shrinking green PBAoE. Anyone who accompanied them will need to stand in it, and it should also overlap the hitbox of the  Iceborn Hydra. The player(s) and Iceborn Hydra will be teleported back to the main platform when the AoE disappears. Players will have the effect
 Power of the Lamp, causing them to float in case there is no platform below them. They can return themselves to the platform with their special action skill,
 Drop. Otherwise, they will be dropped in five seconds when the effect expires.
The Iceborn Hydra will land next to the Ancient Invoked Hydra and temporarily take aggro. It will breathe ice at it, doing 80% of its total health in damage and Stunning it, which applies  Exposed, increasing incoming damage by 50%. This will also trigger the bonus from . The Iceborn Hydra will then disappear. If the Ancient Invoked Hydra still isn’t dead, it will become
 Enraged, dealing more damage. You’ll ideally want to get the Hydra to 80% health before the lamp team returns, or at least while it's Stunned.
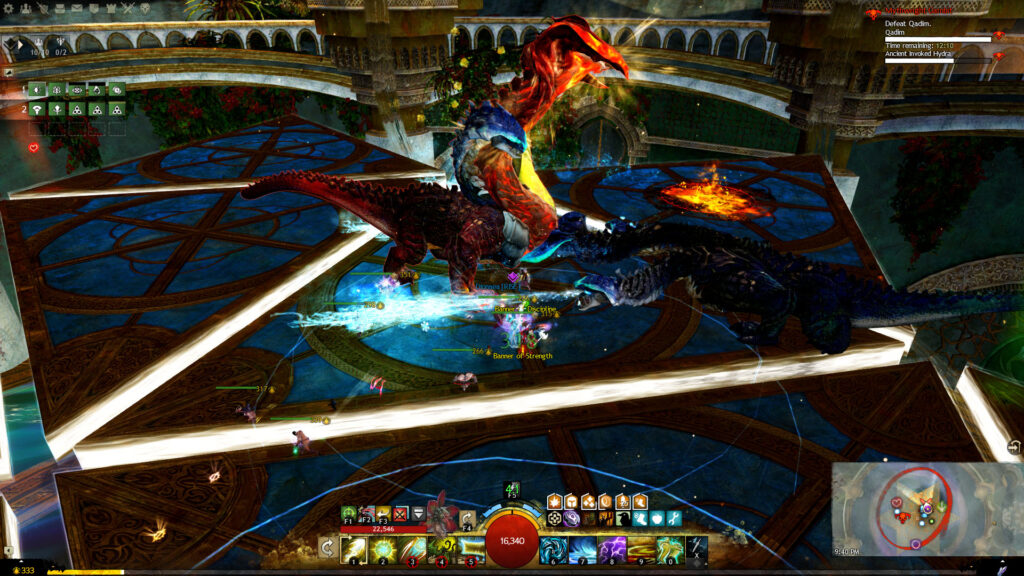
When the Ancient Invoked Hydra dies, Qadim will teleport to the middle of the arena and readjust the platforms, starting Phase 2.
During Phase 2, the platforms will be arranged as a large triangle with three outer platforms accessible by bouncing over on blue orbs. You can damage Qadim directly at all times, but you’ll want to deal with some things first.
Three pyre guardians will appear on the outer platforms. They both have and generate a unique boon for Qadim ( Protection,  Resolution, or
 Stability) as long as they’re alive. They also produce incineration orbs, large balls of fire that bounce around the main platform. Their bounces are telegraphed by gold AoEs. They will Down players instantly or
 Defeat them if they’re already Downed. They can be Dodged or Blocked.
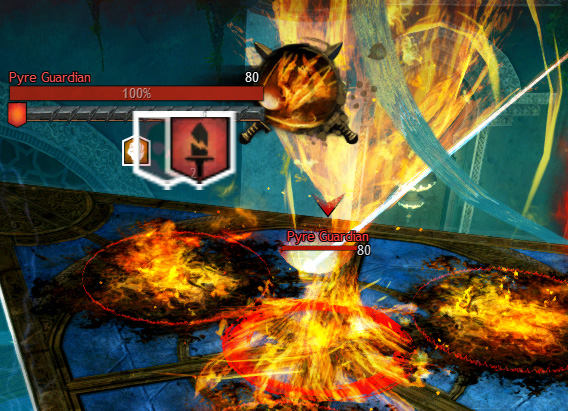
You can either destroy the pyre guardians or have Boon Strips ready for Qadim. If your squad is power-based, you’ll want to destroy the Protection guardian, and if it’s condition-based, you’ll want to destroy the Resolution guardian.
If your squad is destroying one or more pyre guardians, you can send two or three players to each one. If someone with a Boon Strip to goes to the Protection pyre, that will help you kill it faster.
If your squad is ignoring one or more pyre guardians, you’ll need Boon Strips. You can handle this with skills like a  Mesmer's ,
 Spellbreaker's , or
 Necromancer's .
At the beginning of the phase, a greater magma elemental with a fiery ring around it will spawn on each corner of the newly-formed triangle. Each is accompanied by four lava elementals. These enemies will walk slowly toward Qadim. As in Phase 1, the lava elementals will give him a stack of Fiery Surge if he absorbs them.
The magma elemental’s fiery ring protects the lava elementals from being targeted or taking damage. The goal is to  Immobilize, Push, or Pull the magma eles so the lava eles can be killed. You can handle this in two different ways.
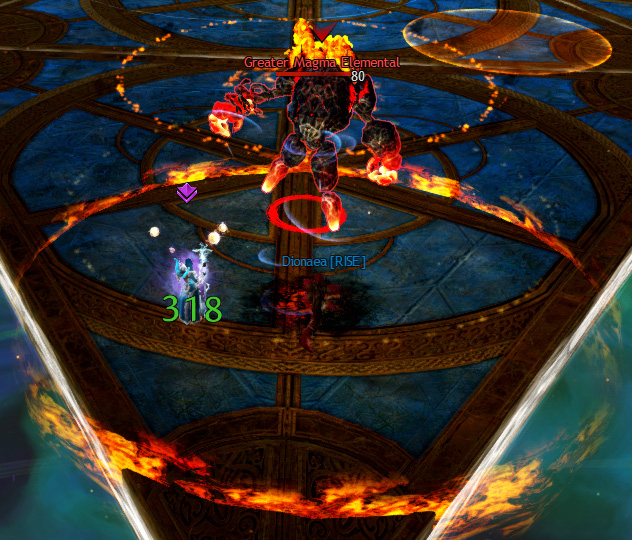
The first strategy is to have two or three players responsible for taking care of each individually. There are a few good options:
 Druid can take care of two magma elementals with their Iboga’s (make sure you target the magma ele for your pet) and . Chronomancer can place a (Focus 4) near one and Pull it away with .
 Soulbeast can use (Axe 4). Daredevil or Deadeye can use (Pistol 2) to repeatedly Immobilize one. A Deadeye can also use .
The second strategy is to wait until the magma elementals are near Qadim and then Pull all three on top of him with a well-timed (Focus 4). Although they will be close, the lava elementals have little health and should be cleaved down before they reach Qadim.
The magma elementals will damage and Knockback players, so they should be killed as well. If you Pull a magma elemental back toward the corner it spawned in, it will stand there confused and no longer approach Qadim.
If players are spreading out during this part, everyone should be careful to avoid incineration orbs and Qadim's attacks, described below. If you brought or , the Mesmer or Thief can place them at Qadim and open them on the outer platforms to bring everyone back quickly and safely.
When everyone has done their jobs with the guardians or elementals, they should stack on Qadim. Be mindful of the incineration orbs if you chose not to destroy the pyres. Again, you can’t stand inside his hitbox due to Sea of Flame. This also makes it difficult to ‘tank’ Qadim, but with enough healing and mechanical awareness, it should be fine if he faces the squad.
Qadim uses the same attack cycle as before (2x Flame Slash → Flame Wave → Flame Slash → Fire Dance) with the addition of  Big Hit at the end.
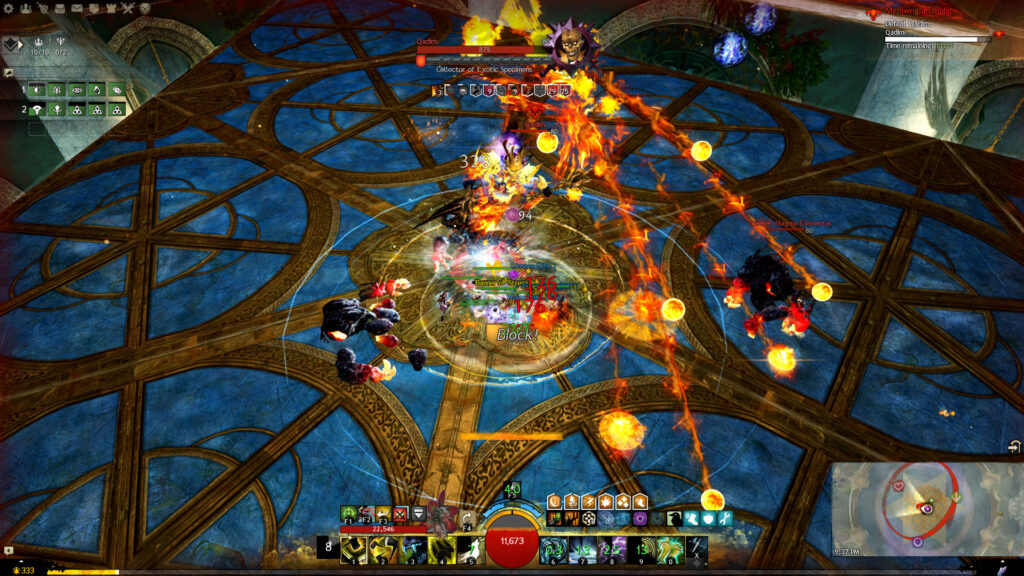
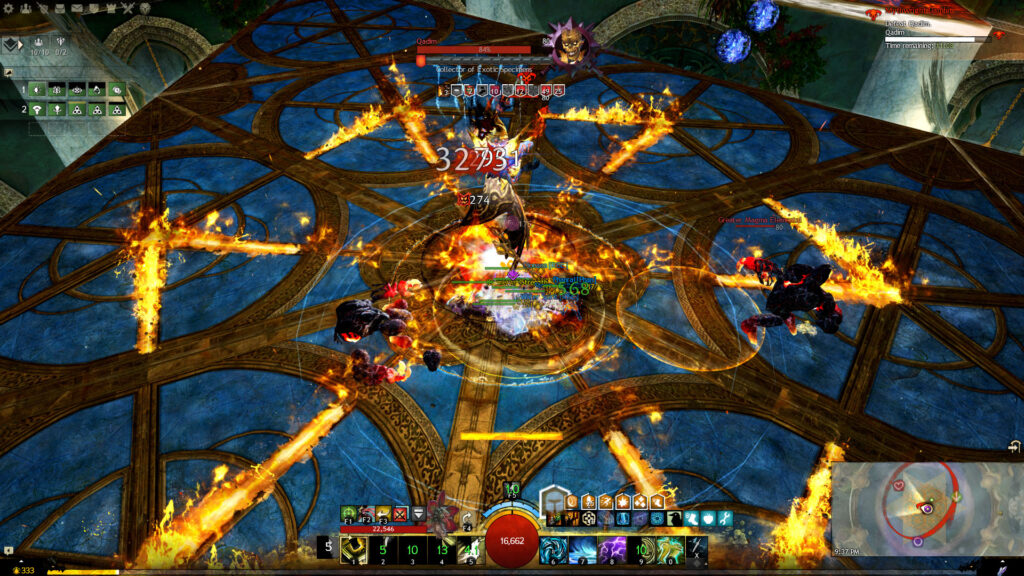
He will cross his maces, releasing a single line of fire and a thin red ring will expand outward, similar to Kenut’s Sea Swell indicator. He will then slam his maces down, releasing an expanding circular wave of fire that does heavy damage and a small Knockback. You can jump the wave if you’re standing at range or Qadim is turned away from you when he uses it. However, it emits from a point in front of him, so if you’re stacked there, you will always be hit by the impact and should Dodge instead.
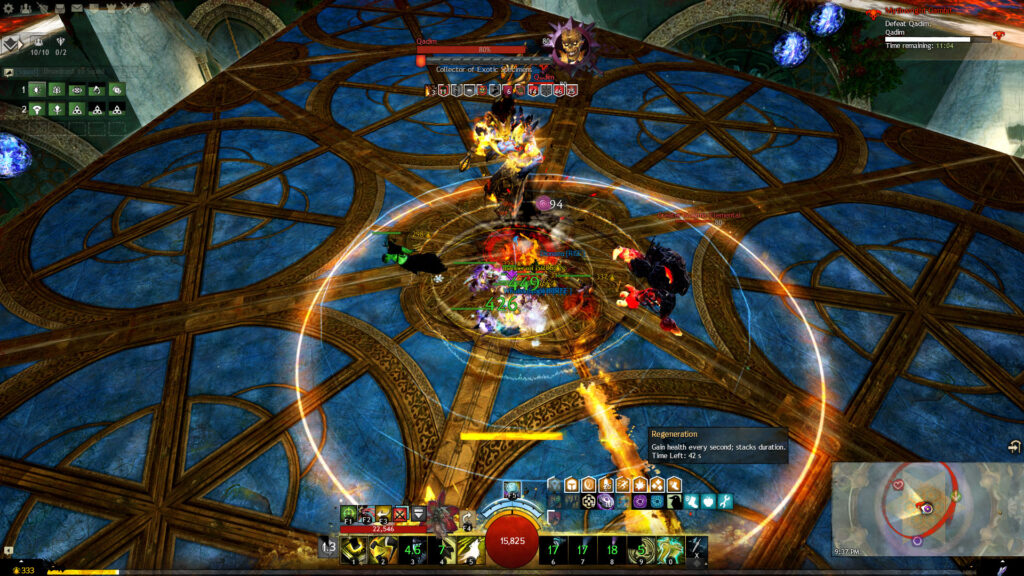
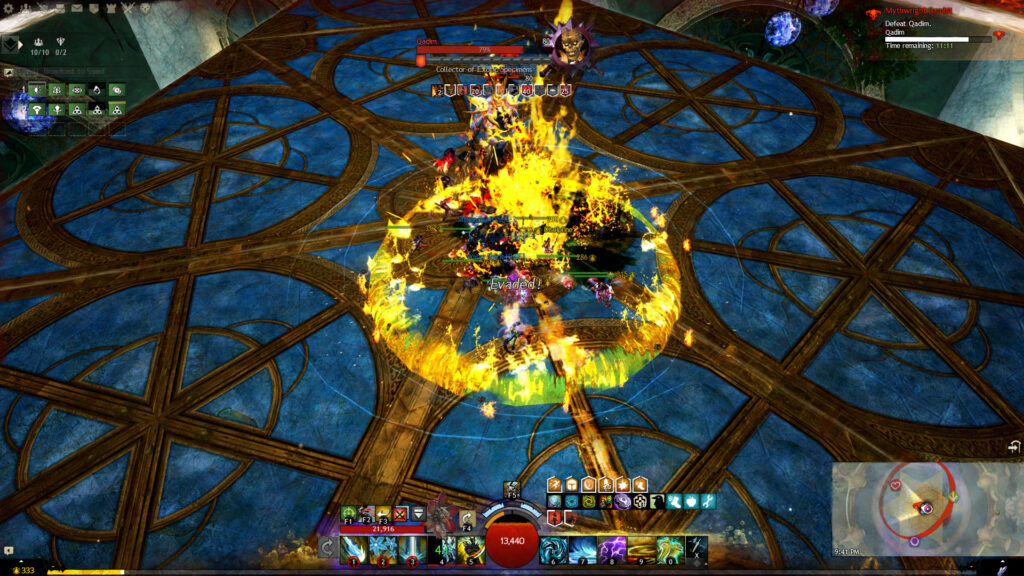
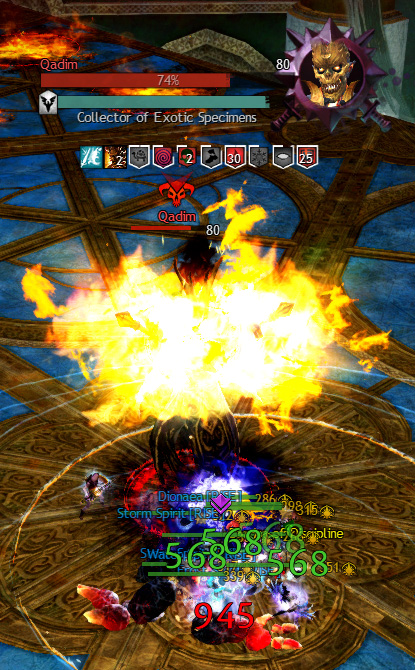
After the second cycle ending in Big Hit, Qadim will summon fire AoEs around the platform. If you’re stacked on him, you shouldn’t be in danger. He will then cross his maces and surround himself in a fiery aura. His defiance bar will also unlock at this time and he will gain  Parry, which absorbs all incoming damage. If the bar is not broken, he will unleash all the stored damage using
 Riposte, almost certainly causing a wipe. If you ignored only the Stability pyre, make sure you use your Boon Strips now, or have everyone immediately stop DPSing.
The magma and lava elementals will eventually respawn in the same corners. If your DPS is good, you can ignore these, since you’ll phase Qadim before they have a chance to reach him. Otherwise, you can handle them using the same strategy as before.
When Qadim reaches 66% health, he will teleport back to his original platform and the second creature phase will begin. All existing adds on the platform will despawn.
Just like in the first phase, your kiter will occupy Qadim and the lamp player(s) will navigate the menagerie.
The second creature Qadim summons is the  Apocalypse Bringer, a giant destroyer. It spawns with three Reapers of Flesh which look like destroyer crabs. Everyone should stack inside the Apocalypse Bringer's hitbox to lure these crabs in and cleave them down, otherwise, they’ll wreak havoc on the squad from afar.
The Apocalypse Bringer tries to use Summon and gets a break bar immediately. Like the Ancient Invoked Hydra, you have a very short amount of time to CC, so everyone should be ready when the phase begins. If not broken, it will begin to summon destroyer trolls near every player on the platform (including the kiter). These trolls, combined with the crabs and Apocalypse Bringer's own attacks, will make the damage extremely hard to manage.
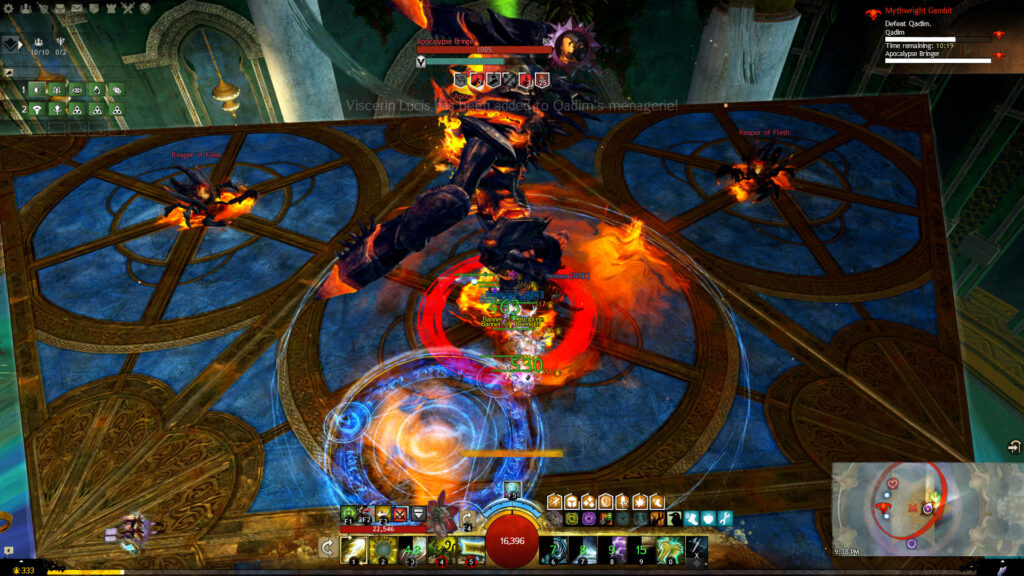
After the bar is broken, the destroyer will use its auto-attack,  Wave of Force, three side-by-side cones that damage and Knockback players a short distance. Most of the cones will be placed to the left of the tank, so they need only sidestep to avoid them and then reposition.
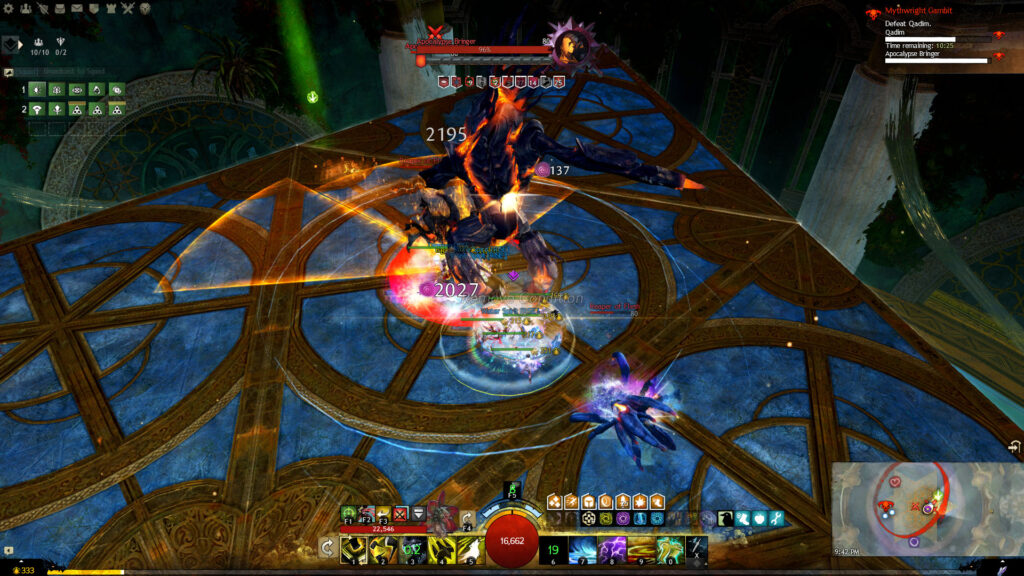
One of its special attacks is  Seismic Stomp. There will be a large gold AoE indicator, and then the destroyer will stomp its right foot down, creating a wave of fire from the impact point. It does heavy damage and Knocks Back players but is easily avoided by jumping over it or Dodging through it. The tank should use a channeled Block or Distortion.
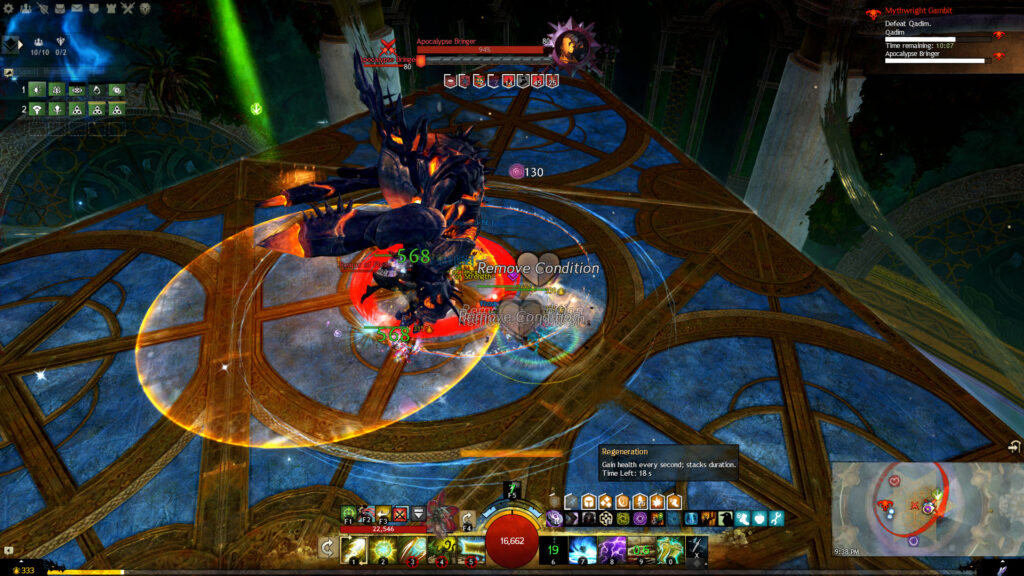
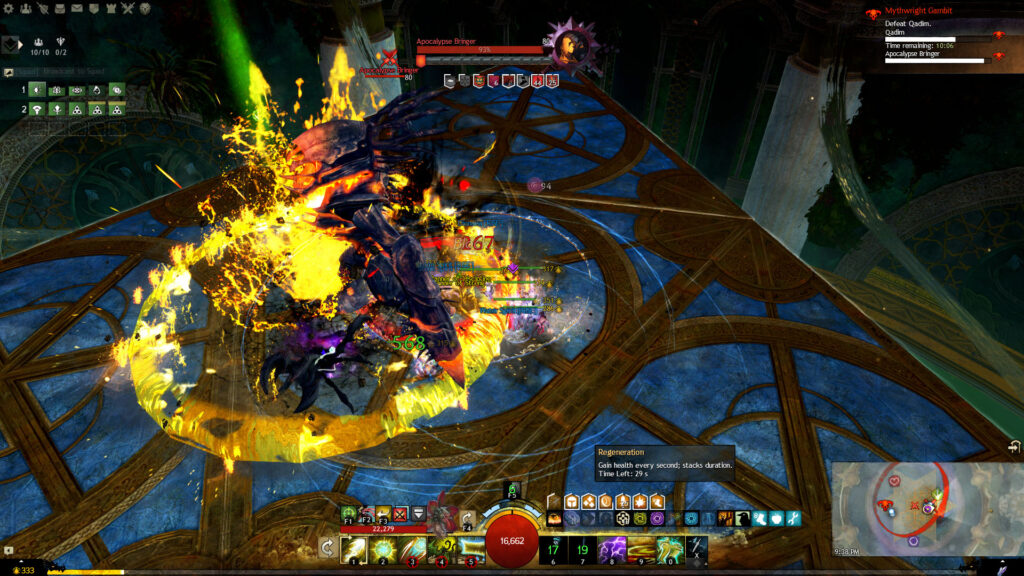
The second attack is  Shattered Earth. The Apocalypse Bringer will jump up and spin in midair, creating many gold AoE indicators on that platform and all adjacent ones. It will then slam back down, causing a fire wave to billow out from it. The AoEs will also explode. Both the AoEs and fire wave do heavy damage, while the wave also Knocks Back players and inflicts them with Cripple, Weakness, and Burning (5 stacks). Because of the additional AoE component to this attack, the stack should consider Dodging instead of jumping.
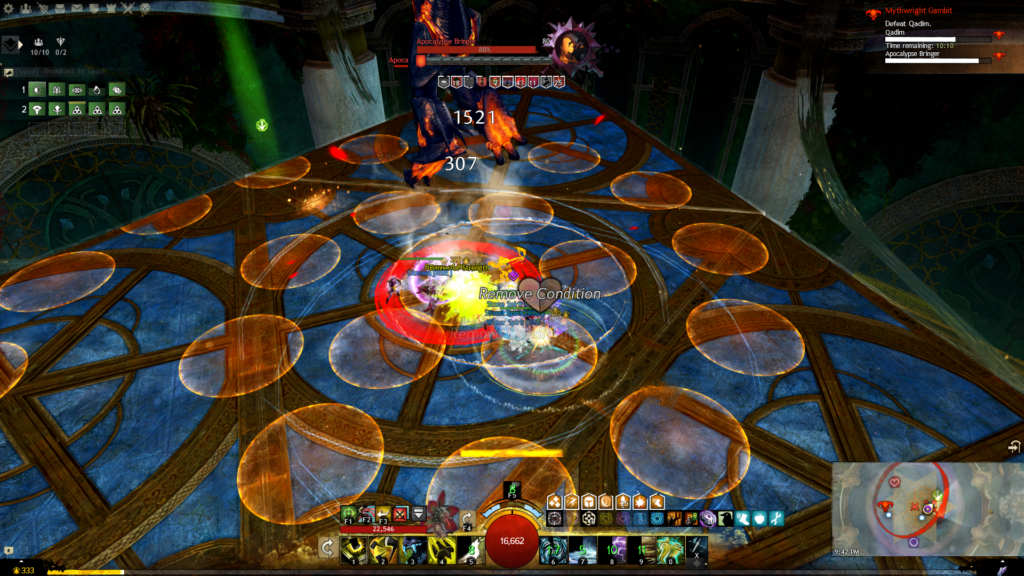
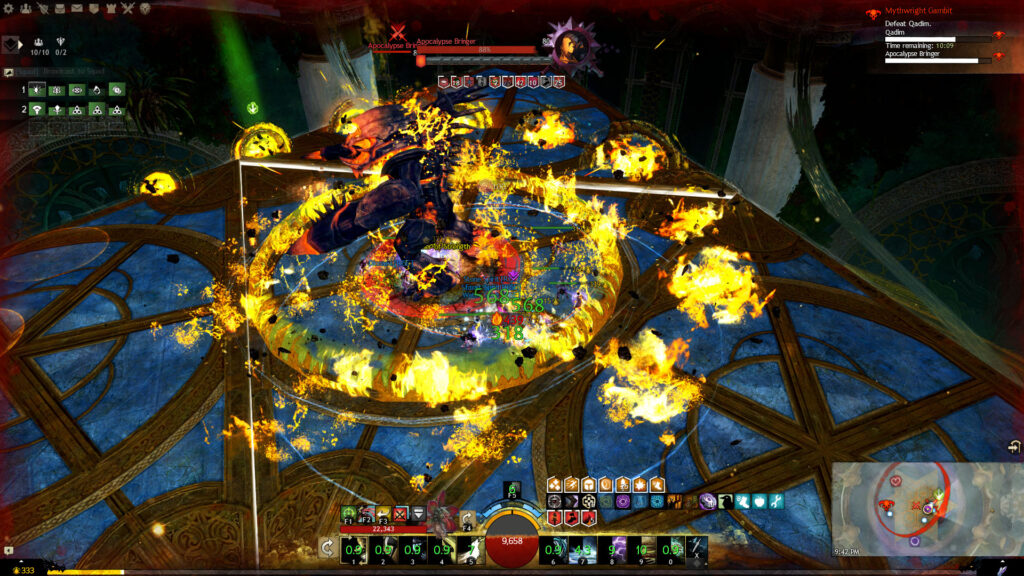
The Apocalypse Bringer's attack pattern is:
Summon → 2x Wave of Force → Seismic Stomp → 2x Wave of Force → Shattered Earth → 2x Wave of Force
If no one is near the Apocalypse Bringer, it will throw destroyer trolls at players.
When the Apocalypse Bringer would try to use Summon a second time, Qadim will use Inferno and Swap simultaneously, so be careful of getting teleported, lest you deprive the stack of much-needed crowd control. If the friendly creature has already been released, the Apocalypse Bringer might be Stunned when it would normally use Summon, however, the Swap will still occur when it would have if it wasn’t Stunned (when Qadim moves platforms).
This time the lamp team will return with the  Ice Elemental. As before, the Ice Elemental will do 80% of the Apocalypse Bringer's total health in damage and Stun it, applying Exposed. Be aware that if you don’t finish the Apocalypse Bringer before the Stun wears off, it will begin its attack pattern from the start, meaning you’ll need to CC it.
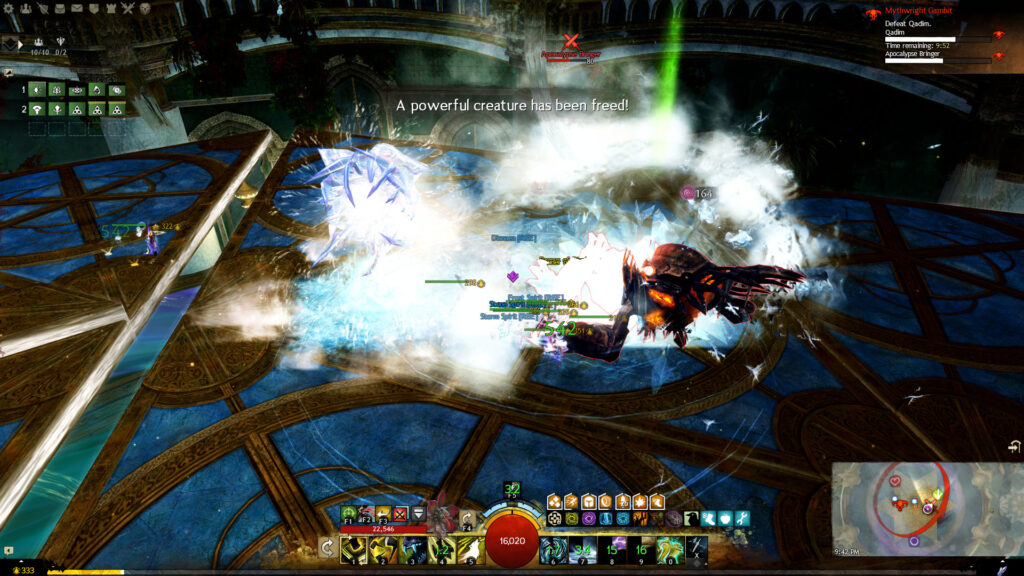
This is almost exactly the same as Phase 2. The pyre guardians’ platforms will be located counterclockwise from their previous positions, so keep that in mind if you’re destroying them. You can deal with the guardians and elementals using whichever strategy you used before.
Qadim will also have no platform space behind himself, so you’ll only have ~260° to maneuver around him.
When he reaches 33% health, Qadim will teleport to a series of connected southern platforms and the final creature phase will begin.
There are two creatures out during this phase: the  Wyvern Matriarch and Wyvern Patriarch. They’ll both be on platforms in the north. You’ll want to keep at least four players on the platforms during this phase: your primary tank, an off-tank for the second wyvern, the kiter, and someone to help CC the Wyvern Patriarch and break the lamp when it’s time.
The lamp will drift with one of the center platforms, so anyone going in the menagerie should make sure they’re in the green circle when it closes.
Both of the wyverns have the same attack pattern, but their second special attack is unique. Their first attack is  Tail Swipe, which is similar to the Apocalypse Bringer's Wave of Force auto-attack. They’ll curl their tail around their body, creating four side-by-side cones that damage and Knockback players a short distance. These can be Blocked or sidestepped since most of the cones will be to the tank’s left. Everyone else should stack on the left side of the wyvern since the AoE covers ~240° around the right side of the hitbox.
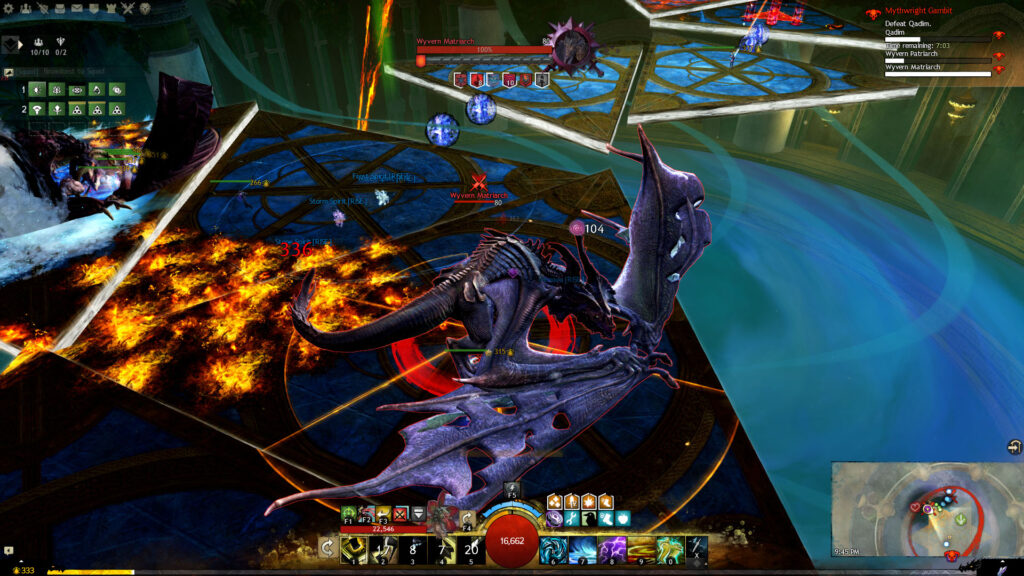
Their second attack is  Slash. They will attempt to slash the tank with their right talon, and then slam their left wing down. The initial slash does moderate to heavy damage and a ~300-range Knockback, while the wing slam is a high-damage Stun. You can avoid the sweep by Dodging or Blocking, and the slam simply by standing in the wyvern’s hitbox. Stability will negate the Knockback and Stun, but since both parts of the attack do heavy damage, you should not rely on this unless you are or have a healer with you.
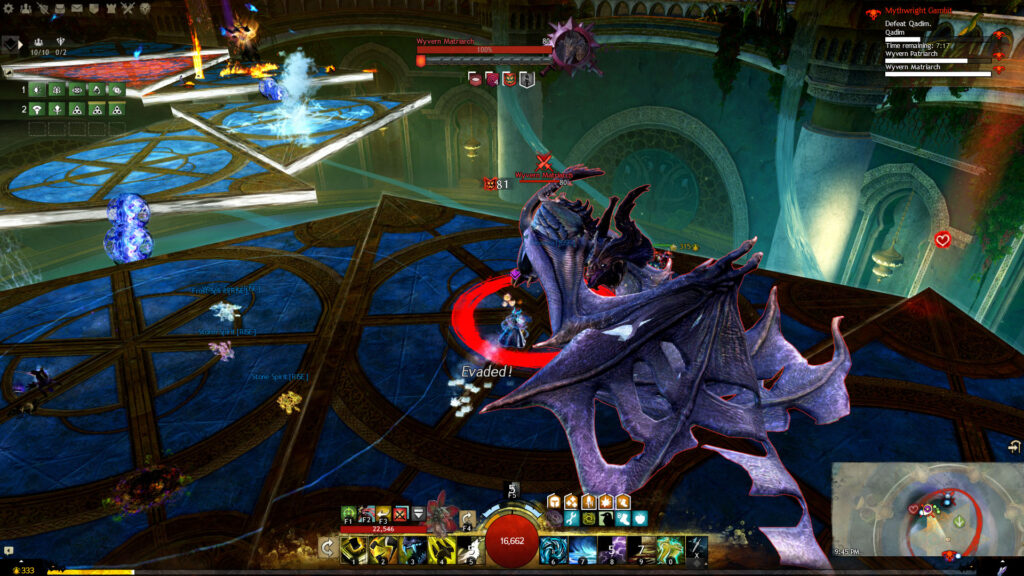
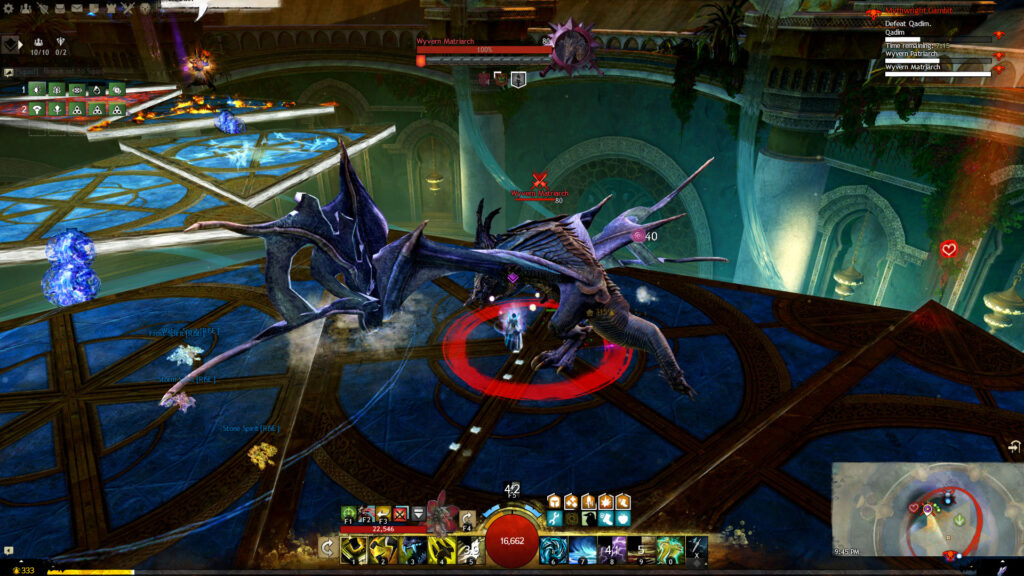
Their third attack is  Fire Breath. They breathe fire in a long cone and leave fiery AoE patches that pulse damage and Burning. The field persists for about 10 seconds after the attack is complete. As the tank, you can either step to the side slightly or, if you’re confident, move to the very center of the wyvern’s hitbox. You will avoid both the initial breath and the fire field if you’re close enough. You’ll have to negate the subsequent Tail Swipe by either Blocking or Dodging to the side using this method.
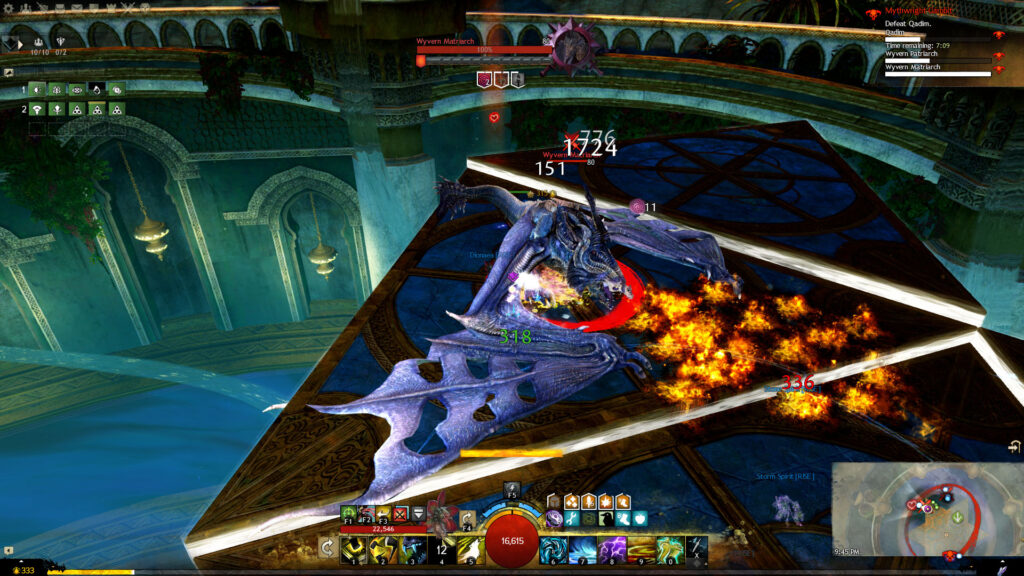
The Patriarch's special attack is to alternate slamming its wings down on the platform in an attempt to destroy it. You must break its defiance bar to prevent this. If you only have one person to help with this in addition to the tank, make sure the bar is broken before they go break open the lamp.
The Matriarch's special attack is  Wing Buffet. She will face the tank and start flapping her wings, repeatedly Knocking Back anyone in the line of fire. The tank can walk through to the back of her hitbox as she lifts her wings since she won’t turn once she starts. They should always face her toward the outside of the area, away from the Patriarch, since the gusts can knock away the other tank and anyone else with them.
Both wyverns will also use Heavy Landing, leaping one platform over in the direction they were facing (the one their tank is closest to).
The Wyvern Patriarch's attack pattern is:
Tail Swipe → Slash → Fire Breath → Tail Swipe → 2x Slash → Breakbar → Heavy Landing
The Wyvern Matriarch's attack pattern is:
Tail Swipe → Slash → Fire Breath → Tail Swipe → 2x Slash → Wing Buffet → Fire Breath → Heavy Landing
If no one is near the wyverns, they will spit fireballs at players.
This time, Zommoros will be freed from the lamp. He will take aggro of both wyverns in turn, first the Patriarch, then the Matriarch. Zommoros will attack three times, briefly Stunning and doing 25% of their total health in damage each time, shadowstepping around the wyvern between each attack. He will have aggro, so players should be prepared for the wyvern to turn erratically.
If Zommoros has been released when the Patriarch would try to destroy the second platform, Qadim will use Inferno and Swap. As with the Ice Elemental, Zommoros will delay and/or disorder the normal attack pattern, but the Swap will still happen when it normally would (this time when Qadim is moving to the third platform). If you’d prefer to use the time to track this Swap, it’s ~1:18 after the team entered the lamp (or ~27 seconds after the Patriarch hopped platforms). Alternatively, your kiter can reliably call out when it’s about to happen. If the Patriarch is dead when the teleport would occur, Swap will happen inside the Matriarch's hitbox instead.
When Zommoros is done with the wyverns, he’ll teleport to Qadim to distract him. Lava elementals will stop spawning and your kiter can rejoin the rest of the squad.
Players should finish off the Patriarch and move to the Matriarch. Since she’ll be Enraged, you can have the primary tank take over if you wish.
The final phase consists of a jumping puzzle to reach Qadim. He will begin to destroy platforms and the squad should run to Zommoros. He has  Aid of the Water Djinn, a protective bubble that periodically heals players, Cleanses conditions, and grants Protection. There are a few ways to deal with this phase.
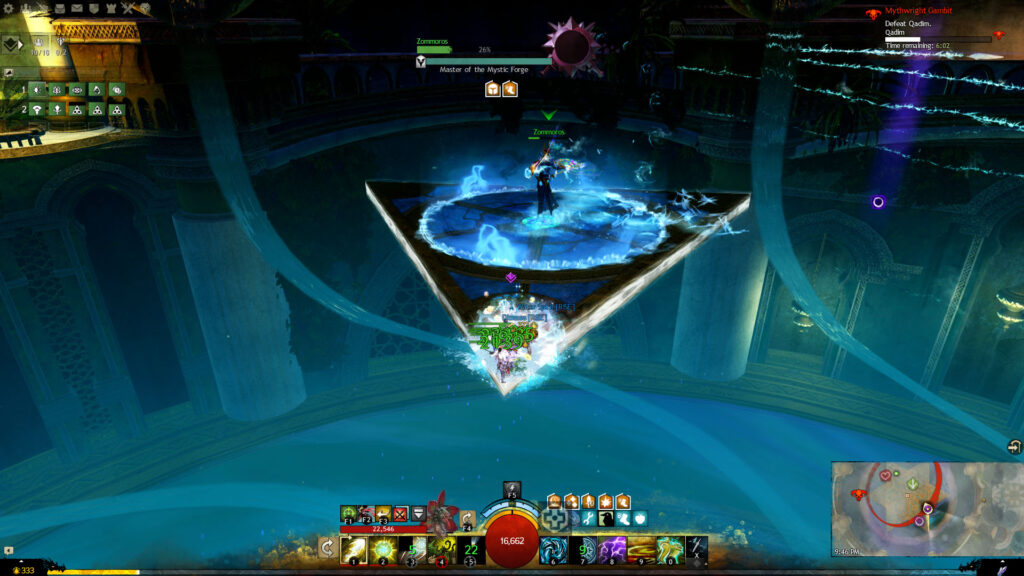
First, you can stick with Zommoros. This is safer, but more time-consuming. Alternatively, your squad can stack on the inner corner of his platform. You must be on the very edge; if you think you’re about to fall off, you’re in the right spot. When the jumping puzzle begins, a rotating platform will spawn overlapping Zommoros', and you’ll all be lifted onto the corner of it immediately.
There are only two pyre guardians in the jumping puzzle instead of three. The Resolution pyre is to the left (south) while the Stability pyre is to the right (north). As in the other phases, you can kill both, ignore the Stability pyre, or ignore both if you have enough Boon Strips.
You can also take advantage of portals here. Your Mesmer or Thief should place it on the corresponding platform (usually either Qadim's or the Resolution pyre’s platform) after both wyverns are dead and before going to Zommoros. They can open it as soon as the platforms reappear.
When navigating the jumping puzzle, try to stick to the edges and still avoid being between the corners and center, as Qadim will use Inferno. If you’re unsure you can make a jump in time, play it safe and wait for the next corner to rotate over to the edge of the next platform. Be aware that Qadim will still be using his attacks, so if you took the time to destroy both pyres, the fire wave from Big Hit may correspond with your squad trying to jump up on Qadim's platform.
Qadim's attack pattern during this phase is:
2x Flame Slash → Flame Wave → 2x Flame Slash → Big Hit
After using Big Hit, he will rush to a different corner of the platform and use the same pattern, but with a different ending:
2x Flame Slash → Flame Wave → 2x Flame Slash → Fire Dance → Riposte
He will then rush to another corner and start the cycle anew.
At 17% health, Qadim will teleport to the last remaining platform, restarting the cycle. As a result, if your DPS is high enough, he may never use Riposte, and you may be able to skip the Stability pyre even if your squad was unable to for the other burn phases.
A magma elemental and its three accompanying lava elementals will spawn on the other two corners of the platform. Knockbacks are useful to deal with these, both so you can continue DPS, and because you’re limited in your ability to position yourself for Pulls.
If you don’t kill Qadim within 13 minutes, he becomes Enraged and starts accumulating two stacks of Fiery Surge every two seconds.
About Phoenix Uprising • Recurring Series • Support the Site • Contact • Editorial Guidelines • Privacy Policy
© 2022 Phoenix Uprising. All rights reserved.
About Phoenix Uprising • Recurring Series • Support the Site
Contact • Editorial Guidelines • Privacy Policy
© 2023 Phoenix Uprising.
All rights reserved.