


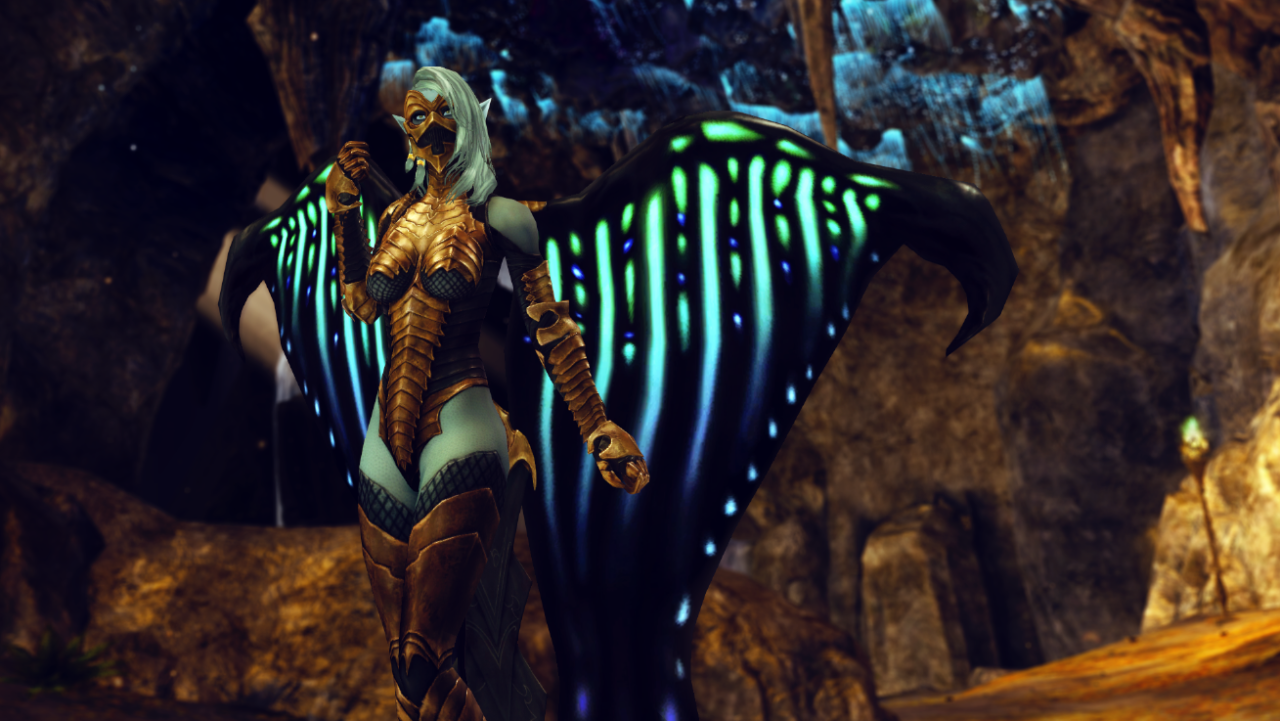
Welcome to my guide for the Guild Wars 2 raid boss, the Twin Largos (TL), the second encounter in Mythwright Gambit (Wing 6). This is a detailed guide on the mechanics of the fight including various strategies that cater to everyone from beginners to experienced raiders. If you’re brand new to raiding, I recommend reading my Path to Endgame guides first.


The Twin Largos assassins, Nikare and  Kenut, will engage players over a series of platforms. On the first two platforms, your squad will fight them as a whole, but then you’ll need to split up to confront them at the same time. The 5–5 split makes this a challenging encounter, especially for anyone used to having their mistakes masked or cleaned up by their squadmates. Everyone will need to be on their toes, avoiding attacks as much as possible and performing mechanics well.
These two also have higher DPS checks relative to other bosses, so people should take a swing at the training golem before opposing these finned foes. All of your DPS players should use bursty condition builds, ideally some with good mobility, because the bosses move around frequently. They both have fairly quick attack speeds too, so  Confusion and
 Torment are potent. Power DPS will struggle to upkeep their bonus as well.
 Glider Basics mastery. Every player needs this to travel between platforms. You can use any Path of Fire mount to get to the first one, but you’ll still need gliding after that. Nikare's and Kenut's defiance bar twice, you’ll likely only have one subgroup to help, and the faster you can break them the better, to lessen pressure on the opposite side.
 Boon Strip: This is handy just in case Kenut steals any boons with
 Vapor Jet.
 Condition Cleanse:
 Chilled and Torment can be deadly in terms of avoiding attacks, so cleanses are helpful to keep people moving.
The area where you fight the Twin Largos has six raised platforms. Each platform sinks on a two-minute timer. If your squad or subgroup can’t reach the required health threshold within that time, the platform will be submerged, water spears will impale everyone, and your squad will wipe.
The Largos will aggro on the player with the highest  Toughness that is currently on the platform. The tanks should try to keep them as stationary as possible in the center of the platform because they’re both already so mobile.
Nikare and Kenut use the same auto-attack chain:  Aquatic Slash followed by
 Vaporous Strike. Both hits inflict
 Vulnerability and cleave, so the squad should always stand behind them. Each Largos also has three special attacks and a platform mechanic.
 Waterlogged is a stacking debuff indicated by a purple water droplet icon on your buff bar. Each stack increases the damage you take from Aquatic Aura, the passive squad-wide pulsing damage. At 10 stacks, you will be assassinated — take rapid intense damage until defeated. Stacks decrease over time.
You acquire Waterlogged by being hit by Nikare's or Kenut's platform mechanics. You also receive a stack whenever you enter the water below the platforms and periodically as you swim through it. Do not keep jumping out of the water as you swim, as this will result in you accumulating stacks faster.
There are several bronze fountains on the surface of the water. Active fountains that are spraying water will launch you onto the center of a platform like a bouncing mushroom. They are marked on the minimap with the same updraft icon ( ) used on Gorseval.
Low fountains will always return you to the platform you were fighting on. In the first three phases, high fountains will bounce you back up to the platform you were fighting on as well. However, in Phase 4, they will launch you across the room to the other twin’s platform. To differentiate them from the other fountains, these are marked by red arrows on the minimap.
Inactive fountains don’t spray water. You can stand on these to get out of the water, regaining terrestrial skills and preventing you from accumulating Waterlogged, but they will not launch you anywhere.
The first two-minute timer does not begin counting down until one person lands on the platform. There are several ways to do this. You can glide into the first fountain, but this is the slowest way. You can also use a  Raptor to jump into the fountain or fly up on a
 Skyscale and use
 Bond of Faith to leap onto the platform.
Nikare will perform two auto-attack chains and then use his attacks for the first time in the order they are presented. His platform mechanic is the only attack on a strict timer.
Tells: Rushing water audio cue on acquisition, blue swirl icon overhead ( ), gold-orange border around screen, on-screen message: “A tidal pool is about to appear at your location!”
This is Nikare's platform mechanic. Every 14 seconds, a random non-tank player will receive a shrinking orange PBAoE. Five seconds later, a Tidal Pool will drop at their feet. This slowly expands to cover the platform, similar to Slothasor’s Volatile Poison. Each pool disappears 82 seconds after it was dropped. Players who stand in a Tidal Pool will take damage over time and rack up stacks of Waterlogged.
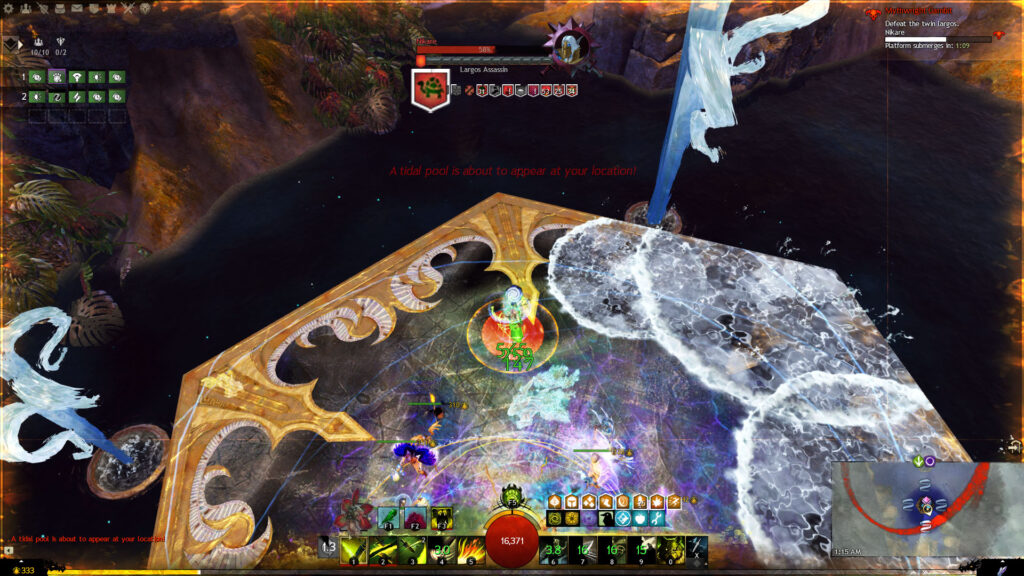
Players should drop Tidal Pools on the opposite side of the platform from where they’re going next, i.e. south/on the side of the high fountain. This will ensure you don’t have to run through pools to reach the next platform. Aim to place them right next to or between any existing pools so they overlap as they expand, leaving you plenty of room to maneuver around other mechanics. If someone accidentally drops the first Tidal Pool on the wrong side, you should prioritize the overlap instead of placing new ones on the correct side.
If a player jumps or is knocked off the platform with this mechanic, the Tidal Pool will drop on the edge of the platform they fell from.
Nikare will cross both arms and slash them down in an inverted V motion. Small expanding AoEs will appear under each player’s feet, similar to Gorseval’s Ghastly Prison. Two seconds later, anyone in them will be  Floated in a bubble of conjured water. The bubble will rise, pulsing damage to the trapped player, and burst four seconds later, dealing heavy damage and dropping them on the platform.
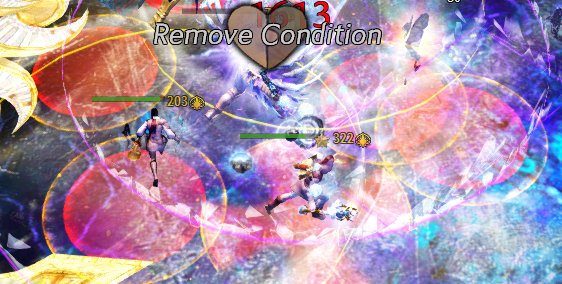
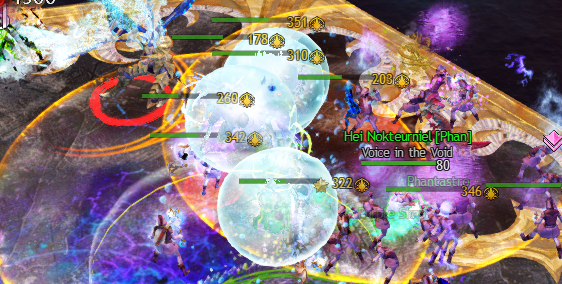
Since they’re so small, it’s best to walk out of the circles if possible and preserve your  Dodges for his other attacks. Be careful not to end up in another player’s AoE.
 Stability will protect you from being Floated while a
 Stun Break will release you from a bubble. Allied Stability like or Stun Breaks such as or are useful for training, but you should not rely on them since players in organized groups usually won’t bring them.
This attack will probably cause players to go down if they are trapped. It will also result in a sizable dip in DPS if multiple people are caught and can cause a Tidal Pool to drop in a bad spot, e.g. the center of the platform.
The first  Aquatic Detainment will occur as he finishes his opening line of dialogue. He will use it every 18–23 seconds after that.
Nikare will dash three times in rapid succession. The first two times he will rush toward the farthest player and the third time he will dash back to the tank. Anyone caught in his trajectory will take medium damage and be Chilled and  Slowed.
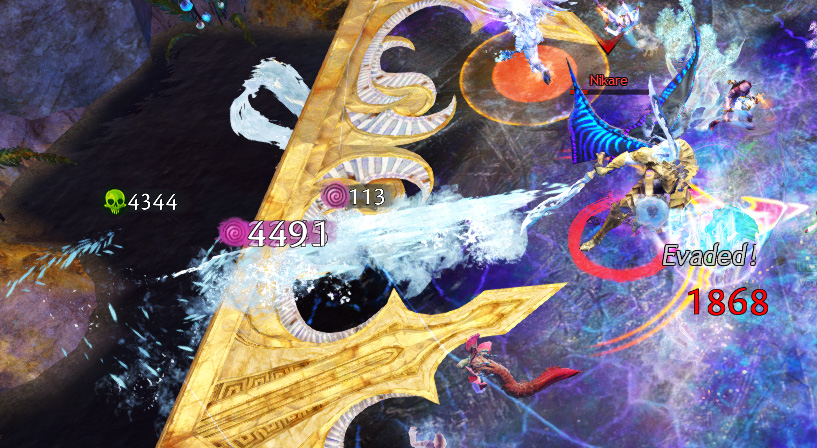
This attack is probably his most dangerous since it’s hard to avoid every dash every time. Be careful if you’re running back from dropping off a Tidal Pool since he’ll probably target you first. Healers should save their Cleanses like , , or for this attack.
He will use this attack every ~20 seconds.
Nikare will choose two random players and put large orange expanding AoEs under them. Two seconds later, geysers will erupt, doing heavy damage and inflicting any player caught with a 600-unit  Knockback. If you’re near the center of the platform, you won’t be knocked off, but you will end up close to the edge.
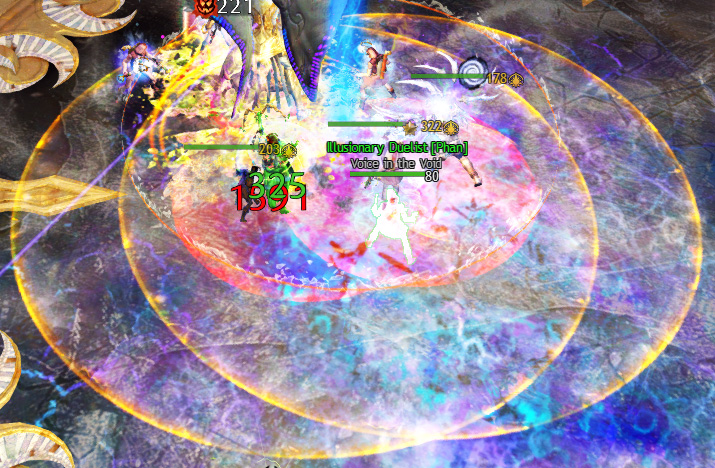
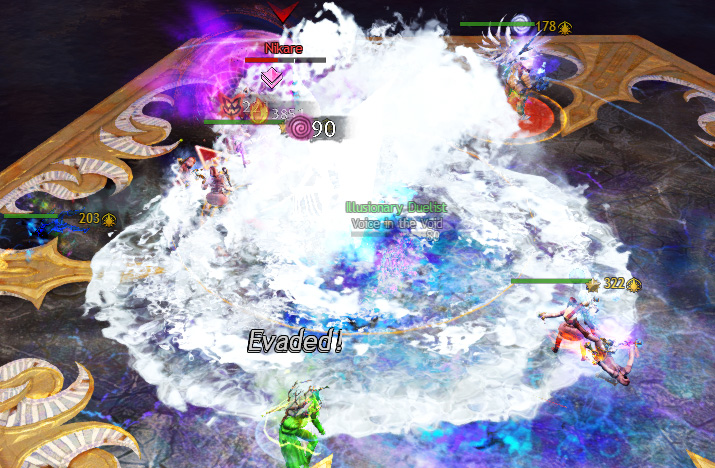
Walk out of the AoE if possible since you’ll want to preserve your Dodges for  Vapor Rush.
He will use this attack every ~10 seconds but there will sometimes be a much longer gap between the first and second  Geyser.
At 50% health, Nikare will go  Invulnerable and disappear. The fountain on the opposite side from where you started will rise up and your squad will need to glide into it to get to the next platform.
If you didn’t have many seconds to spare, the platform will be close to the water and you might have to swim to the fountain. Kenut's platform timer also begins after Nikare becomes Invulnerable, meaning you’ll inevitably lose several seconds getting to her. Because of this, the faster you complete this (and every) phase, the better.
As on the first platform, you’ll face Kenut with your entire squad. She will perform three or four auto-attack chains and then use her attacks for the first time in the order they are presented.
This is Kenut's platform mechanic. She will summon three swirling water vortices when you engage her. These will move generally clockwise around the platform and persist throughout the phase. Players who stand in an  Aquatic Vortex will take damage over time, be Chilled and Slowed, and rack up stacks of Waterlogged.
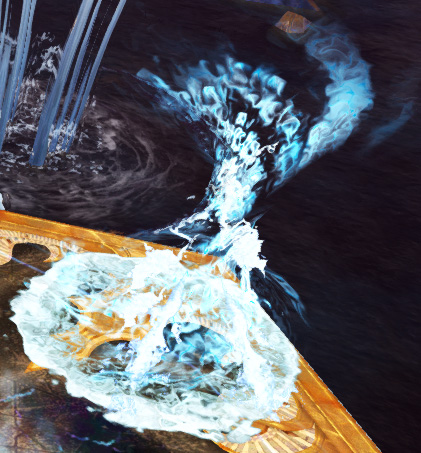
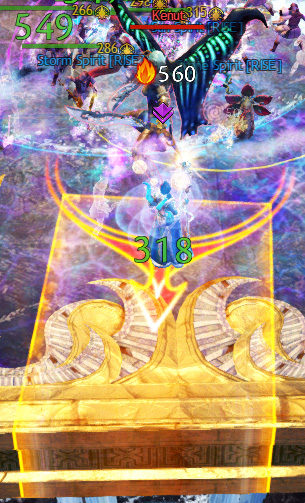
Kenut will disappear into a cloud of mist, stealthing for two seconds, and then teleport to the farthest player. She will reveal herself and a rectangular AoE will appear before her. Anyone caught in the AoE will have all their boons stolen and be inflicted with  Poison (5 stacks).
Players usually have the healer that will stay on Kenut's side go out and bait this attack. She locks on to your location as soon as she vanishes, so you can Dodge forward or use a movement skill like to get back to the group as soon as you see this.
In case she does get boons, you’ll want to Strip them right away using a skill like or . A  Mesmer's in their (and their clones’) sword auto-attack chain can help as well, but it removes boons too slowly to be effective on its own.
 Protection and
 Resolution severely hinder your DPS, while
 Quickness causes her to attack even faster and shortens the tells for the next two attacks.
She will use this attack every ~22 seconds.
Kenut will create a triradial (Y-shaped) arrangement of AoE circles from small to medium to large. Essentially three different-sized circles each make up a single cone. Each AoE will burst in quick succession, from the small ones closest to her to the largest ones on the outside. The pattern will then rotate 60°, impacting the areas the first formation didn’t. This is similar to the Keep Construct’s final Phantasmal Blades pattern. They deal moderate damage, inflict Torment (5 stacks), and give Kenut  Might for every player hit.
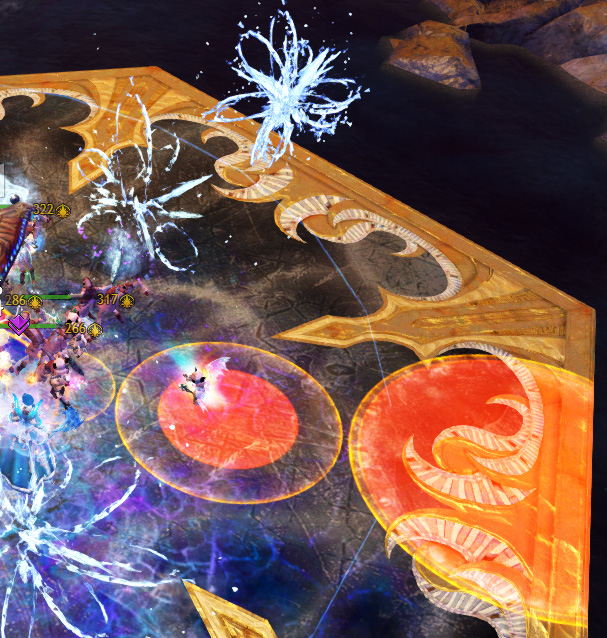
Her easiest to avoid attack, you can sidestep a set and then get back into your original position as long as you’re stacked on top of her. If you’re on the outside of the platform, consider Dodging one or both since those circles are large.
She will use this attack every ~12 seconds, but there will sometimes be a much longer gap between the first and second Cyclone Burst.
A thin red ring will rapidly expand outward from Kenut. She will release an expanding circular wave of water that does heavy damage and a 300-unit Knockback. Kenut also gains three seconds of Protection for each player struck.
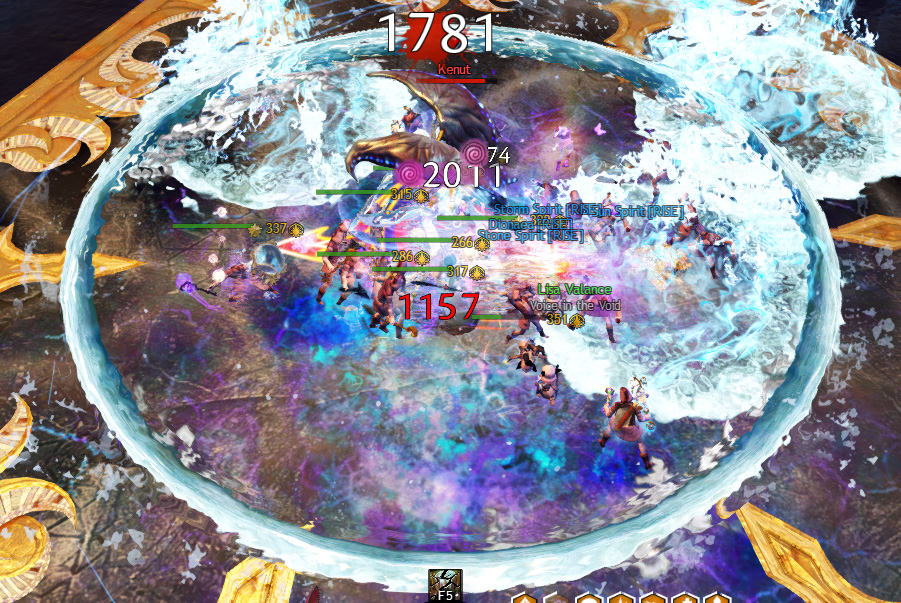
Assuming you are stacked on her, you should jump or Dodge toward Kenut as soon as you see the red ring. If you’re standing farther back, you can delay by a second or two.
She will use this attack every ~20 seconds.
At 50% health, Kenut will go Invulnerable and disappear. The fountains on either side of her platform will rise up and you’ll need to split up to confront Nikare on the left and Kenut on the right. The subgroup with higher DPS should go to Nikare's side since he has more health than Kenut.
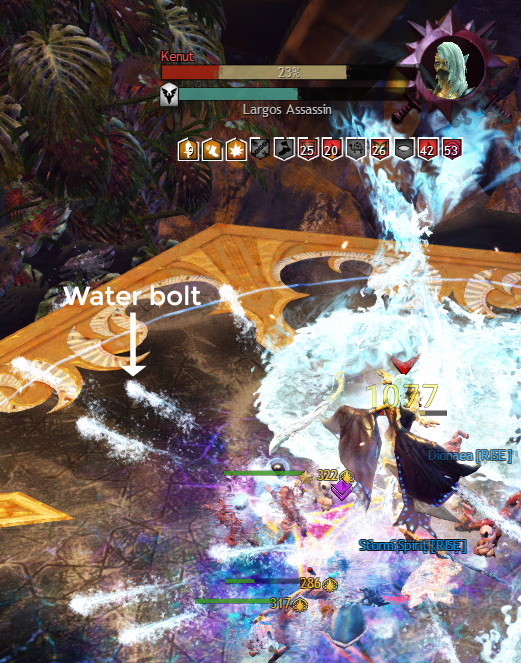
The Twin Largos retain all their attacks from the first two phases with the addition of  Aquatic Barrage. At 1:40–1:35 and 0:40–0:35, the largos will teleport to the center of their platform. Their defiance bars will unlock and they will gain a persistent
 Barrier. They will also spin in place, shooting off a flurry of water bolts in every direction, and barraging the other twin’s platform with small AoEs if you don’t break their bar fast enough.
The CC requirement isn’t strict, but you need to break their bars as soon as possible so you don’t put pressure on the other side or waste a lot of condition ticks against their Barrier.  Druids can place inside the boss’ hitbox to convert the bolts into healing while you’re breaking the bar.
When the Twins reach 25% health, they will go Invulnerable and teleport to their last platform. The final two-minute timers for both bosses are separate and only start when each boss reaches the threshold.
On the last set of platforms, there are high fountains on the inner sides that will take you to the other boss’ platform. If your DPS is wildly mismatched, you can send someone to the side that’s lacking. If you fall into the water and want to get back on your platform, make sure you go to one of the other three fountains.
This is the same as Phase 3 with one addition. On each platform, you will gain Aquatic Aura, a debuff that increases your incoming damage from that Largos’ attacks by 2% per stack. You get another stack every three seconds. This has the same name as the passive pulsing damage but is different.
The debuffs are separate, meaning if you get eight stacks of Kenut's  Aquatic Aura, taking 16% extra damage from her attacks, you can go to Nikare's platform and will only take standard damage from his until you accumulate stacks of his
 Aquatic Aura.
If you kill one assassin before the other, the living twin will utter a voice line and become  Enraged, doing 200% more damage. To kill them both at the same time, you can have one side slow their DPS to wait for the other. You can also have the faster side get their boss to ~3% and then have the DPS go help at the other boss, leaving the tank and healer to survive as the conditions tick down.
The respective two-minute hard enrage timers are still in play, so balance your DPS as well as you can. Don’t leave one side too early or let your side with lower DPS suffer the boss’ attacks with the debuff for too long.
This is an alternative approach that allows you to keep your squad together during Phases 3 and 4. Lower-damage groups might find this tempting to ensure they meet the DPS checks, but I absolutely do not recommend it for low-damage, unorganized, or inexperienced groups. For them, the focus should be on avoiding attacks with consistency and remaining on the platforms at all times.
For this strategy, you’ll need one Mesmer to bring and potentially , or two Mesmers with . After Phase 2, nine players will go to one side and start fighting one of the Twins. The Mesmer will go to the opposite side, place a on the very edge of the platform and then return to the group. They should ignore the high fountain next to the platform as it will bounce them back up where they were, and instead glide past it and the platform they fought Kenut on into the other high fountain.
The squad will bring the first Largos down to 25%. The Mesmer will their , and everyone will teleport over to the other twin. They’ll bring that twin to 25% health. Everyone will then take the high fountain to that same twin’s final platform. (For example, the order would be Kenut 25% → Nikare 25% → Nikare 0% → Kenut 0% or vice versa.)
The Mesmer can avoid landing on the platform and take the high fountain to the opposite side again, place a as before, and then rejoin the squad.
If using this strategy, it’s safer to get one twin to ~5% health during Phase 4, go to the other twin and kill them, and then return to the first twin to finish them off. This avoids spending any significant time with one twin Enraged but does add travel time, and is therefore better-suited for high-DPS, well-organized squads.
I’ve seen many split opinions on which boss you finish off first. At the end of the day, it depends on which boss your squad is most comfortable with, as they’re both very painful when Enraged. To put this in perspective, here are approximate incoming damage numbers for players with no Toughness:
Tidal Pool & Aquatic Vortex: up to 9k per pulse Vapor Rush &  Cyclone Burst: 10–14k Geyser &
 Sea Swell: 22–28k
The appeal of this strategy is that your squad can stay together, giving you more healing, boon output, and people available to revive. However, it comes with a couple of huge drawbacks. First, you waste a lot of time zig-zagging across the room. Second, you might spend a lot of time with an Enraged twin. While this strategy can help cover for low DPS or sweep individuals’ mistakes under the rug, it’s actually more effective for experienced squads.
About Phoenix Uprising • Recurring Series • Support the Site • Contact • Editorial Guidelines • Privacy Policy
© 2022 Phoenix Uprising. All rights reserved.
About Phoenix Uprising • Recurring Series • Support the Site
Contact • Editorial Guidelines • Privacy Policy
© 2023 Phoenix Uprising.
All rights reserved.